Table of Contents SHOW
By the time of writing this guide, I have already spent 6 months in Once Human, joined its content creator team, and published over 40 videos on my YouTube channel, some of which have garnered hundreds of thousands of views. Here are my essential tips for new players that will ease your acquaintance with the game and solve most common problems.
TIP #1: Choose the Right Scenario
Once Human is a seasonal game. It has different servers with different scenarios. When you create a character on a server, you will have to spend at least 5 weeks (a season) there before migrating to a new server.
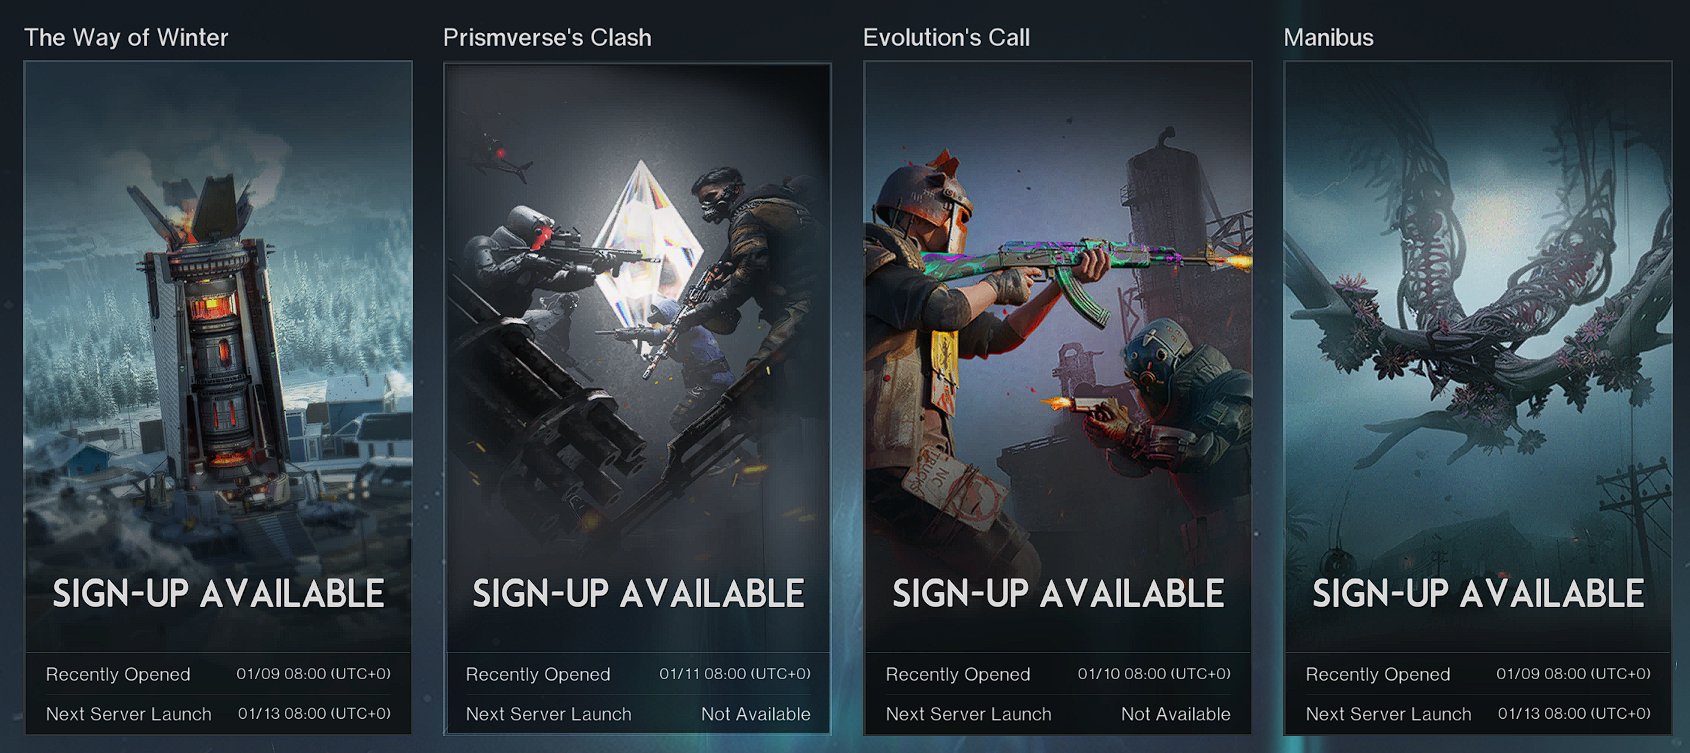
At the moment, there are 4 scenarios in Once Human:
- Manibus (PVE, classic map),
- Evolution’s Call (PVP, classic map),
- Prismverse’s Clash (PVP, classic map),
- The Way of Winter (PVE, WOW map).
As a new player, you should start on a classic map. This is important for two major reasons.
- On a classic map, you don’t have as many problems with body temperature as on the map of The Way of Winter scenario.
- Most useful deviants (Electric Eel, Canine Skull, etc.) can only be found on a classic map.
I recommend starting with the Manibus or Evolution’s Call scenarios. Once you’ve learned the basics and feel confident in the game, you can try The Way of Winter and other new ones.
TIP #2: Complete Main and Side Quests, Commissions
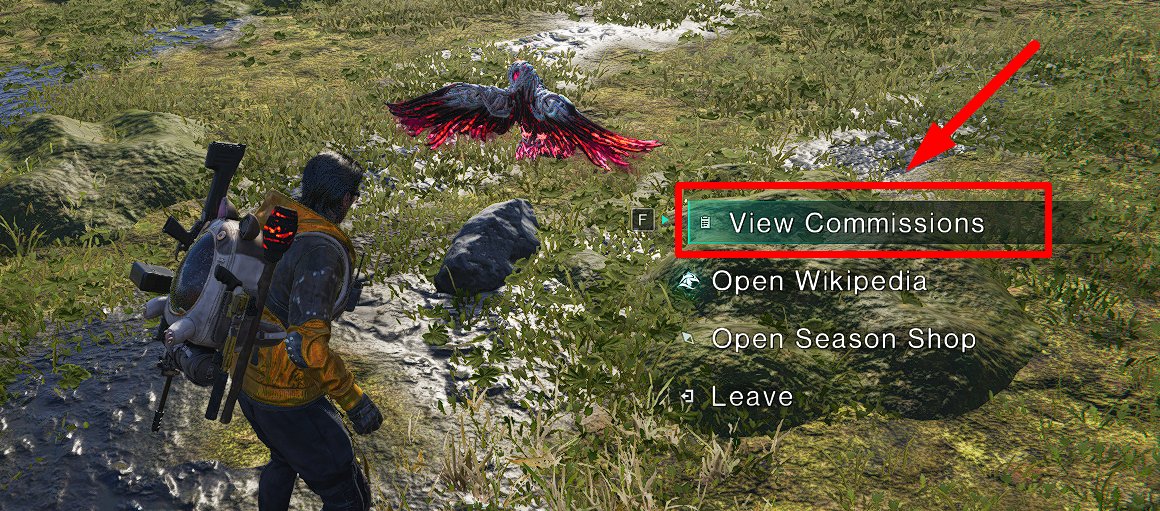
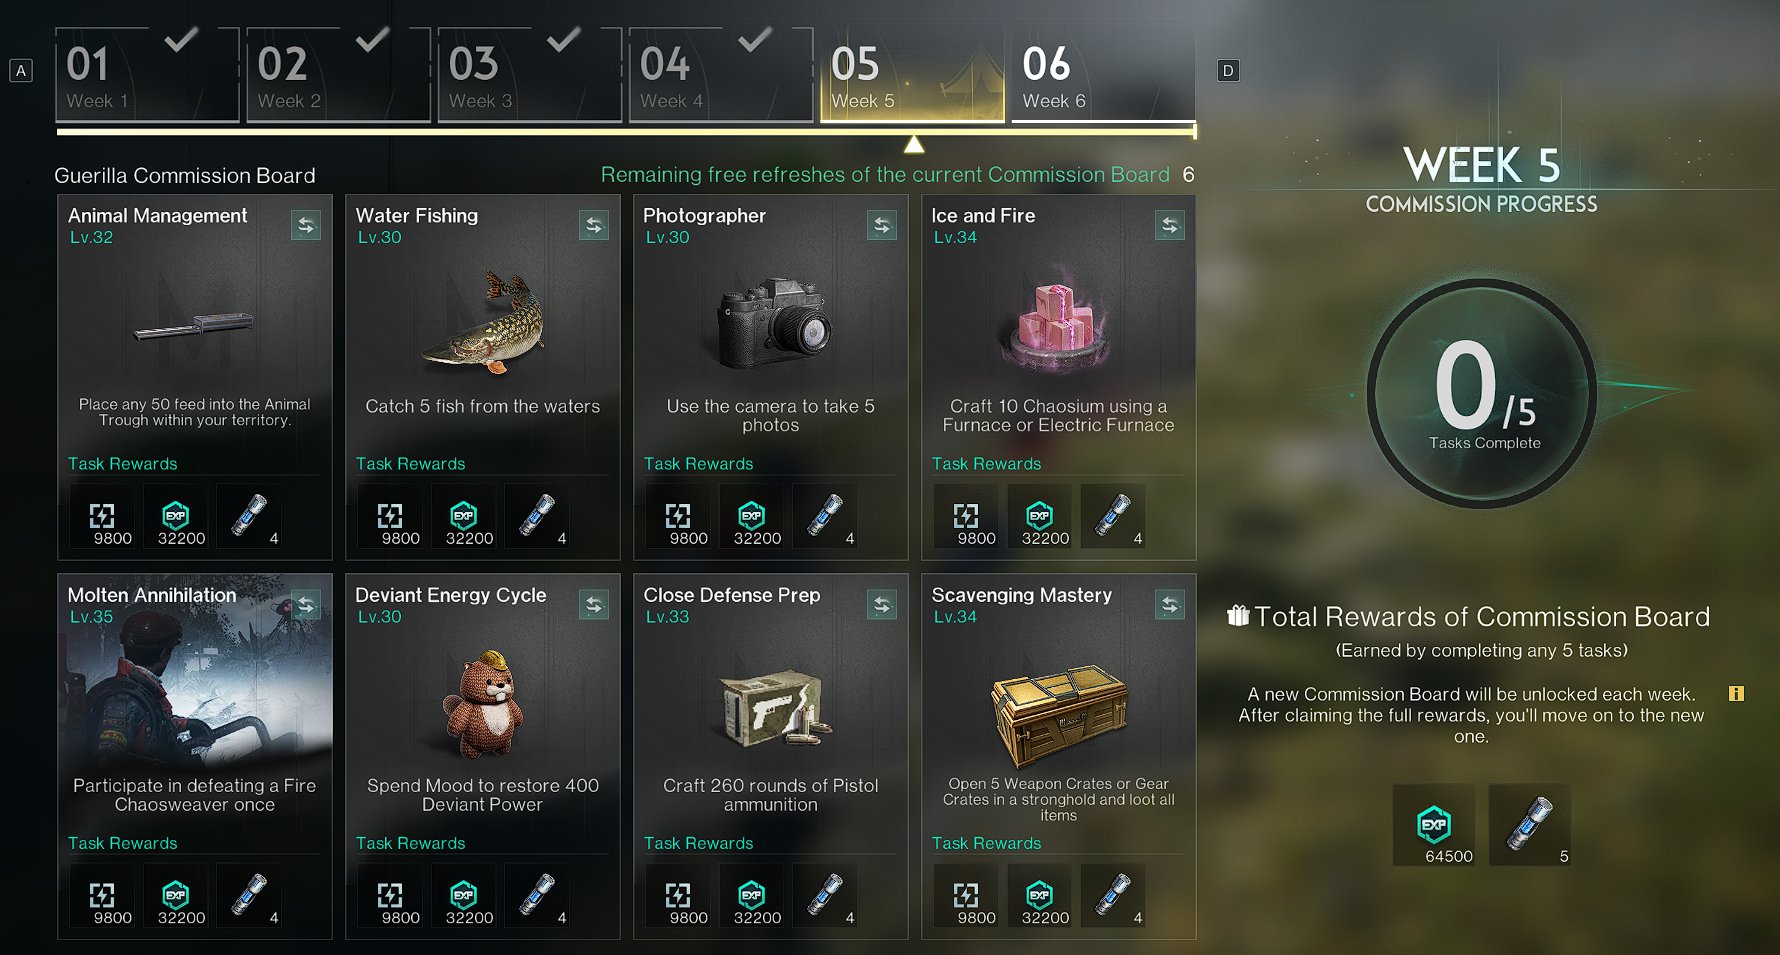
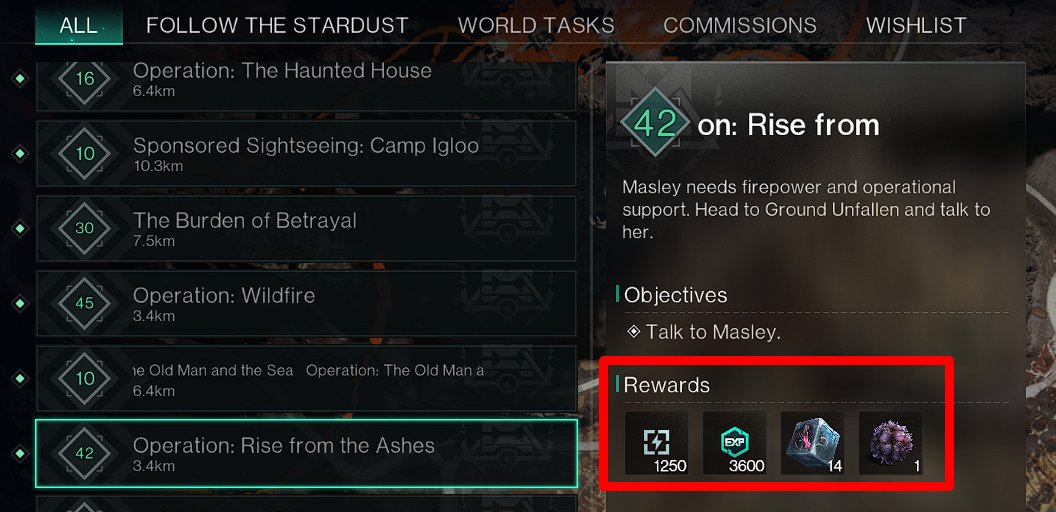
Commissions are the easiest way to level up in Once Human. They are a type of weekly task. Each week, you can choose 5 commissions from a list of 8 available. To do this, hold the TAB key and select “Summon V,” then choose “View Commissions” in the dialog with the crow.
Always complete your commissions, as they provide not only EXP and Energy Links (the main currency) but also Controllers, which are essential for receiving full rewards in Monoliths and Securement Silos. If you skip a week, you can still complete those commissions later.
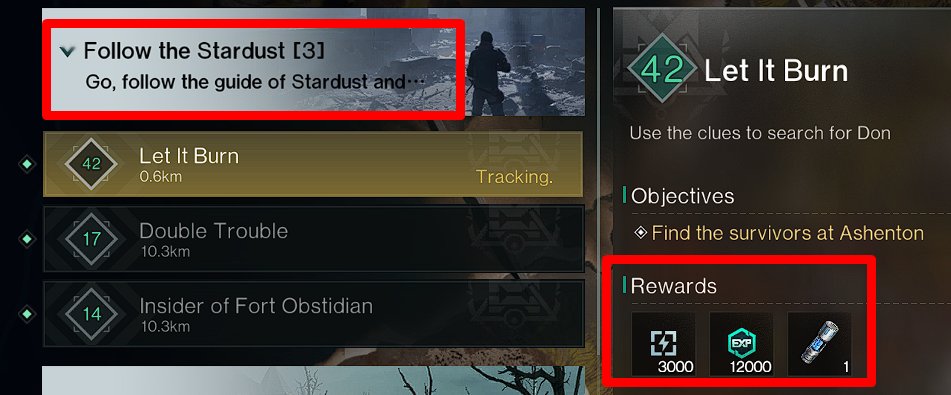
Main tasks are also one of the best ways to level up quickly. These story quests will introduce you to the game’s world and teach you some basic mechanics. Additionally, you will gradually unlock new instances and occasionally receive Controllers.
There are also numerous side quests on the map (marked in blue). As a beginner, you should complete these as well. They reward you with EXP, Energy Links, and Stellar Planuna—a unique currency that can be spent in any settlement to purchase legendary weapon accessories, Controllers, mod crates, mod parts, furniture formulas, and other useful items.
TIP #3: Switch the World to Farm Any Ores or Plants
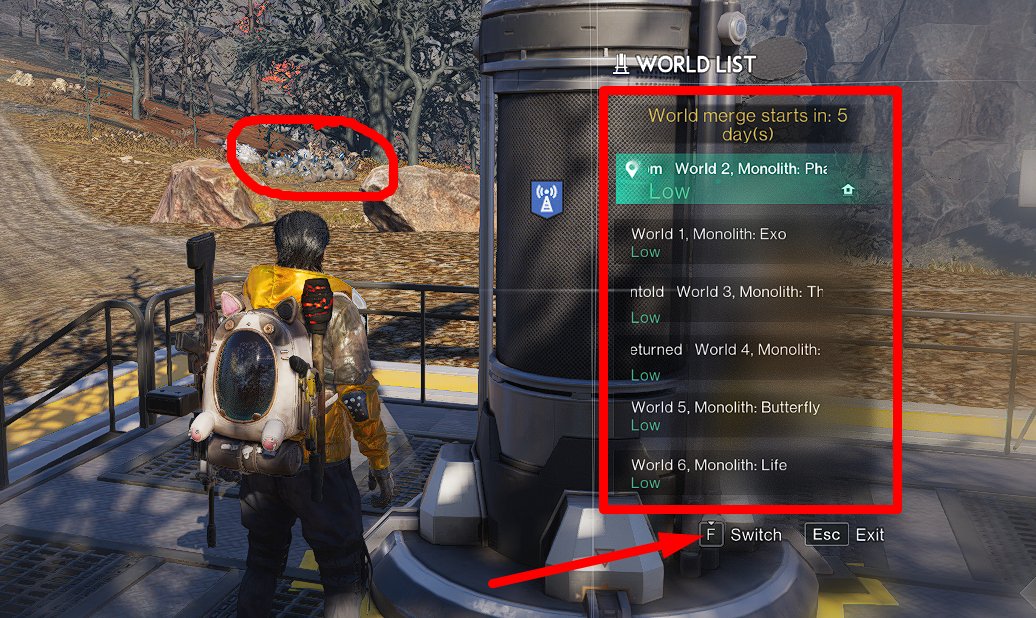
Near any of the teleportation towers, there are rich spots with resources like ores and plants. Despite the fact that they respawn quickly (1-3 minutes), you can gather them without any delays by switching worlds.
Each Once Human server has several “worlds” (usually 5-10). This is done to ensure that all players have enough space to place their territories. When you interact with any teleportation tower by pressing “G,” you can freely switch between worlds.
This is important because ores and plants respawn separately in each world. This means you can gather resources in one world, then switch to the next one and gather them again. I discovered this feature in the first weeks of playing, and it helped me a lot, so I highly recommend using it.
TIP #4: Gather and Disassemble All the Scrap You Find
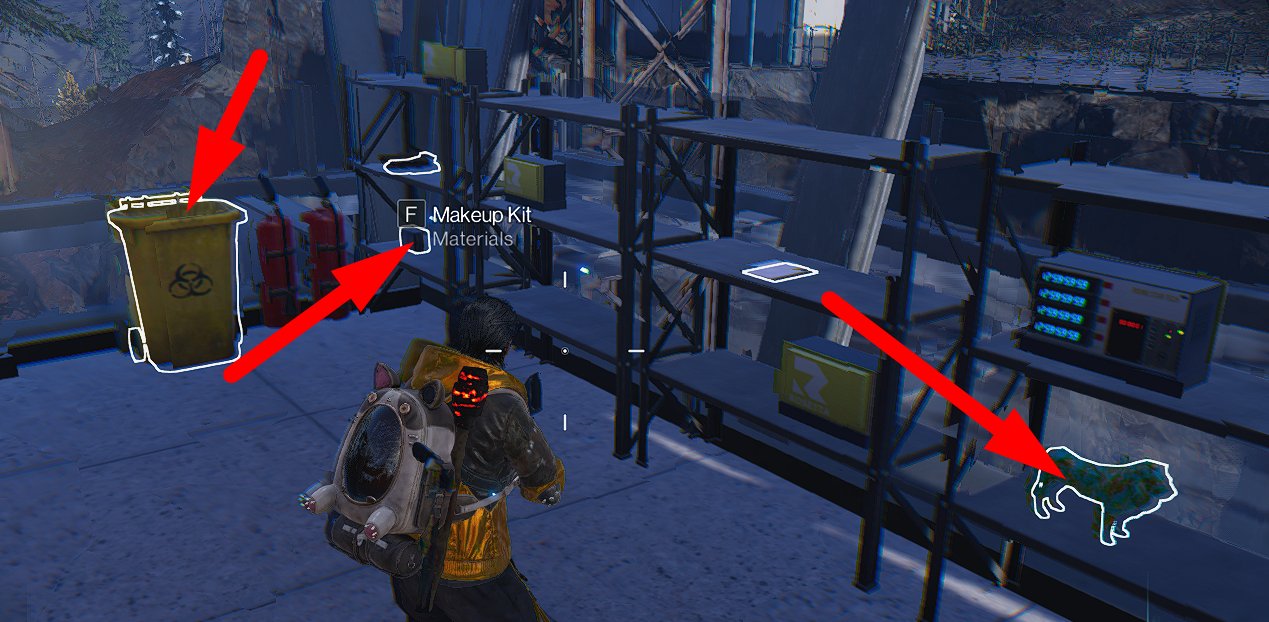
When clearing locations, you will find a lot of various scrap. Press the “Q” button to highlight all the scrap nearby, and “F” to gather it.
All these items can be dismantled into resources using Disassembly Bench. Absolutely all resources are necessary for building and crafting, and that’s why you should gather all the scrap you find.
TIP #5: Focus on Meme Points
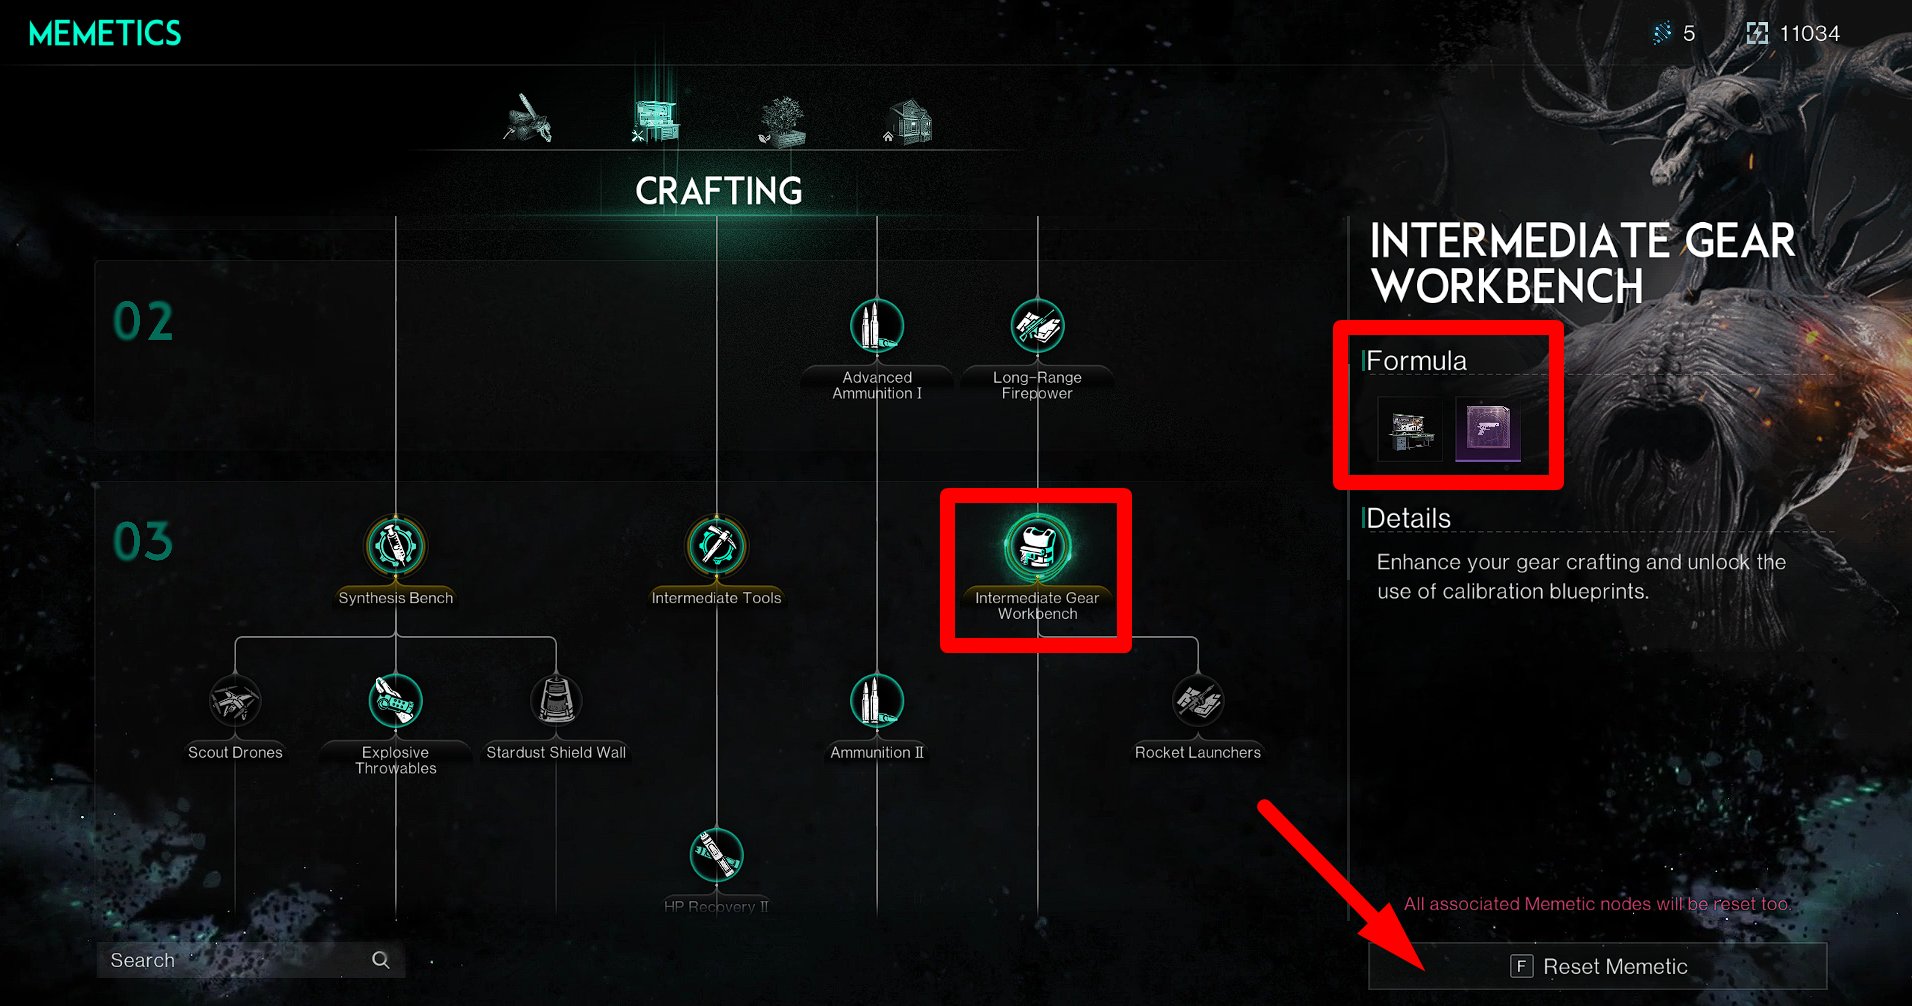
In the Memetics interface (hotkey “O”), you can spend Meme points to unlock various technologies, such as new construction parts or the ability to craft new metals.
There is a simple trick that allows you to save Meme points: you can unlock the perk, build or craft what you need (e.g., a workbench), and then return all the Meme points and part of the Energy Links you spent on it. The crafted or built items will remain with you. This way, you gain a small advantage in progress speed.
You can obtain Meme points in a few major ways:
- Leveling up your character;
- Securing new deviants (even if you secured them already in previous seasons);
- Completing Season Goals.
Make sure you obtain as many Meme points as possible, as their amount directly and significantly affects your in-game possibilities.
TIP #6: Choose Production Memetic Specializations
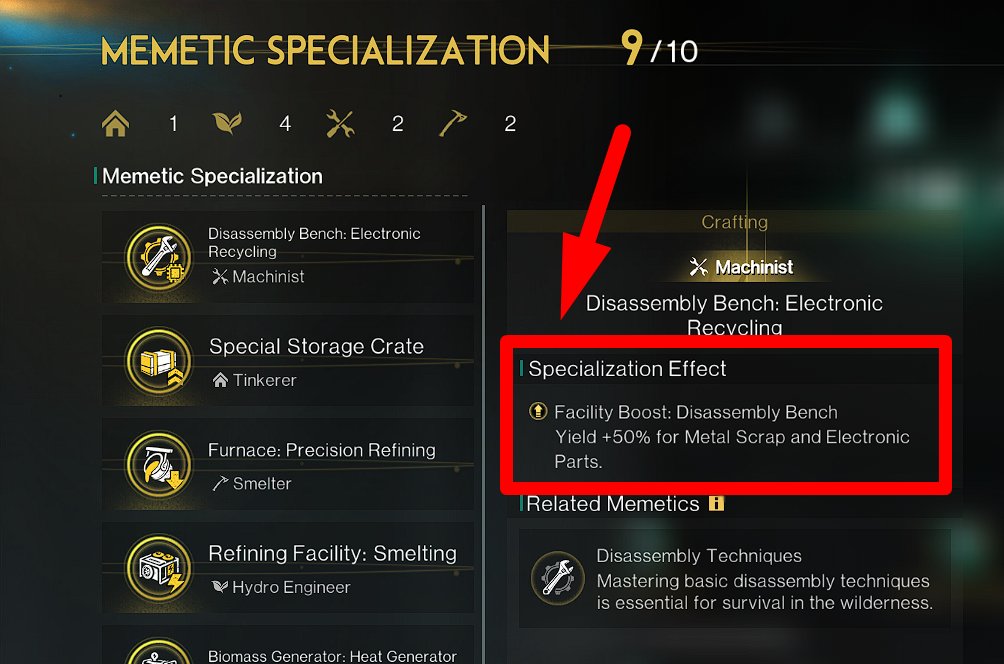
If you open the Memetics panel by pressing “O” and go to “Memetics Specializations,” you will be able to unlock one Memetics Specialization every 5 levels. These perks are random, and you should focus on those that improve your production or gathering in any way.
Strive not to prioritize perks that increase the durability of the structures in your base or improve tactical items (e.g., drones), since, in reality, they are mostly useless.
In the picture above, you can see several examples of good memetics perks. Some of them will allow you to produce unique resources, while others can increase the growth speed of your crops or the amount of energy you can produce.
TIP #7: Don’t Forget to Use Cradle
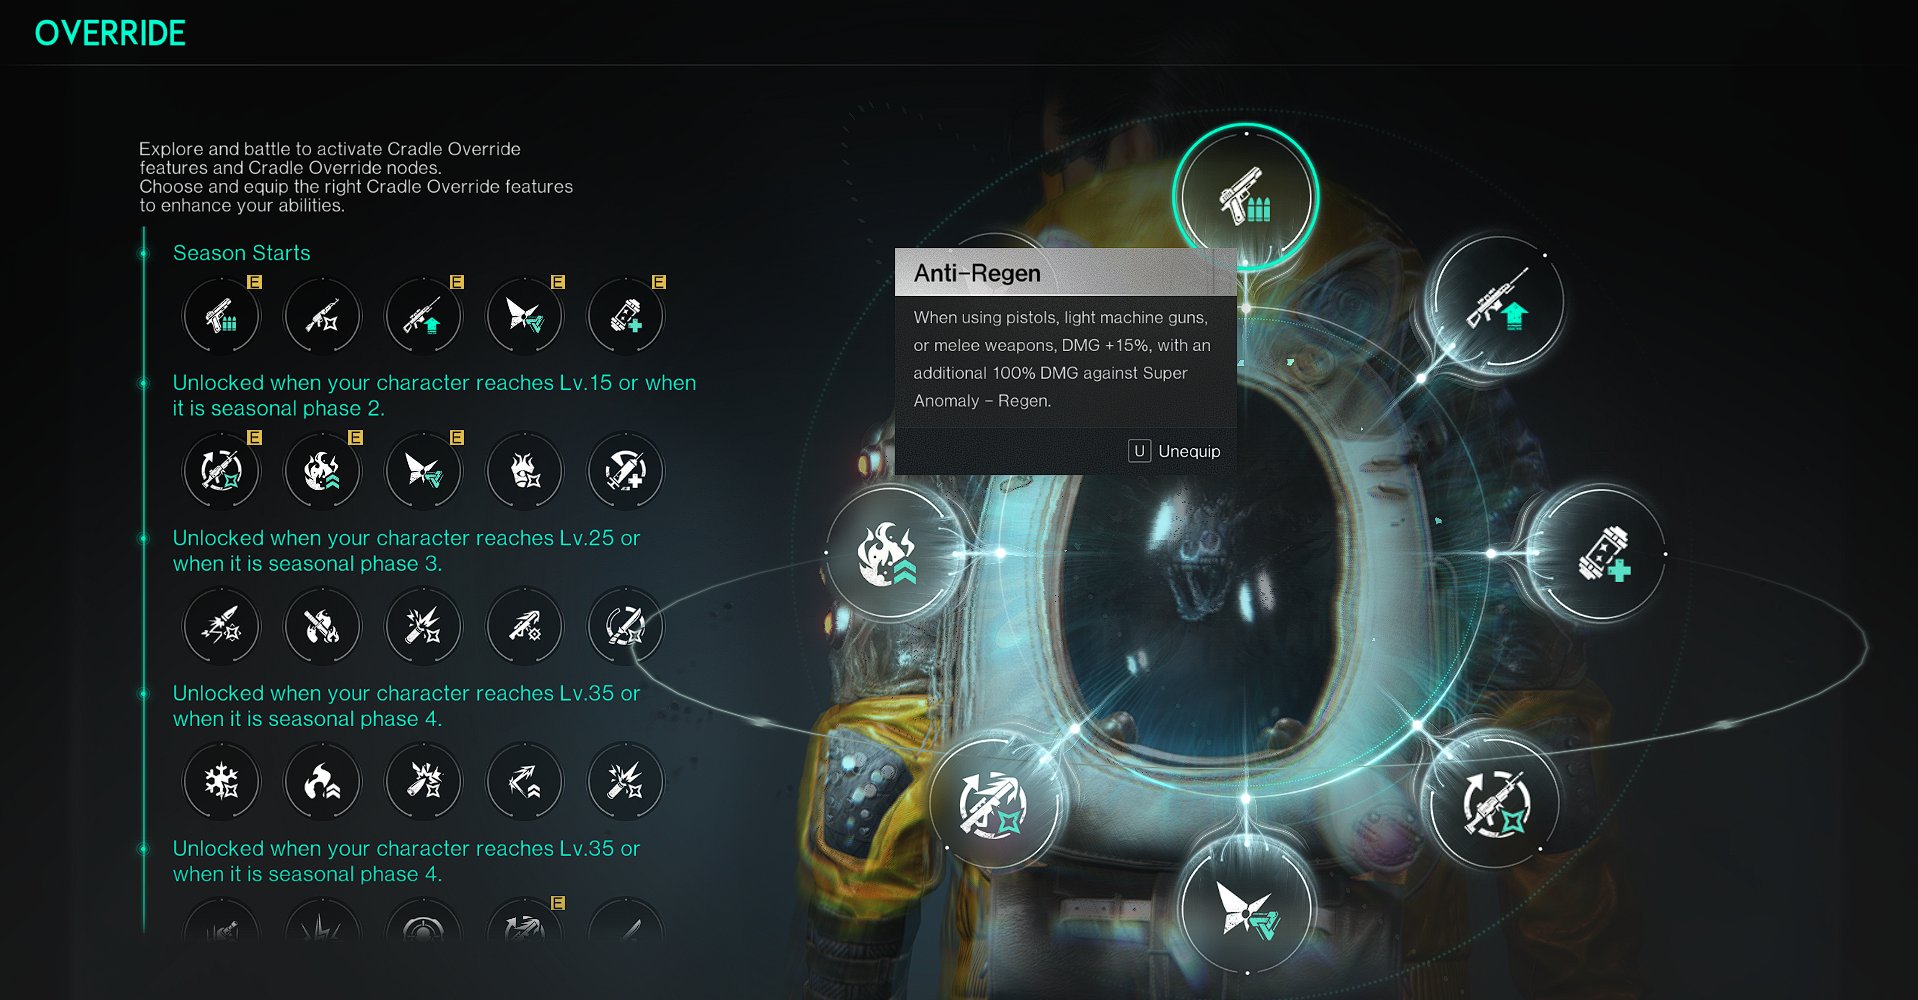
Press the “O” key and go to “Cradle.” Here, you can activate up to 8 Cradle Override features, which significantly increase your combat performance. For example, the “Anti-Regen” feature increases weapon damage by 15% when using pistols, light machine guns, or melee weapons.
Cradle Override features unlock gradually as the character’s level increases or as a seasonal phase changes. To unlock slots (Cradle Override nodes), you must complete specific dungeons, which are indicated when hovering over the node (for example, some Securement Silo). Strive to unlock and use as many Cradle Override features as possible.
TIP #8: Use Weapons with High Single-Shot Damage
Examples of such weapons include pistols, sniper rifles, and shotguns. These weapons are much easier and more convenient to use, especially when you don’t have legendary or epic accessories yet.
For example, you can use the R500 – Memento (Pistol) and AWS.338 – Bullseye (Sniper Rifle). This setup is suitable for most situations. Unfortunately, automatic weapons (such as assault rifles and LMGs) are much more difficult to develop early on, as they require specific mods to deal significant damage. Additionally, such weapons tend to have high recoil.
TIP #9: Easy Stardust Source
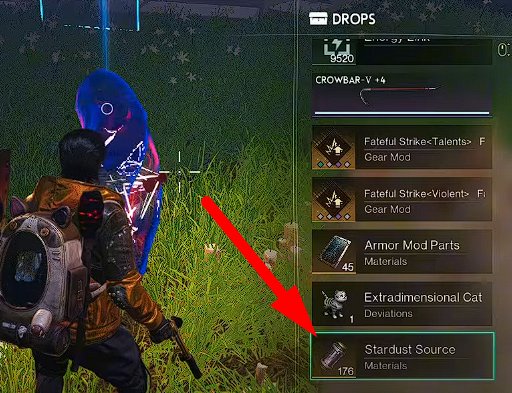
On both “The Way of Winter” and classic maps, there is an easy high-level dungeon where you can obtain rewards without killing almost any mobs on your way to the boss. On the WOW map, it’s Securement Silo Taurus, and on the classic map, it’s Securement Silo Theta. Guides on speed-running both of them are already published on my channel.
Each run takes 3–4 minutes, allowing you to quickly earn Stardust Source and Energy Links. Don’t forget that you need to spend Controllers to get the full rewards, though.
TIP #10: Basic Needs First
Among all Once Human tips, this one is probably the most obvious, but I must remind you that the basic needs of your character should be your first priority. Addressing them will result in far fewer issues with everything else. Here’s a simple checklist of what needs to be done:
-
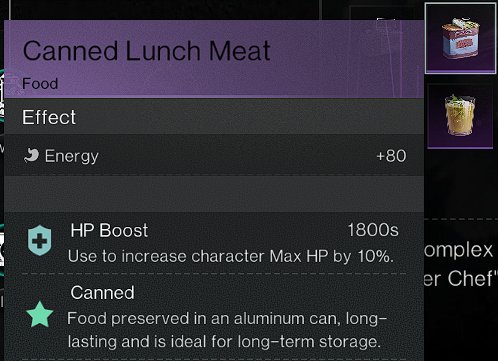
Prepare Canned Lunch Meat. Some types of meat (e.g., goat meat) provide passive HP regeneration while not in combat, while others gradually restore your Sanity in the same way.

-
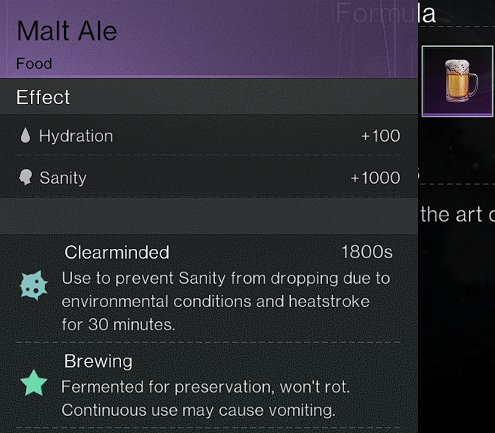
Prepare Corn or Malt Ale. Both of these drinks prevent your Sanity from dropping for 30 minutes after consumption.

-
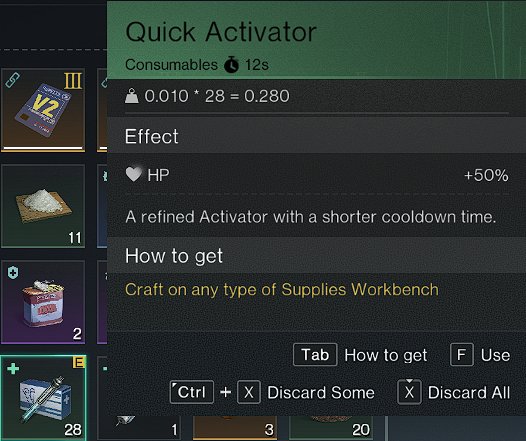
Prepare Activators and Adrenaline Shots. Activators restore your HP during combat. Adrenaline Shots are necessary for reanimating yourself after being knocked down.

Having a supply of the items listed above will make your gameplay much easier.
TIP #11: Solve Puzzles, Explore Riddle Spots
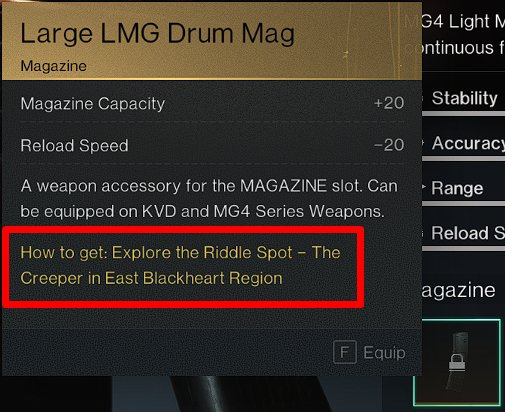
Most of the best accessories for weapons can only be found in the world by solving specific riddles. The riddle that needs to be solved to gain access to the accessory is always specified in its description. Solutions for all the riddles have already been published on YouTube, so you can easily find them.
I highly recommend gathering all the most important accessories for the weapon you use as soon as possible, as this will significantly improve its accuracy, stability (less recoil), and magazine size.
TIP #12: Use an Interactive Map
There is an interactive map for Once Human, which includes the locations of all resources, contaminated zones, and other useful data.
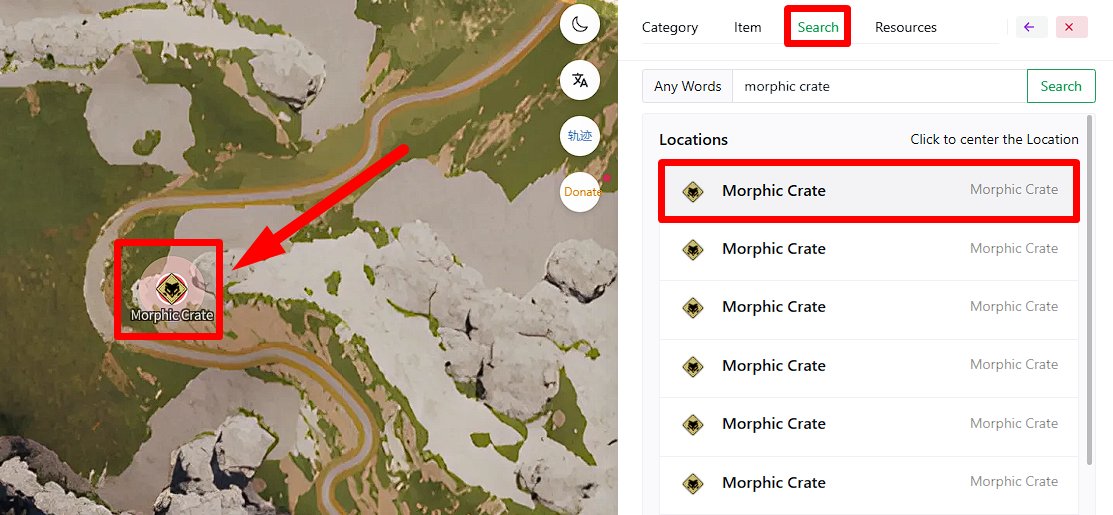
For example, you can use this map to easily find Morphic Crates (just type “morphic crate” in the search field). These crates are one of the in-game puzzles. Initially, they are hidden, but your backpack starts blinking when you come across one. As you get closer to the hidden Morphic Crate, the backpack blinks faster until you finally reveal the crate itself. After this, you need to shoot it and gather your rewards.
The most valuable thing in these crates is the Stellar Planula. As mentioned above, you can spend this currency in any settlement to buy many useful items, including accessories for your weapon, mod crates, controllers, and more.
TIP #13: Easy Energy Links
As you’ve probably noticed, the traders in Once Human have a weekly limit on the amount of Energy Links you can earn by selling items to them (e.g., 50k). Players who are lucky enough to be able to smelt Golden and Silver ingots thanks to a rare Memetics perk obviously can’t sell those ingots beyond the weekly limit. That’s why they often put them on sale for much lower prices using Vending Machines.
All you need to do is buy Golden or Silver ingots from other players and sell them to the trader for a higher price. On the WOW map, traders usually place their Vending Machines in the Oblivion settlement, and on the classic map – in Blackfell.
And, of course, you can relatively easily earn Energy Links by speed-running instances: Securement Silo Taurus for The Way of Winter and Securement Silo Theta for the classic map.
TIP #14: Produce Acid or Stardust Source
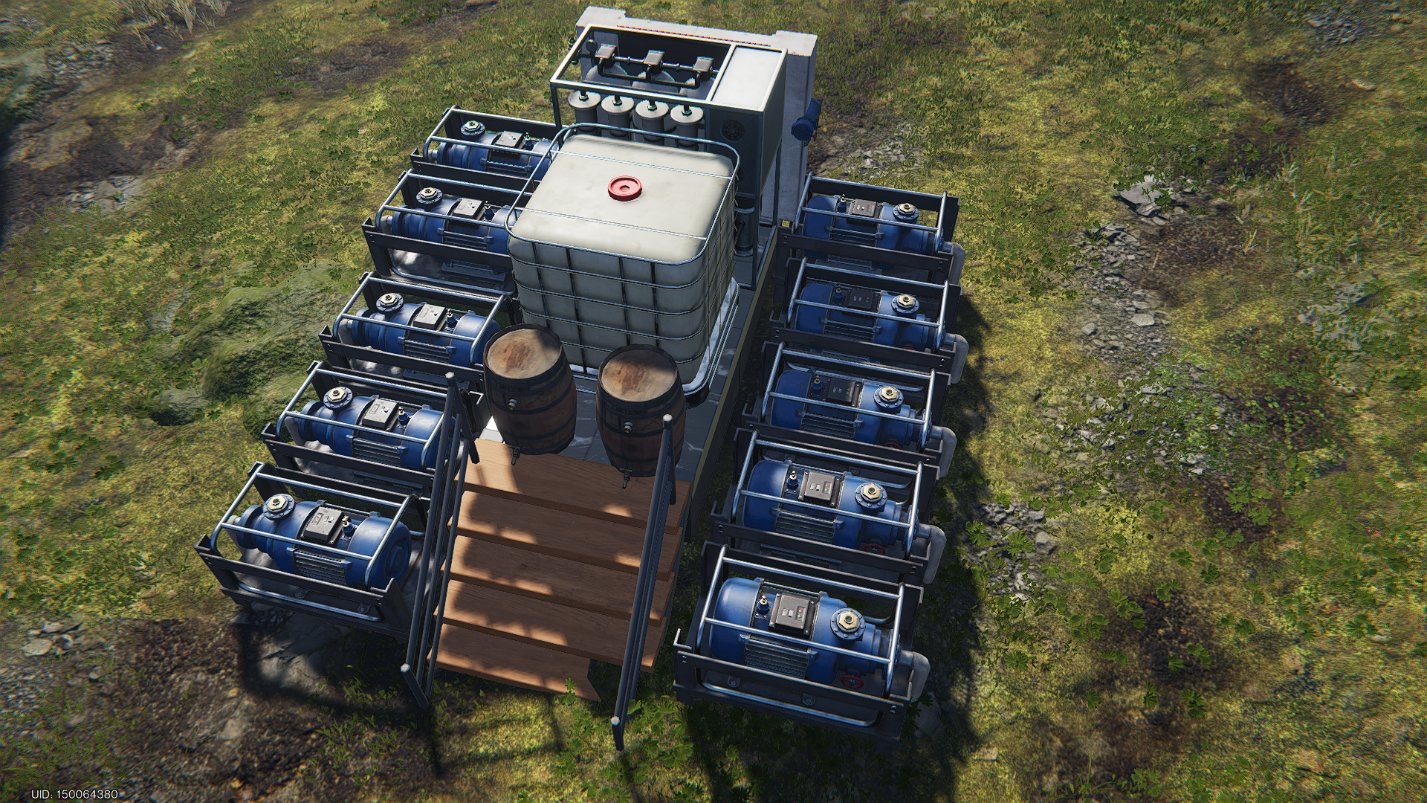
Every player in Once Human can produce Acid in Contaminated Areas, and there is a separate guide about this with a full breakdown of the math. All you need to do is move your territory to any Contaminated Area (which you can find using the interactive map) and build a simple farm that includes 10 Water Pumps, 1 Osmosis Water Purifier, and 2 Brewing Barrels. Each such farm will bring you 24 Acid per hour. This number may seem small, but imagine how much Acid you can produce in 2-3 weeks.
There is an important trick that will help you separate Acid and Pure Water production in Contaminated Areas. To do this, you only need to build your base on the border of such an area so that one half of your territory is within the polluted zone and the other half is outside. In the polluted part, you will be able to place Deviation Energy Generators and your Acid farm, and in the normal part – produce Pure Water without any mess.
There is also a rare Memetics Specialization that allows you to produce Stardust Source from Portable Mixed Fuel. If you have this memetics, you should find an Oilfield Area using the interactive map and start extracting Crude Oil using Water Pumps. After this, using Refining Facilities, you can convert Crude Oil into Portable Mixed Fuel and then craft Stardust Source.
TIP #15: Grow Contaminated Plants to Produce Acid
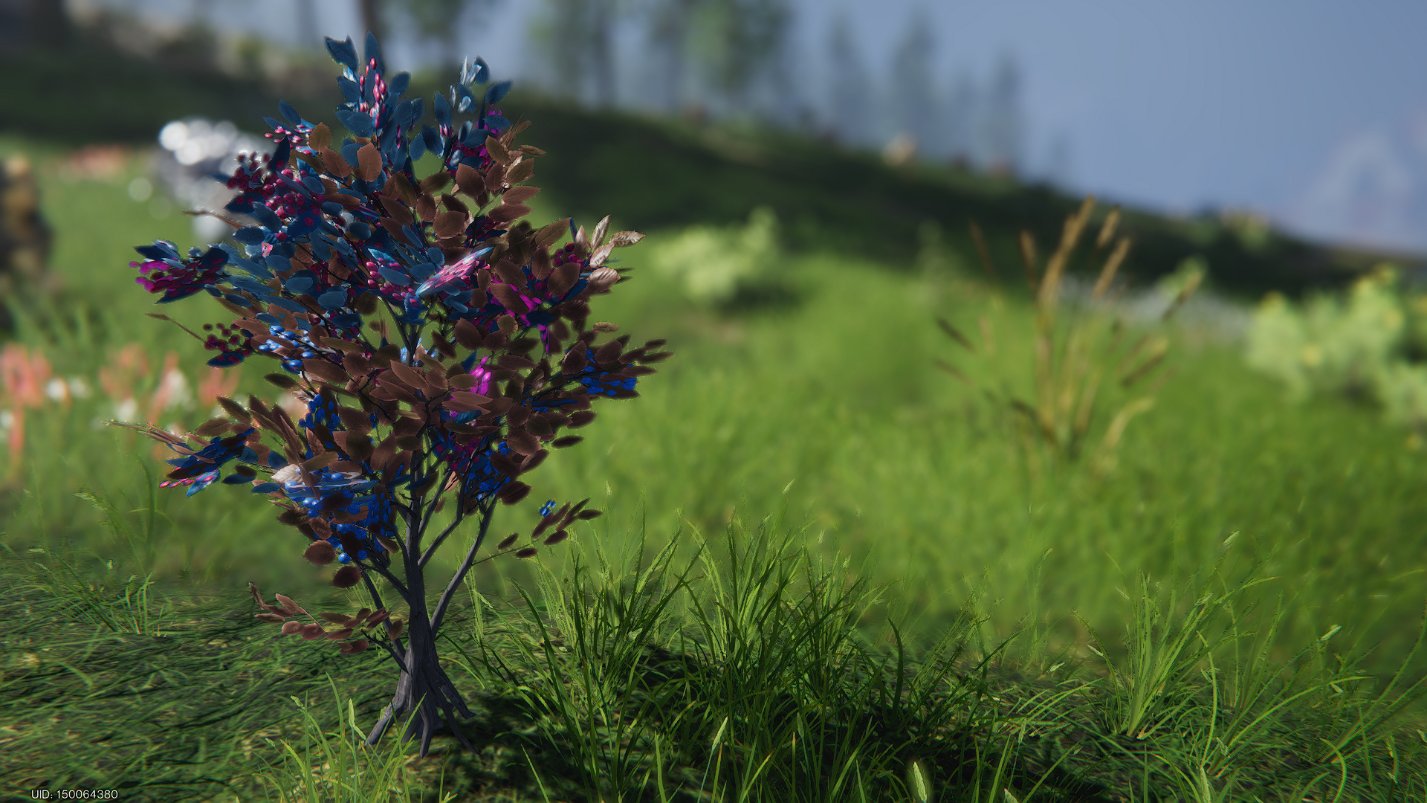
In contaminated areas, you can find special plants: Contaminated Berries, Contaminated Wheat, and Contaminated Aloe Vera. Do not confuse these plants with “Deviated” ones. These plants are unique and can only be used to produce acid using Brewing Barrels.
- 3 Contaminated Berries + 1 Pure Water = 1 Acid / 20 minutes
- 3 Contaminated Wheat + 1 Pure Water = 1 Acid / 20 minutes
- 2 Contaminated Aloe Vera + 1 Pure Water = 1 Acid / 20 minutes
The good thing about contaminated crops is that they don’t require light, so it’s very easy to build an extremely compact farm using only 1 Irrigation Facility, as I showed in the video below.

To breed seeds of the crops, you should use Breeding Boost Fertilizer. This way, you will be able to triple your seed harvest and easily get hundreds of seeds in just a few iterations. I showed how to do this in a separate tutorial, which was released immediately after this feature appeared in the game.
TIP #16: Focus on These Deviants First
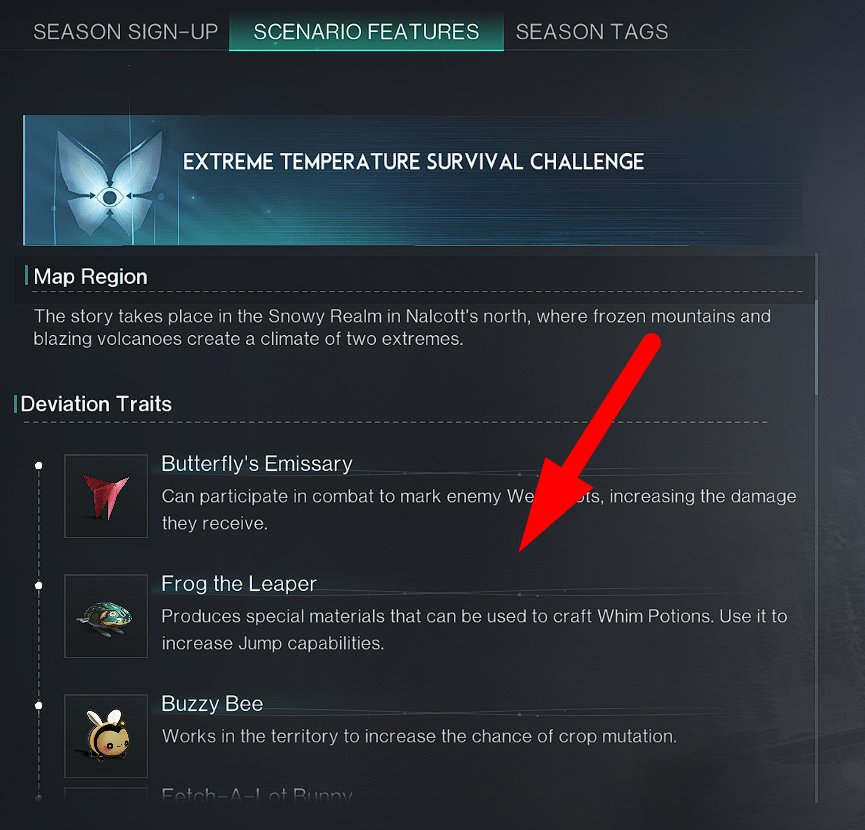
Deviants are something like pets in Once Human. They live in your territory in their Isolated Securement Units and perform various jobs. The list of deviants available is different for each game mode, and you can check it in the “Scenario & Seasonal Details” section of your server.
This is important because, for example, you can’t obtain Buzzy Bee in the PVP scenario Evolution Call, despite the fact that it uses the same map as the PVE Manibus.
Here is a list of deviants that are the most important for you:
- Growshroom – Automatically plants and harvests plants on your farm, can use fertilizers.
- Electric Eel – Attaches to one of your generators and increases the amount of energy it produces. You need 6 such deviants with Skill Rating 5 to maximize energy production.
- Canine Skull – This combat deviant provokes enemies to attack it and increases your damage to any targets it attacks. Currently, the best combat deviant in the game.
- Extradimensional Cat (Moonlight Jewel) – A rare cat that passively restores the Deviant Power of your deviants, allowing them to work continuously without needing to rest.
- Rebecca – Restores the mood of your deviants, making them work better and faster.
- Fetch-A-Lot Bunny – Brings you random vegetables and seeds (including rare ones, e.g., Morel Seeds).
- Lethal Rabbit – Brings you hides and meat or animals that are typical for the current region of the map.
In my opinion, these deviants are the most important, and you should strive to obtain them as soon as possible.
TIP #17: Save Your Buildings into Blueprints
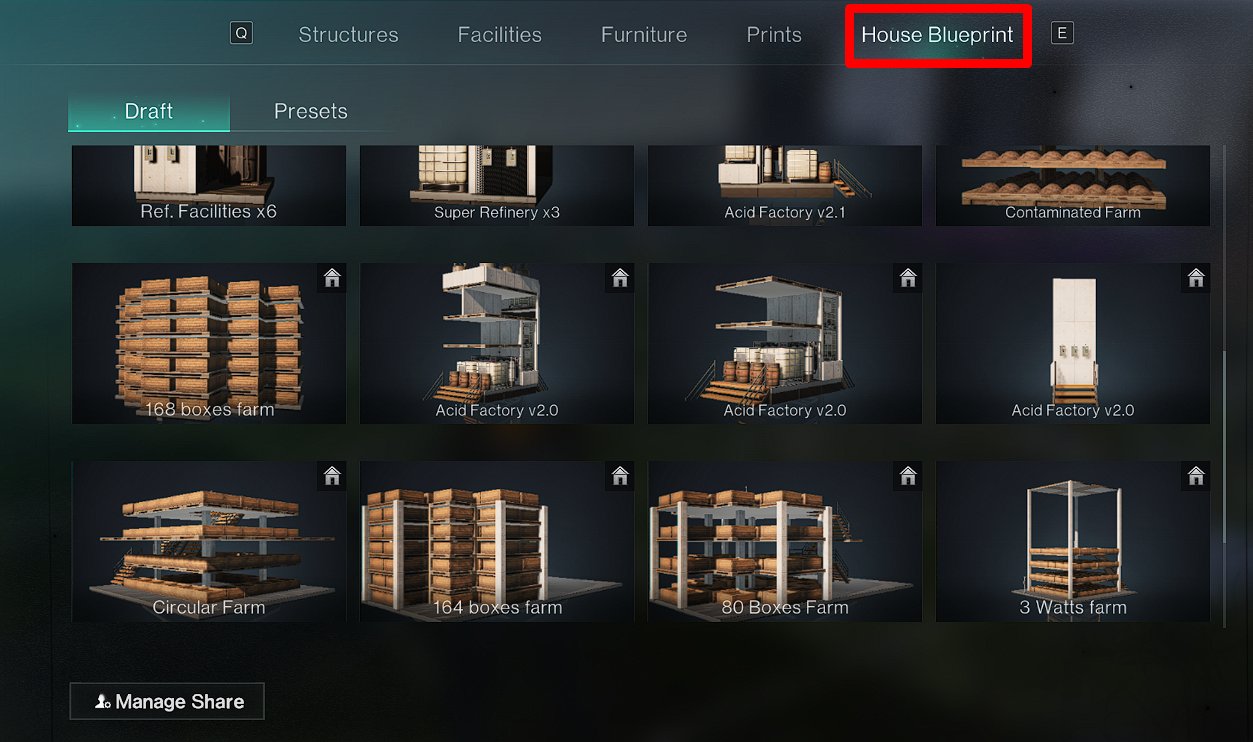
This is extremely important because, when you migrate to a new season, your blueprints are saved, and you can still use them. Moreover, when you save a single building as a blueprint, you will be able to build it later even if the construction mechanics change.
I recommend separating your production and saving individual buildings: an acid farm, a pure water farm, a crop farm, and so on. This way, you will have something like a modular system and will be able to build any of the modules with just one click.
TIP #18: Transfer Your Items Wisely
When you migrate to a new season (server), almost all your items move to the Spacetime Backpack. There is also a separate Cross-Server Transferring Guide, where all the key points of this feature are explained.
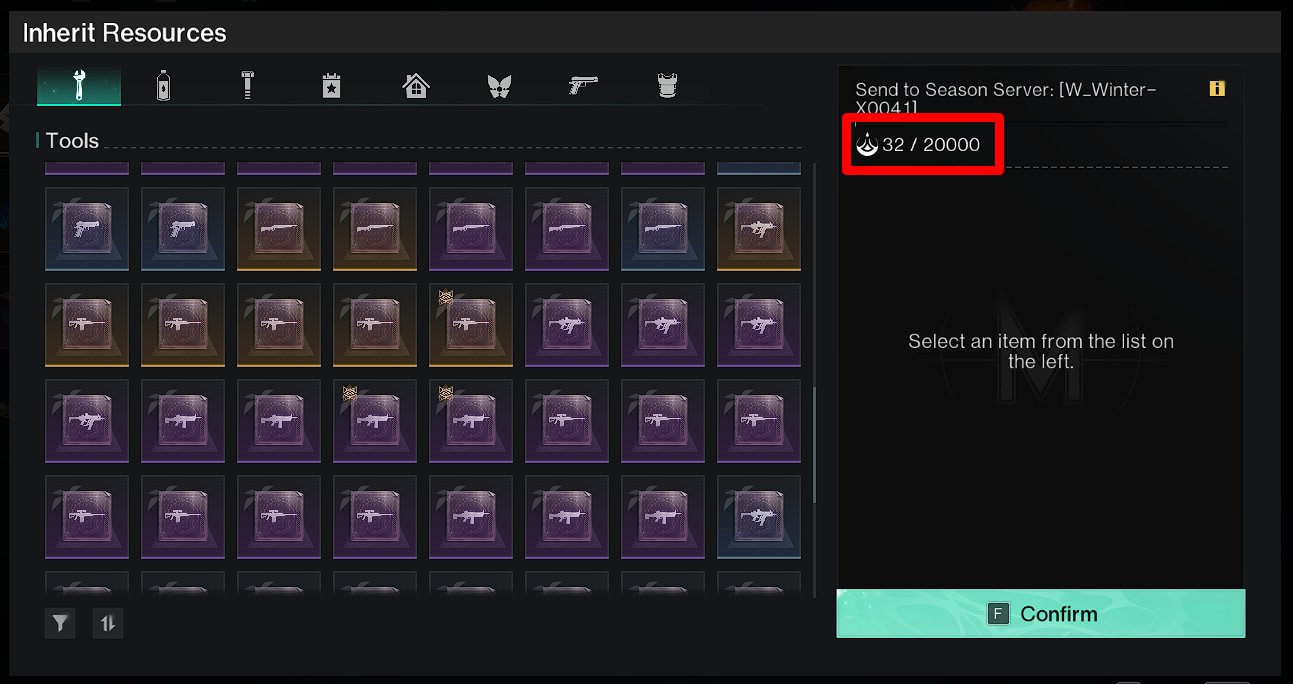
You receive 20,000 Material Points and can use them to transfer any of the items you have to a new server, which gives a huge advantage. Here is a list of the most important items to transfer:
- Electric Drill (especially with the Treasure Hunter perk) and Chainsaw – allow you to gather wood and ores at the highest speed from Day 1.
- Seeds and some Fertilizers – enable you to grow crops, even if they are unavailable in the current scenario.
- Deviants – transfer your best deviants with the highest Skill Rating.
- Calibration Blueprints – ideal for upgrading your weapons.
- Controllers – useful when you need more to get full rewards from dungeons.
- Animals – bring your best animals for ranching.
To spend your Material Points as effectively as possible, prioritize transferring items that are the hardest to obtain.
TIP #19: Save Power
This small tip will help you produce more by saving power at your base. There are several ways to do this.
-
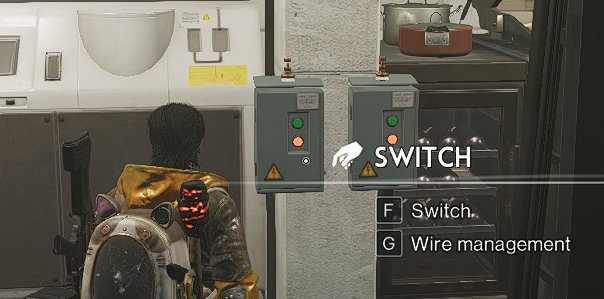
Add switches to your facilities or facility groups (e.g., one switch for 10 water pumps) and turn them on only when you use them. Exception: the fridge.

-
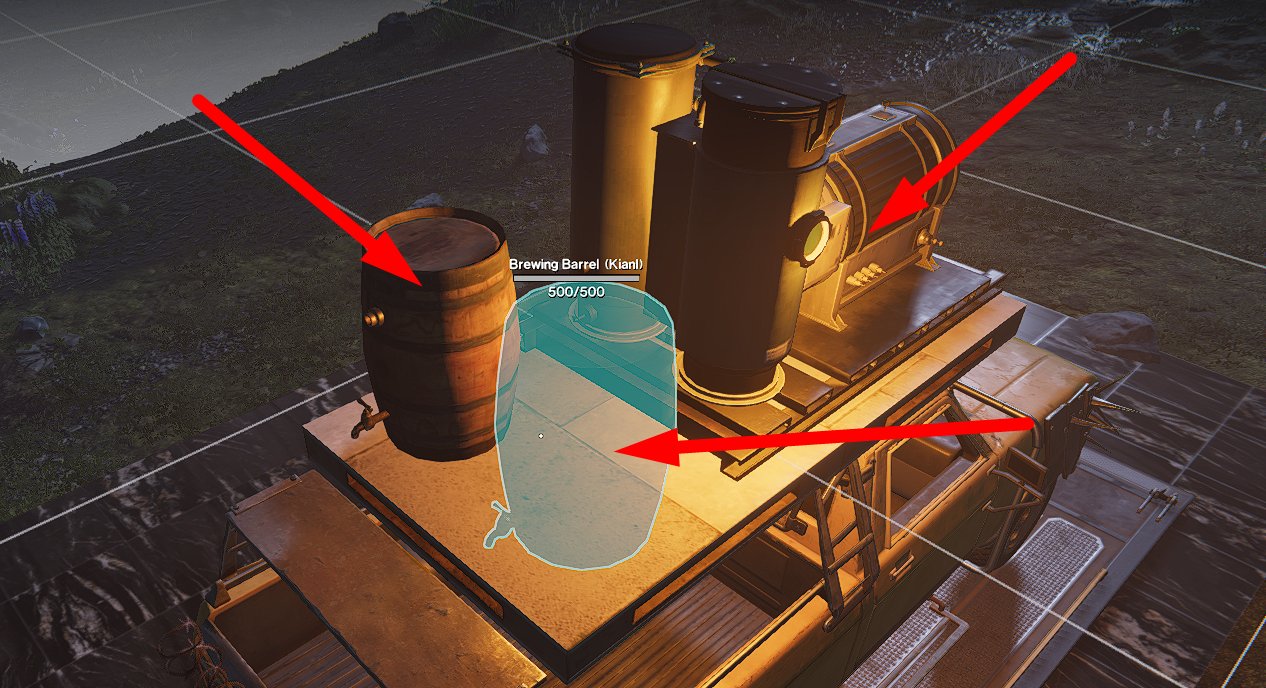
Place some facilities on cars, which you can build using Medium and Large Garages. Each car can have its own generator. For example, you can place two brewing barrels on each car, saving 40 watts of power for your base. While this method is not always convenient, it is highly effective in reducing power consumption.

-
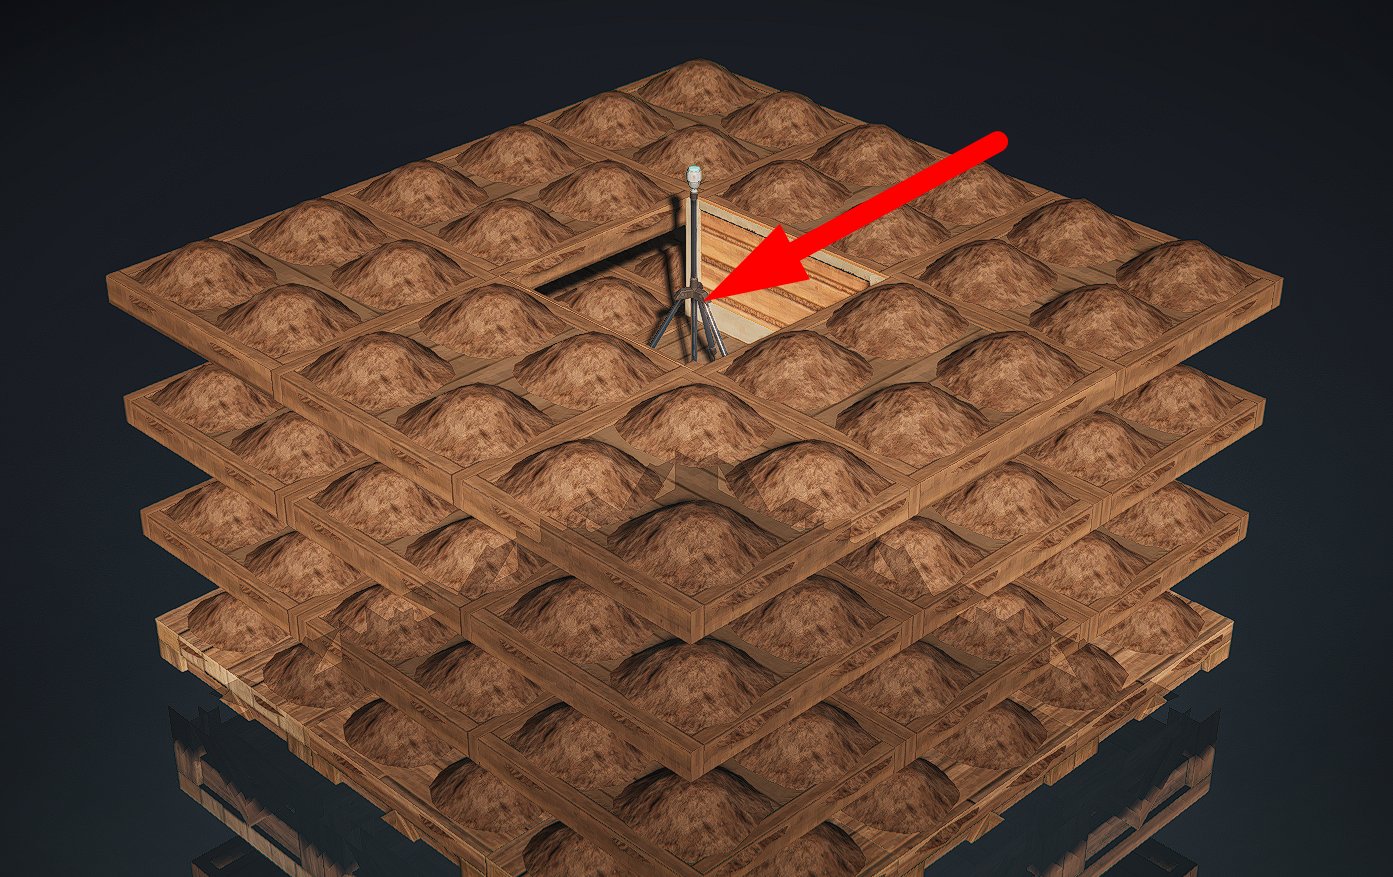
Use only one irrigation facility, as it works through ceilings up to a maximum height of three half-blocks (or half-columns). This will save not only power but also pure water, as each irrigation facility consumes about 100 units of pure water per hour when you are online.

Power is not something crucial since you don’t need much of it for relatively effective gameplay. These tricks are for those who want to maximize efficiency with the resources they have.
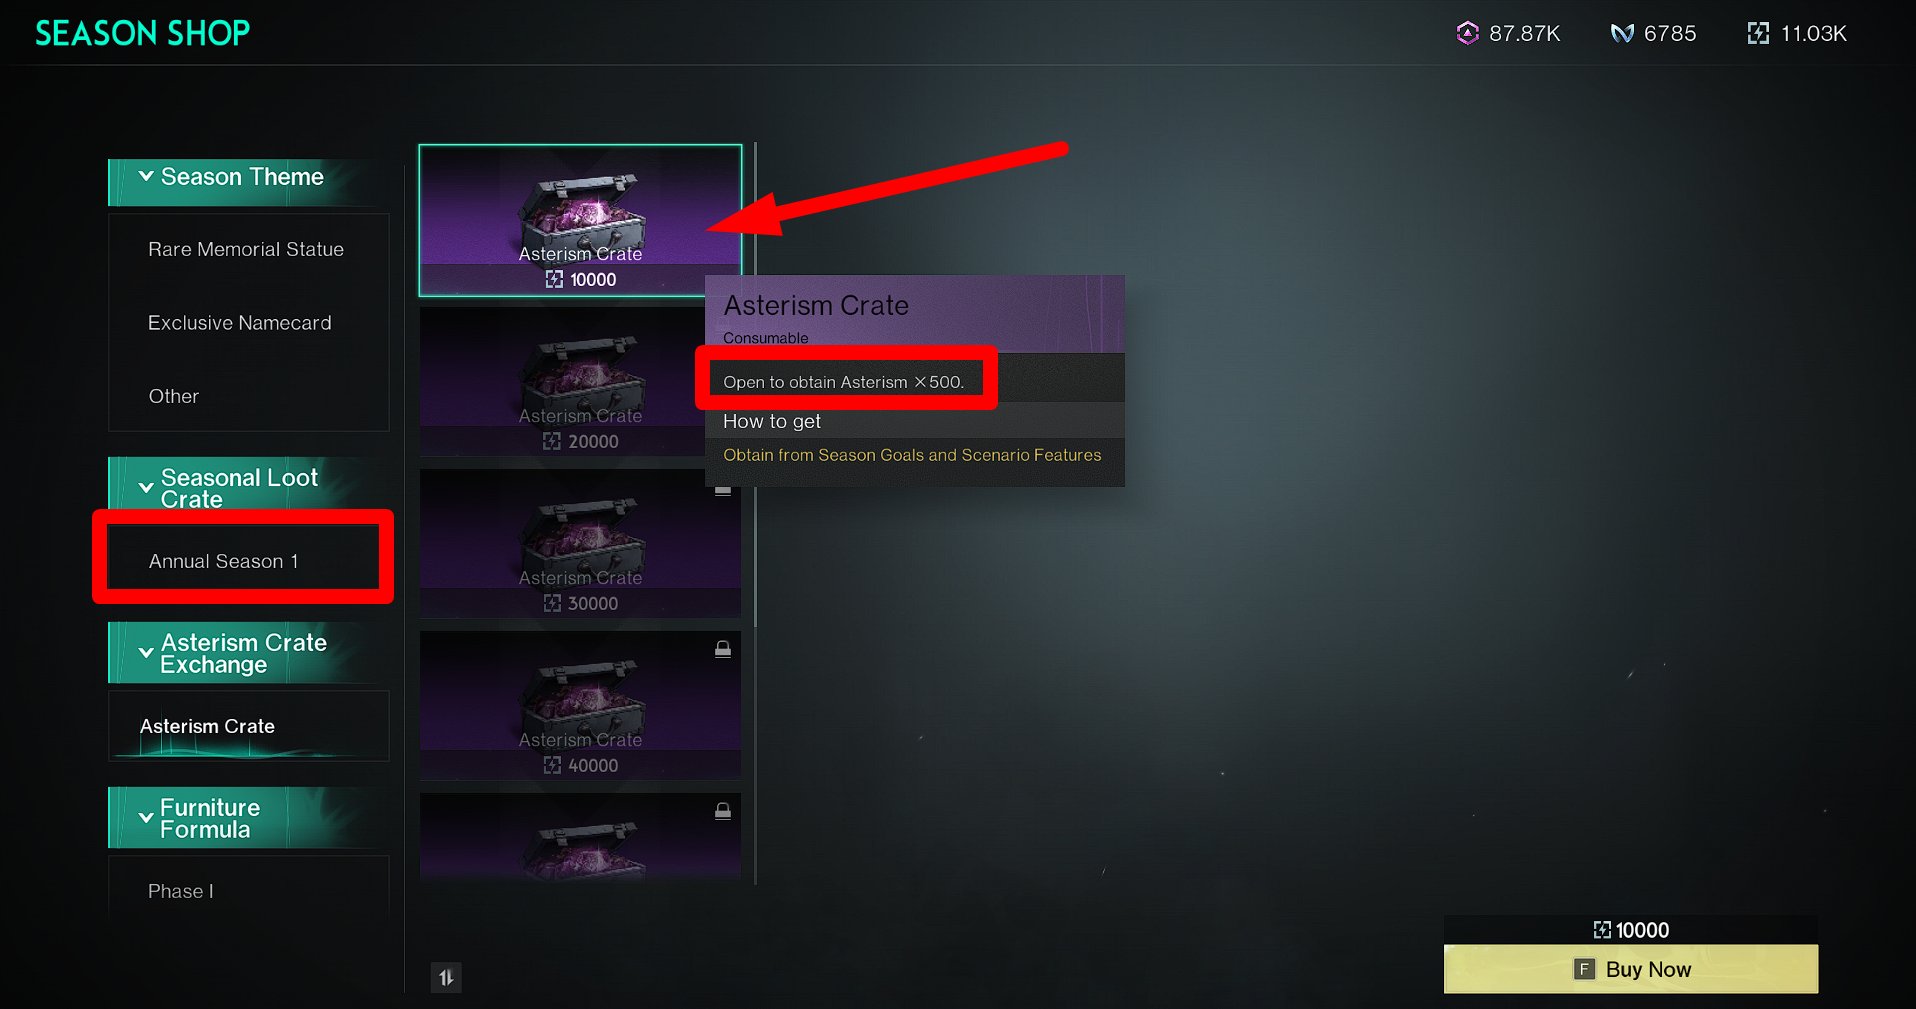
TIP #20: Don’t Forget to Buy Asterism Crates
Asterism will bring you Starchrom, which is required to unlock weapon and equipment blueprints. At the end of the season, go to Esc → Season menu → Season Goals → Season Shop and buy Asterism Crates for Energy Links. You can purchase up to 7 Asterism Crates in total, with each subsequent one being more expensive, starting from 10k and finishing at 80k Energy Links.
If you don’t have enough Energy Links at the end of the season, there’s a simple trick: you can reset all your Memetics to quickly reclaim 30% of the Energy Links you spent to unlock them. This is effective because, when you’re planning to migrate to a new server, you won’t need those Memetics anymore, right? Usually, this will bring you about 60-80k Energy Links immediately.
