Table of Contents HIDE
Weapons in Blood Strike can be modified using various components that gradually unlock as you level up the gun. However, if you’ve never played battle royal shooters like COD: Warzone, understanding the weapon parameters can be quite problematic. This guide is written to assist beginners and explains in detail all the intricacies of weapon modification in the game.
Weapon Parameters and What They Mean
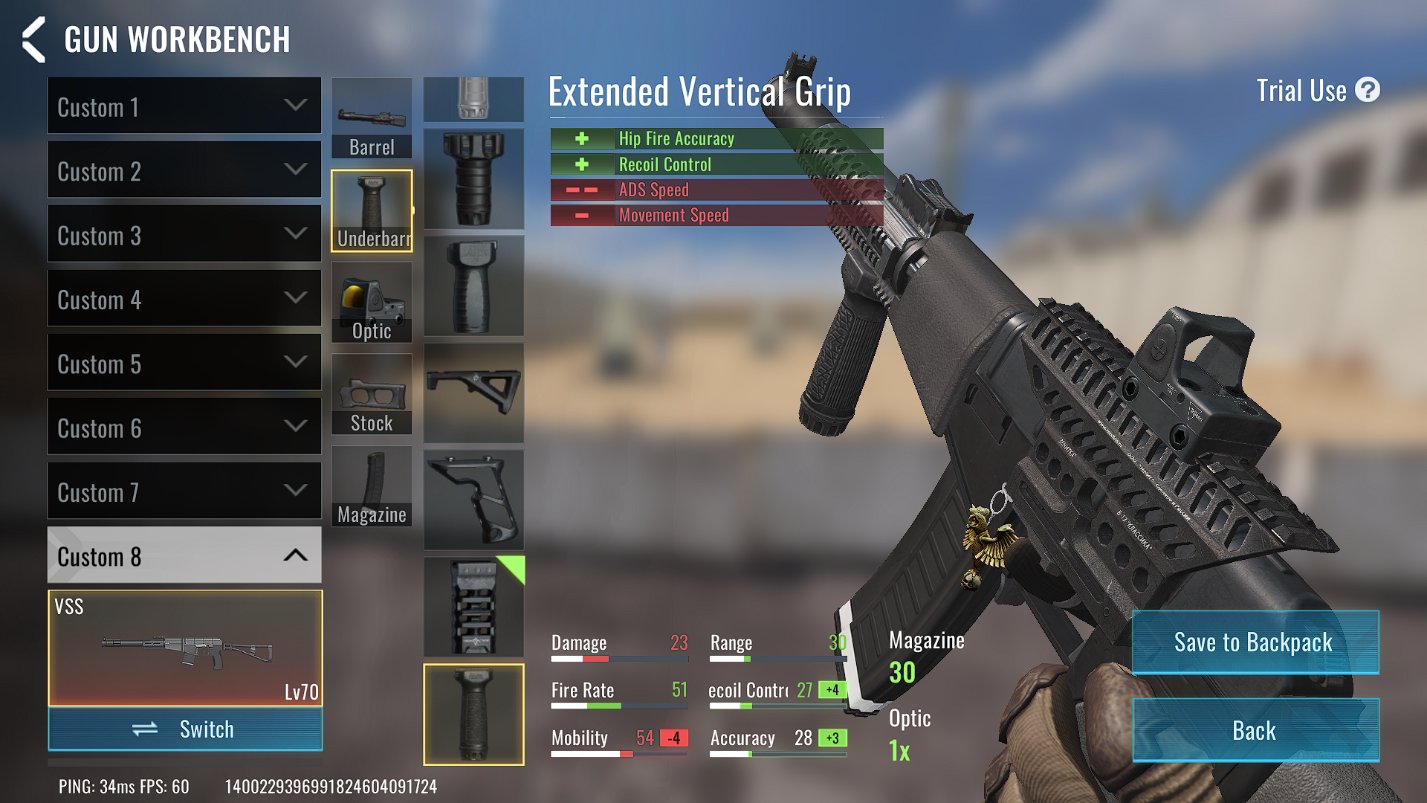
Open the “Weapon” section in the game lobby, select the desired weapon, and switch to the “Modify” mode. You will see 7 parameters of this weapon.
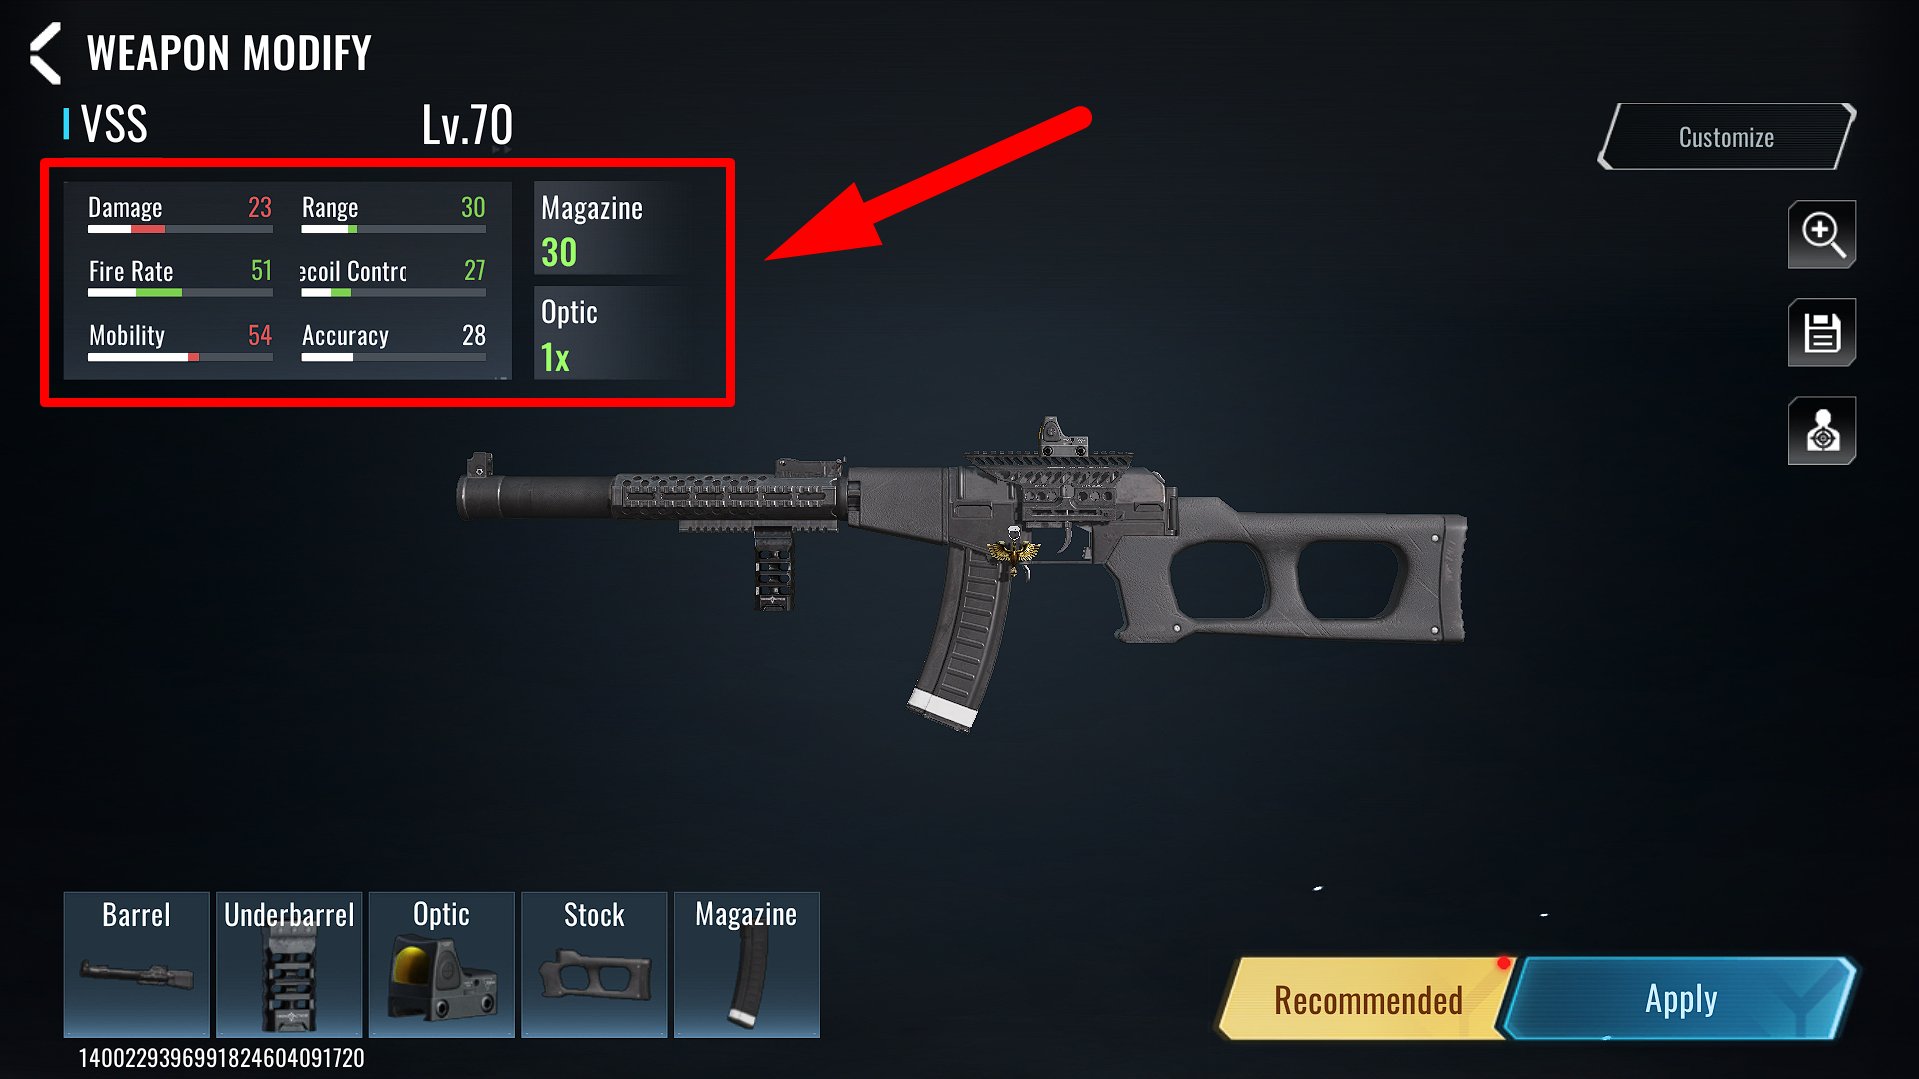
- Damage – this is the exact amount of damage dealt to the target’s body upon hitting, i.e., the single-shot damage.
- Range – this is the conditional effective range. From what I understand from tests, this parameter summarizes the convenience of aiming and the drop-off of damage with distance. I didn’t find a direct relationship between the drop-off of damage with increasing distance to the target and the Range parameter.
- Fire Rate – basically, the rate of fire of the weapon. Usually, the higher, the better.
- Recoil Control – the higher this parameter, the weaker the weapon’s recoil during shooting.
- Mobility – a conditional parameter that summarizes ADS speed, character movement speed, and Sprint-to-fire speed. For this reason, it’s not advisable to rely directly on this parameter.
- Accuracy – a conditional parameter that includes both accuracy when aiming and hip fire accuracy.
- Magazine – the size of the weapon’s magazine.
Usually, beginners orient themselves precisely on these parameters when modifying weapons, but this is not entirely correct. It’s important to rely on the parameters specified in the description of the accessory you are installing.
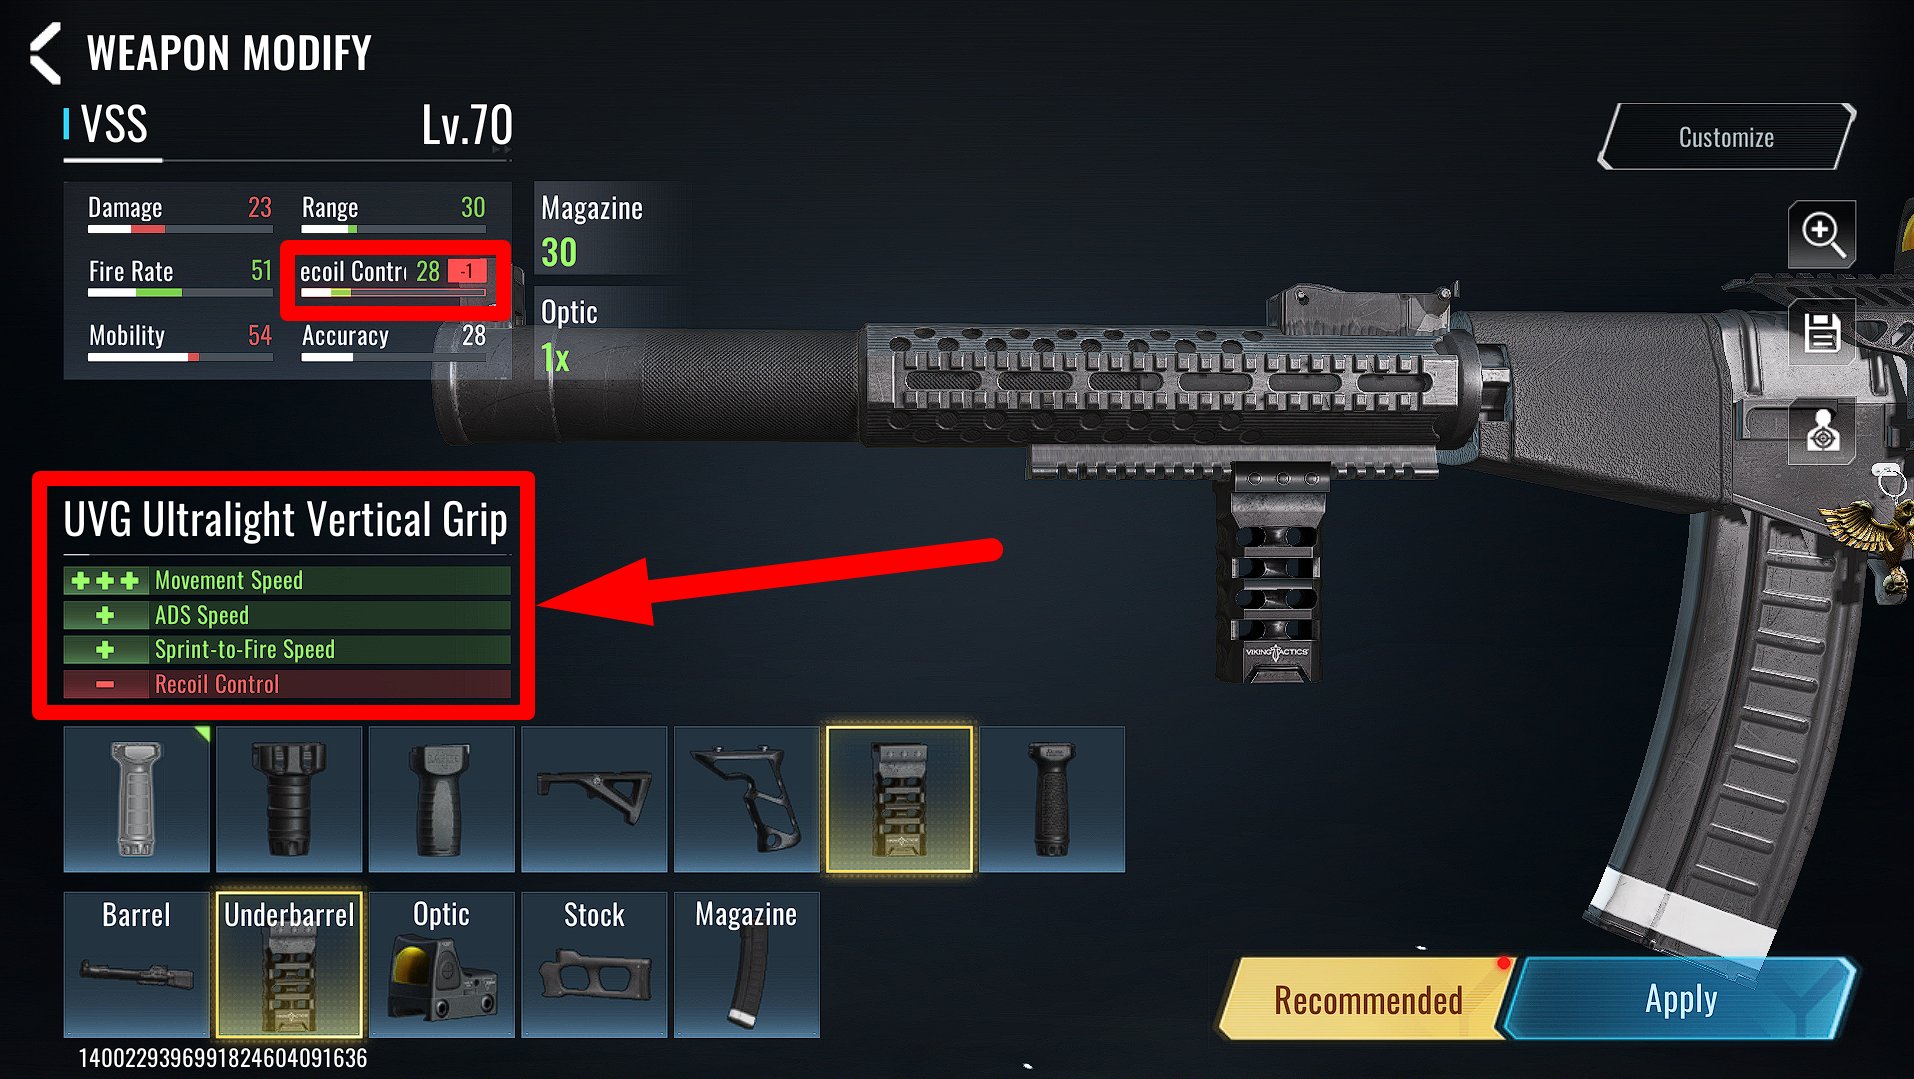
For example, by installing the “UVG Ultralight Vertical Grip” instead of the standard one, we only see “Recoil Control -1“, which tells us little. However, in the parameters of the accessory itself, we see the maximum possible increase in movement speed, as well as the minimum increase in ADS Speed (aiming speed) and Sprint-to-Fire Speed. In simpler terms, we get slightly stronger recoil but significantly increase the mobility of the striker and the speed of handling the weapon.
Carefully study the parameters of each accessory before installation.
Test Your Weapon in the Shooting Range
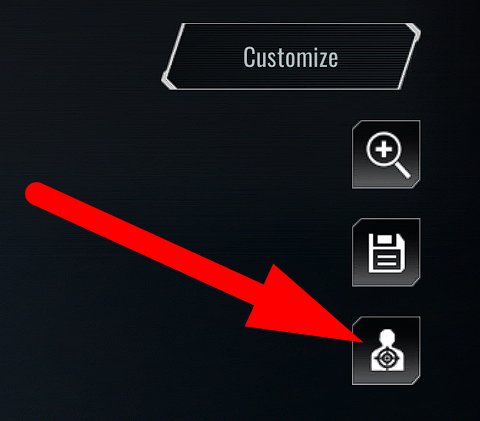
In Blood Strike, there is a Shooting Range where you can personally test any weapon in any configuration (even if accessories are still locked). To access the Shooting Range, click on the corresponding button in the weapon modification interface, as shown in the screenshot.
At the top, there is the “Modify” button, which opens the modification menu. Using this menu, you can change the weapon without leaving the Shooting Range and immediately test it on targets and dummies.

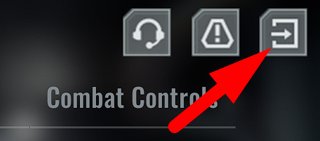
To leave the shooting range, go to the “Settings” section and click on the “Exit” icon in the top right corner.
I mention this separately because the first time I couldn’t get out of there for a long time 😁.
Saving Schemes
Sometimes it’s useful to have multiple schemes for the same weapon. For example, you may have a rapid-fire VSS with a collimator sight for short distances, and a VSS with high single-shot damage and an optical sight for long/medium distances. To avoid manually changing accessories every time, it’s worth saving schemes in advance.
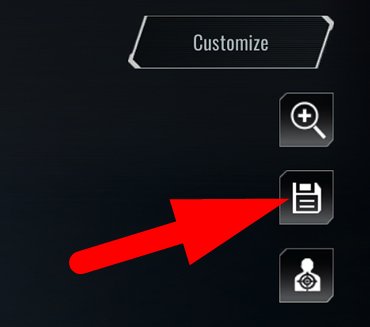
Click on the save button, which is located to the right in the weapon modification interface. Choose one of the available slots and save your configuration with the desired name.
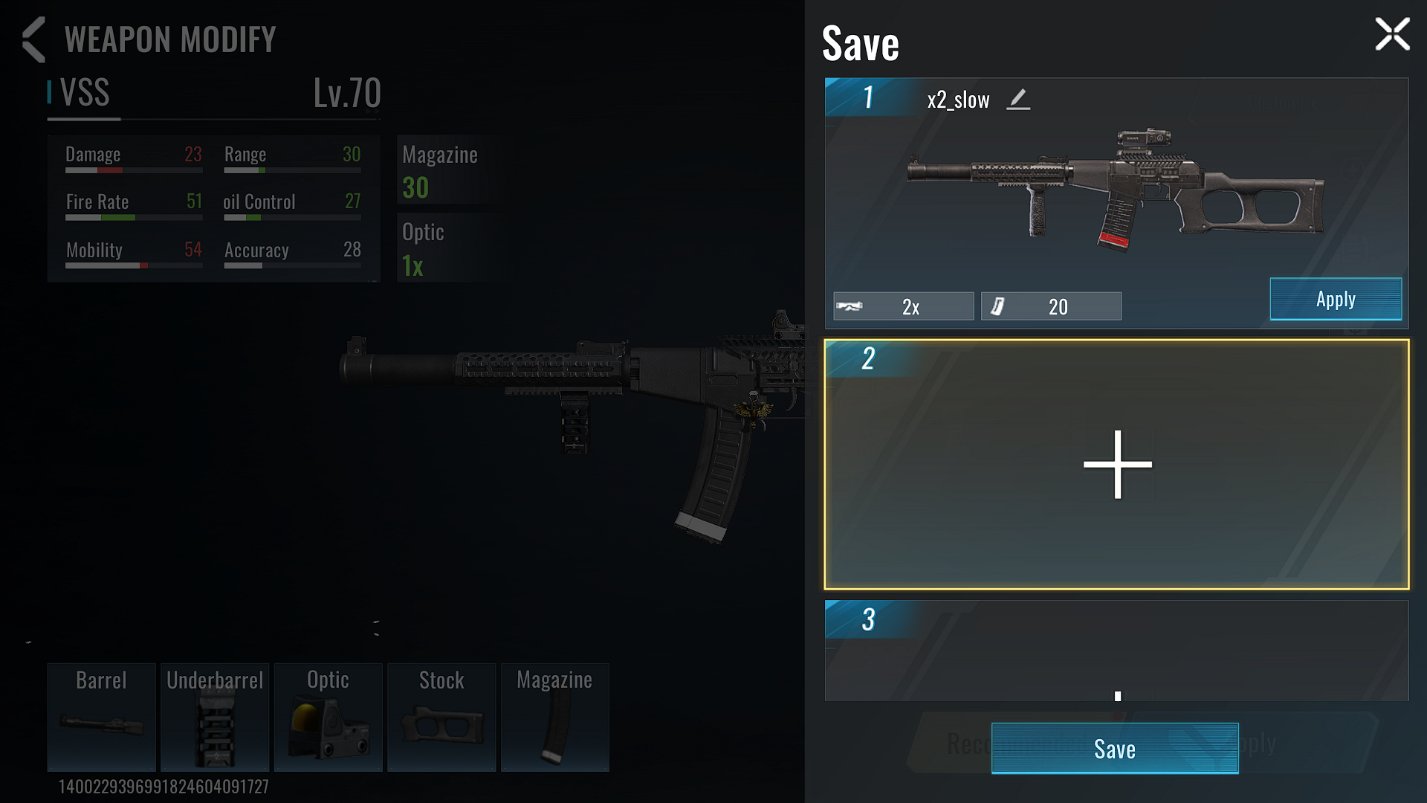
Now you can quickly switch between the required schemes.
Ready-made Weapon Presets from TOP Players
Go to the “Leaderboard” from the game lobby and open the “Ace Shooter” section. Here you can select any available weapon and view the schemes used by the top players.
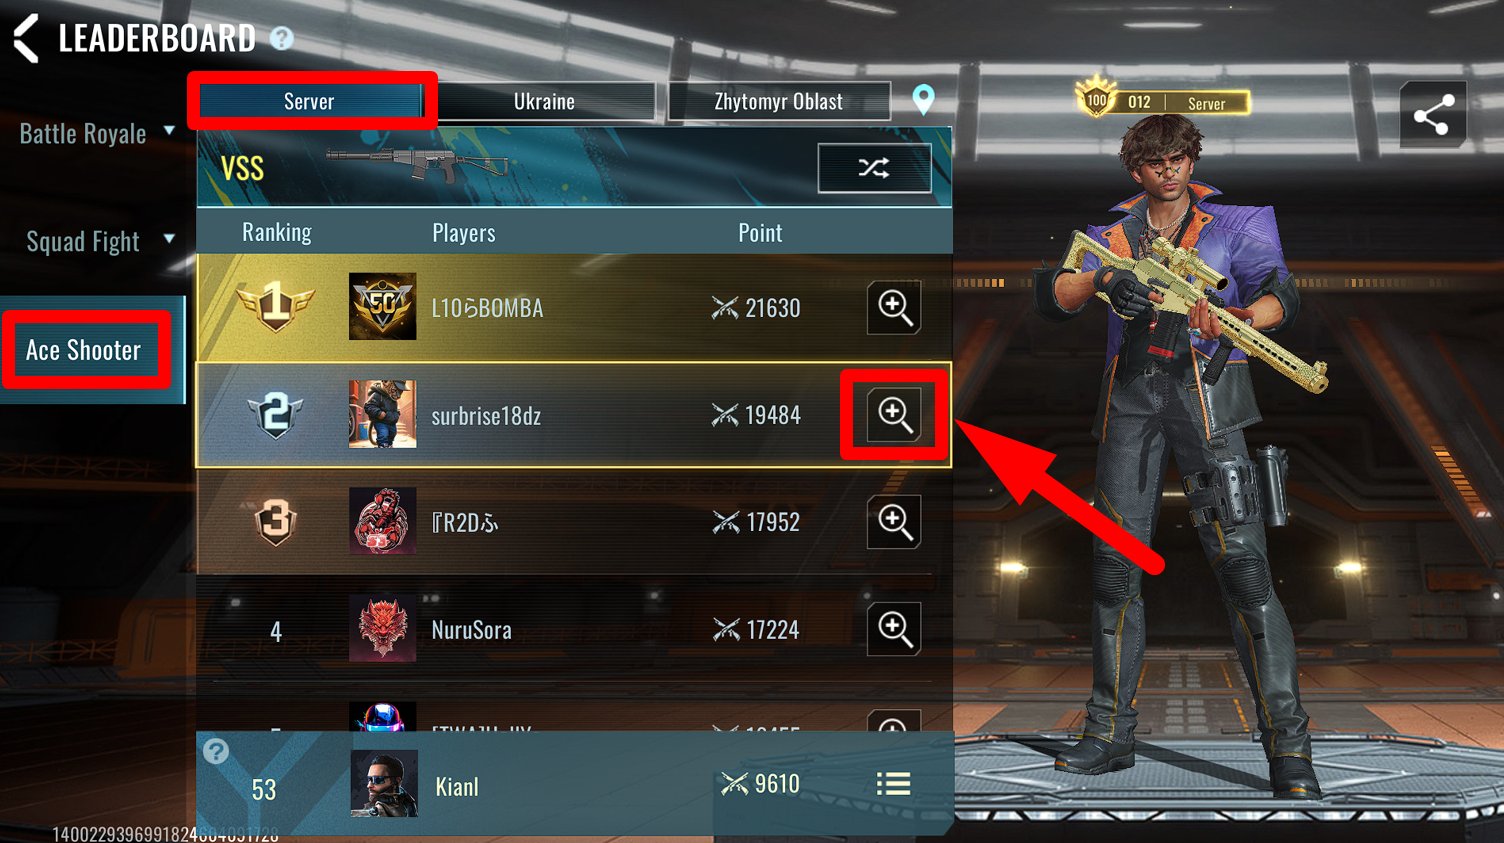
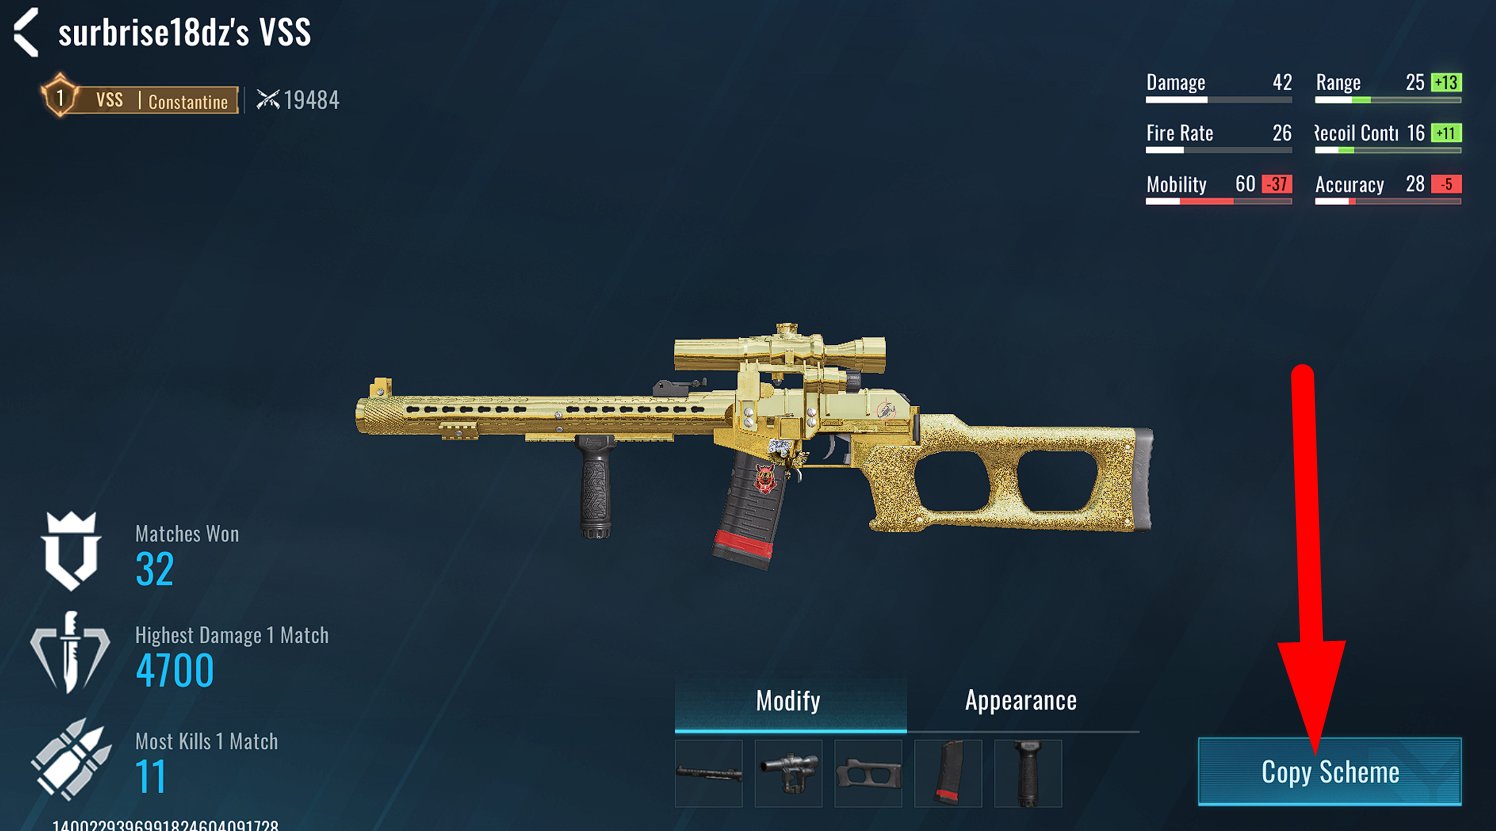
To copy a scheme, click on the magnifying glass icon, then click “Copy Scheme“.
Once again, I remind you that you can save multiple schemes and then freely switch between them.