Table of Contents HIDE
- How are matchmaking balance and win rate related?
- Why you should prepare your team in advance
-
Team Composition Techniques
- Each hero, skill, or aura should have an alternative
- Deceive your opponent
- Prepare for the worst-case scenario
- Heroes worth using on Live Arena
- Once again: Put your opponent before an impossible choice
- Video and screenshots of my team
- Layers of protection: How to save your damage dealers
- Who and why should aim to play from the first move?
- Tactics of Picks and Bans
- Ready Tactics
- Conclusion
The introduction of Live Arena has marked a new milestone in the development of RAID: Shadow Legends. Now, players can battle not just against bots, but against real opponents in real-time mode. The rules of the Live Arena differ from those of the Classic and Tag arenas for understandable reasons. Due to the increased complexity, many players quickly became disillusioned with Live Arena gameplay, criticizing it negatively due to what they see as unbalanced matchmaking.
Since the inception of Live Arena, I’ve already fought more than 600 battles, but haven’t achieved significant success due to the lack of heroes.
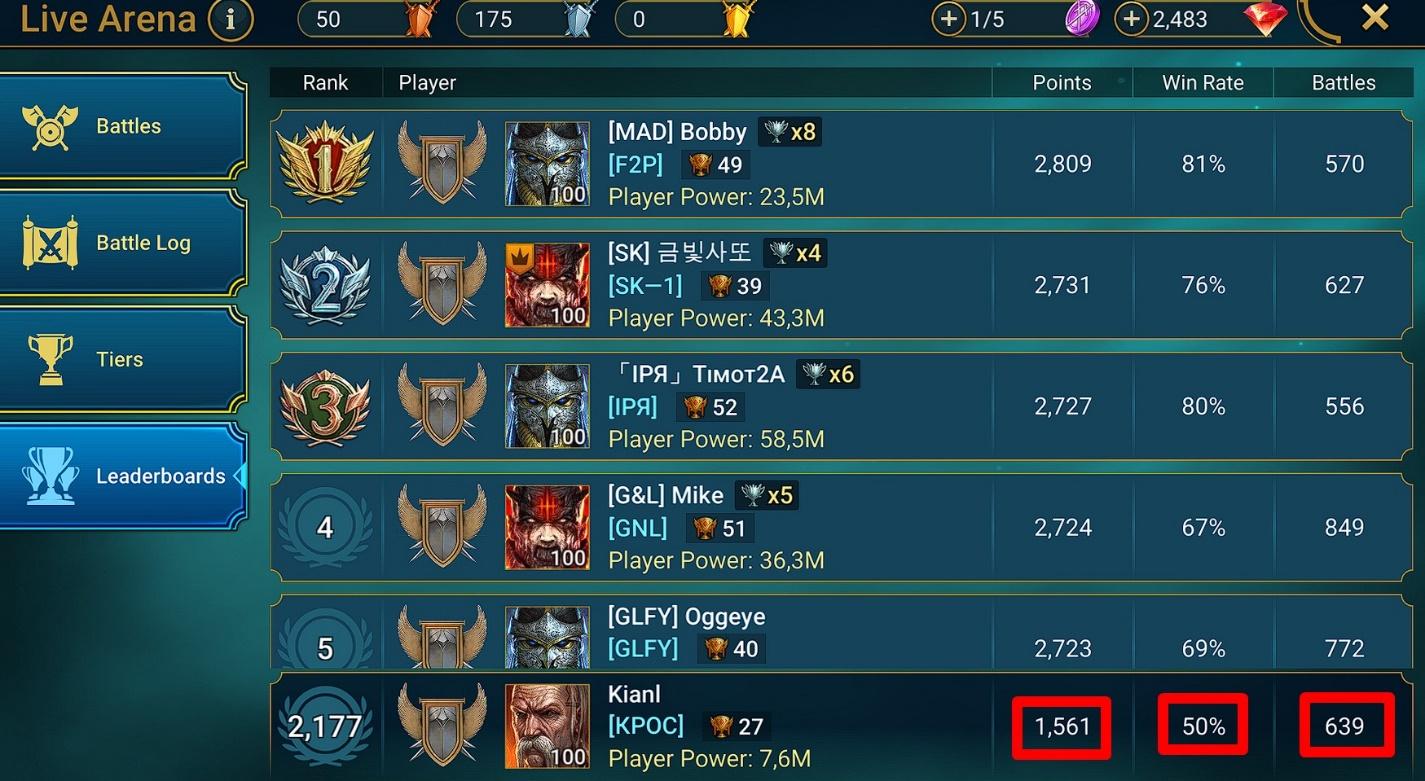
I’m stating this honestly at the start of the article so as not to give you false expectations. Many tactics presented in the article have not yet been personally tested by me. Nevertheless, some basic things are laid out here that will definitely be useful, regardless of which league of Live Arena you are currently in. And I think you’ll be quite surprised when you see which heroes and gear helped me reach a 1561 rating. Let’s begin.
How are matchmaking balance and win rate related?
Many players complain about balancing, citing that the game matches them against opponents who are much higher in level, have more heroes, and so on. Throughout my gameplay, I’ve noticed that the win rate of an account heavily influences the selection of opponents. In particular, streaks of continuous victories and losses significantly affect the strength of the adversary.
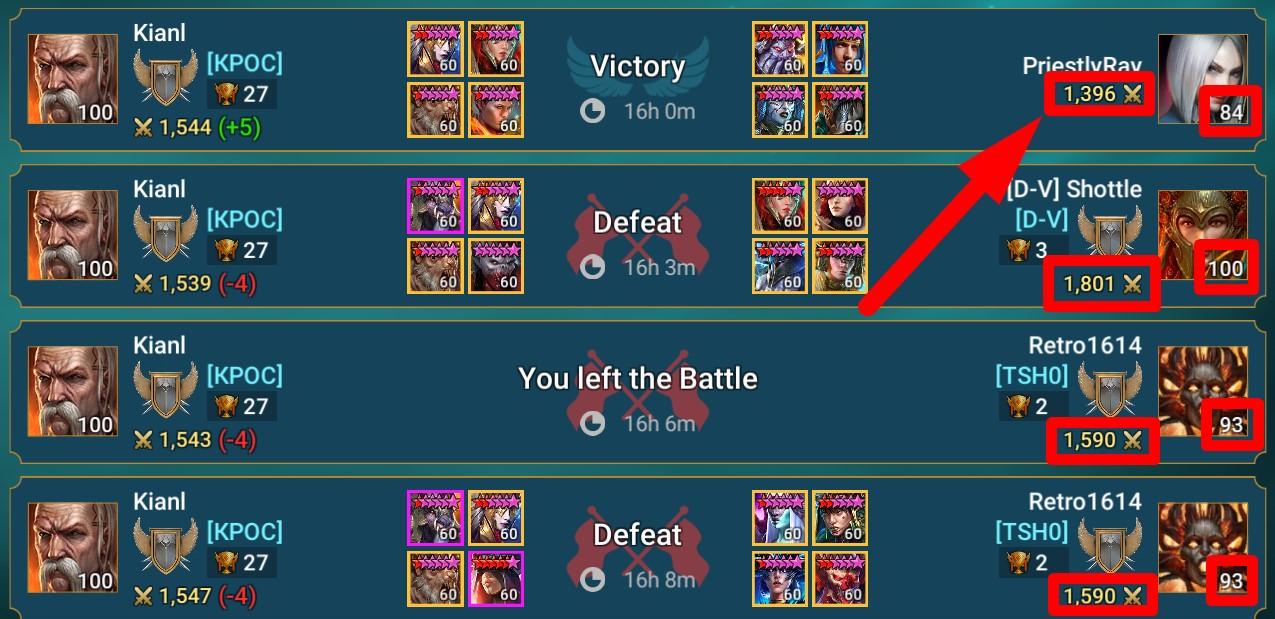
As you can see from the screenshot above, my win rate is only 50%, occasionally rising to 51-52%. I’ve noticed that the more battles I lose, the weaker the opponents I encounter. For example, being in Silver II, I can easily meet a player with a 1200-1300 rating if I lose 3-4 battles in a row or drop my win rate below 50% (presumably).
The same holds true the other way around. For example, I’ve repeatedly battled against players with a 1700-1800+ rating, having a 1500 rating myself, after a small winning streak. I believe the game tries to match us with a weaker or stronger opponent to artificially break long chains of continuous victories or defeats. I’m almost certain that the opponent’s win/loss streaks are also taken into account.
In other words, if a player with a 1200 rating has won 5 battles in a row, and a player with a 1500 rating has lost 5 battles in a row, why not pit them against each other? In my opinion, this seems quite logical and fair, although not everyone agrees.
Why you should prepare your team in advance
Don’t attempt to form a team each time for every specific case before a battle. This is a bad practice that is unlikely to yield good results, especially if you are a beginner. A team should be thought out and prepared in advance, but at the same time, it should have alternatives (several heroes for substitution) against various types of enemy teams.
For this, you need to have at least some good heroes, otherwise, you will simply have no one to play. Of course, you may disagree with me on this, but in this conviction, I am quite firm: it’s better to have a bad plan than to have none at all.
Team Composition Techniques
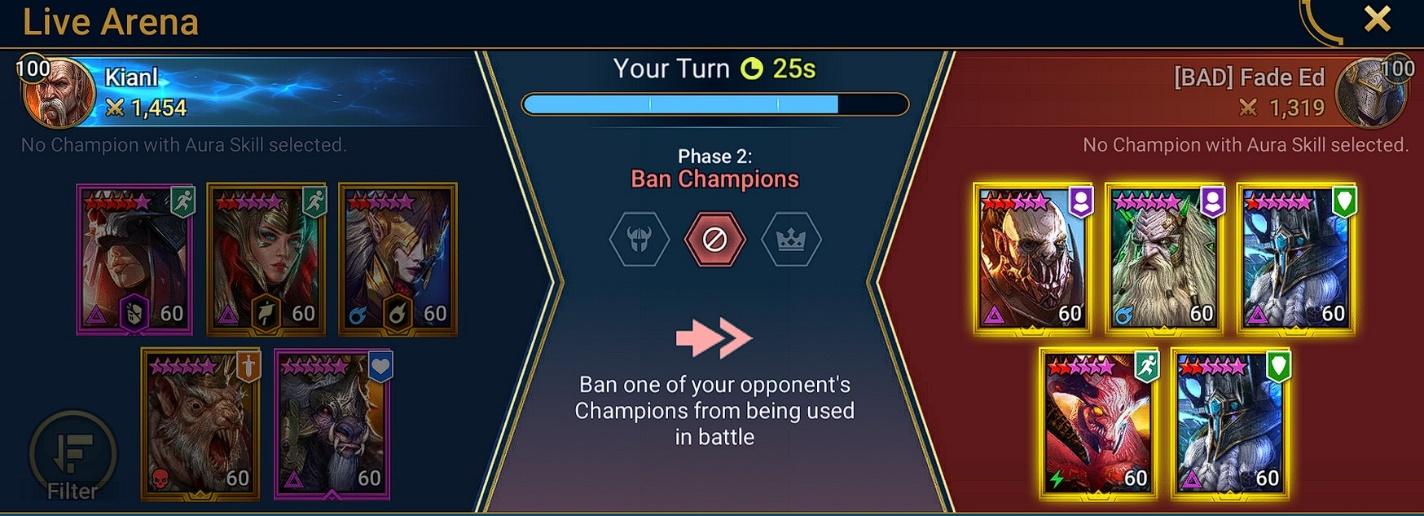
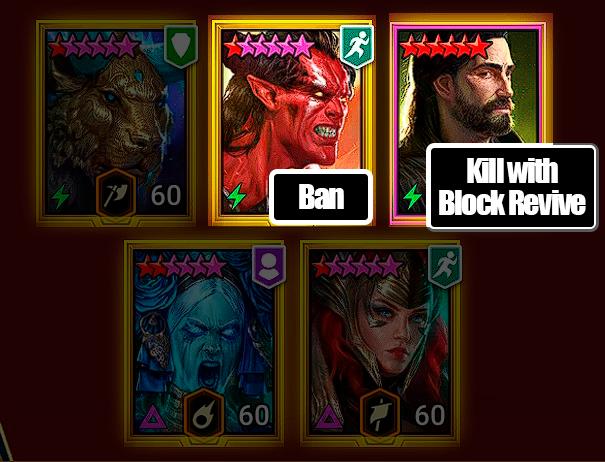
So, you have 5 heroes available on Live Arena, one of which will be blocked by the opponent. This means that ideally, your team should be composed in such a way that it remains combat-ready and capable of fulfilling its tasks even if any of the 5 heroes are blocked. This is not a simple thing, but I’ll help you a bit within my experience.
Each hero, skill, or aura should have an alternative
The opponent will try to disrupt the concept on which your team is built. For example, if you attempt to use the classic team for old arenas, consisting, for instance, of Arbiter, Lyssandra, Madame Serris, Trunda, and Yakarl, the opponent will almost certainly block your Arbiter, thus gaining a speed advantage and depriving you of the sole ally resurrection skill.
For this reason, absolutely EVERYTHING you rely on (this is an important clarification) in your team should have an alternative. For example, if you plan to beat the opponent in speed, you need to have 2 speed auras and at least 2 heroes with roughly the same top speed in case one of them gets blocked. A good combination, for instance, would be Arbiter + Lyssandra + Prince Kymar, where Arbiter and Lyssandra have roughly the same speeds. This way, whoever of this trio the enemy blocks, you still have a 30% speed aura and a hero with a high speed stat.
For the same reason, your team should have at least 2 damage dealers. After all, if you only have 1 DD, the opponent will block him before the battle and you will lose the ability to inflict any noticeable damage on them. But all this is only part of a successful tactic.
Deceive your opponent
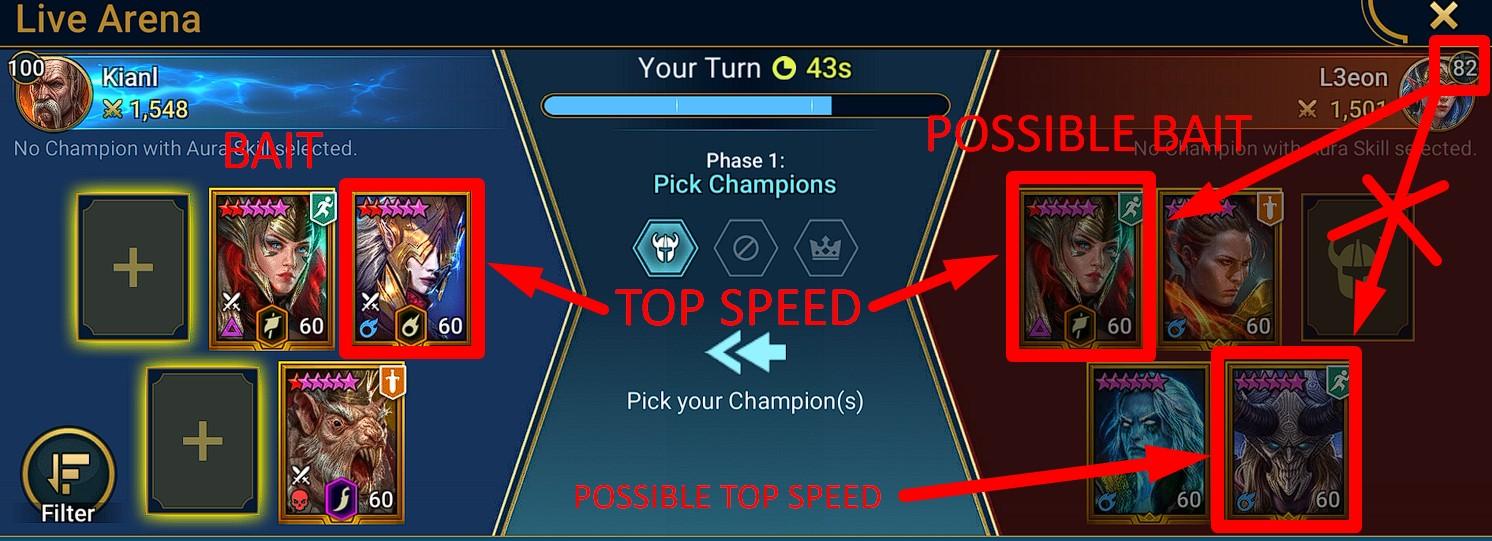
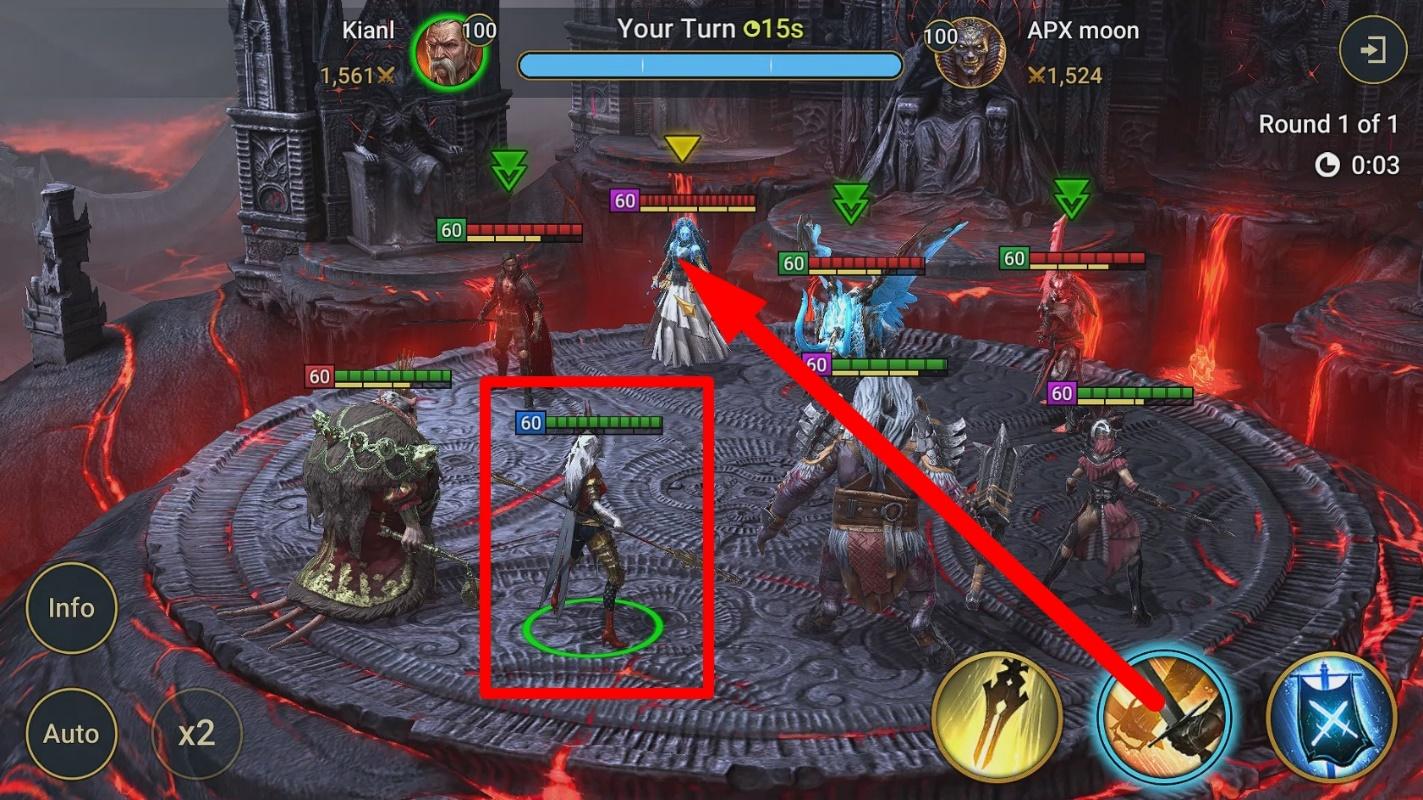
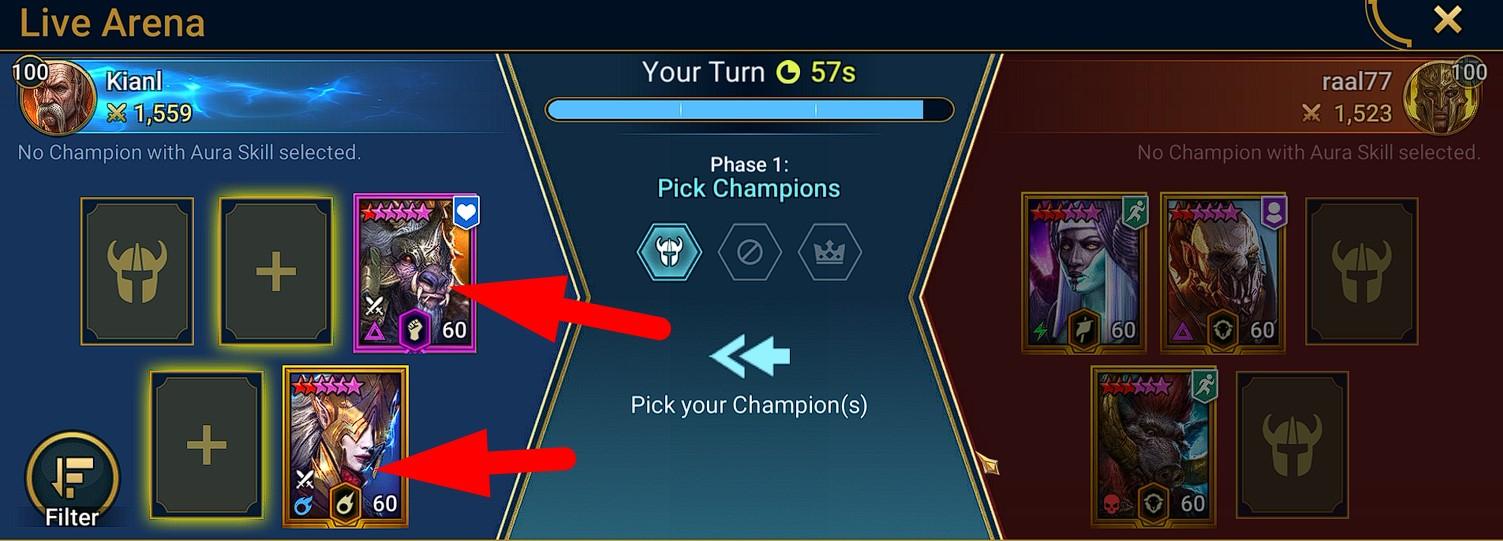
The opponent will always block the hero they think is the key hero in your team. You can use this against them. The simplest way to pull off this trick is to equip the top-speed gear on a less noticeable hero with a turn meter filling skill, and make Arbiter second in speed and set as bait. In 95%+ of cases, the opponent will block your Arbiter, thinking she is the key hero. This way, you can easily retain the first move advantage if it’s important for your team. Let’s look at this using my team as an example.
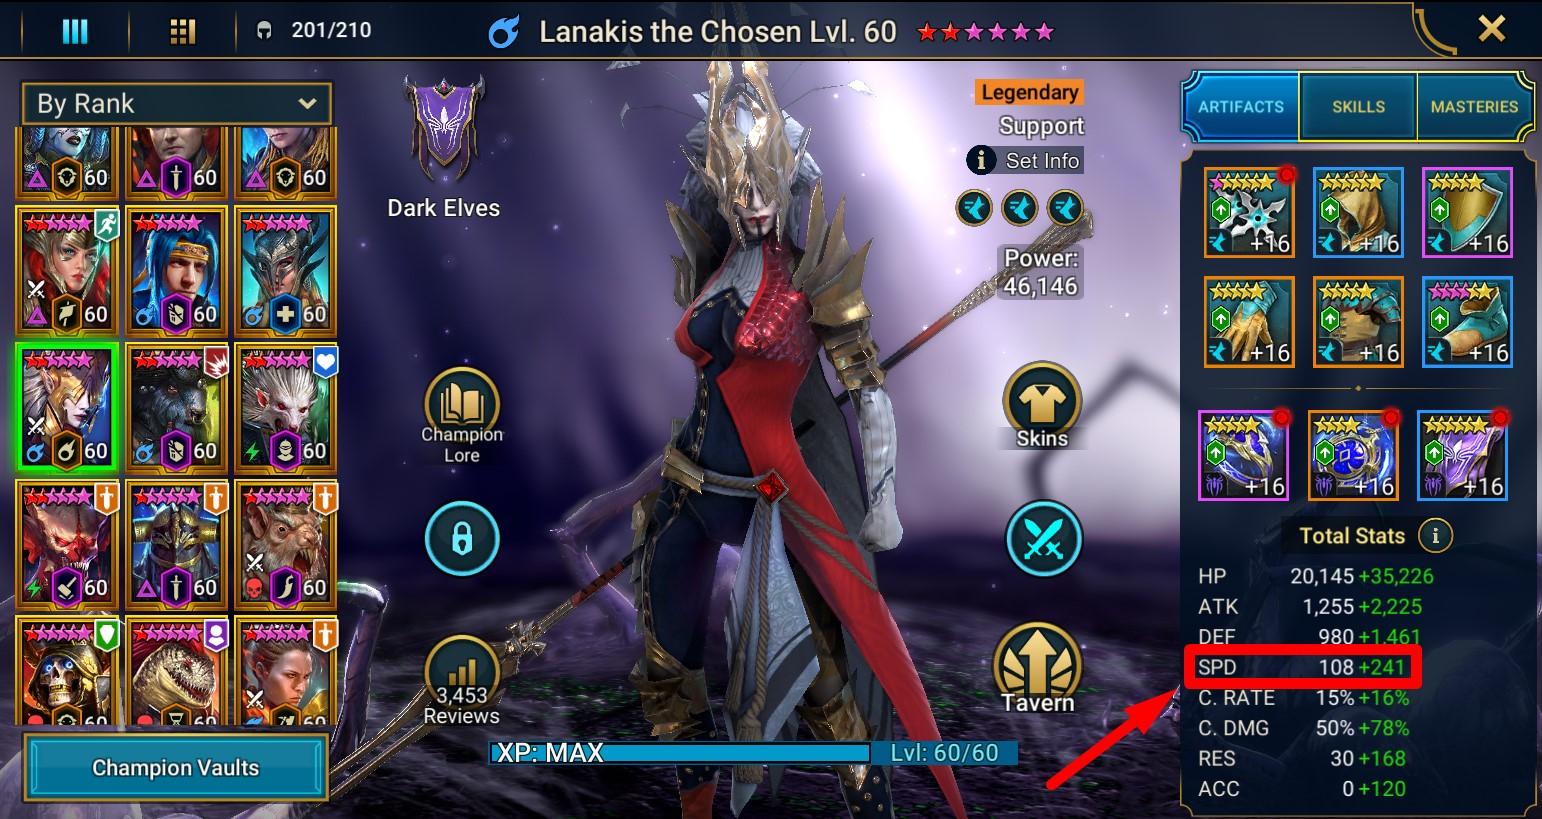
My main turn meter filler is Lanakis with a speed of 349, but she doesn’t have a speed aura.
So, my tactic is as follows:
- I pick Lanakis + Arbiter.

- If there is a speed aura in the enemy’s team, I pick Skullcrown for the last slot.
This way I solve 2 problems at once: I get an additional DD and a 23% speed aura to the team.
Of course, it’s not the best aura, so I have to rely on the fact that my opponent either doesn’t use the same approach, or has weaker equipment. As you understand, Lord Shazar, for instance, could easily be in this slot. Or you could just as well put Valkyrie, who will provide you with additional turn meter filling even if the opponent gets the first turn.
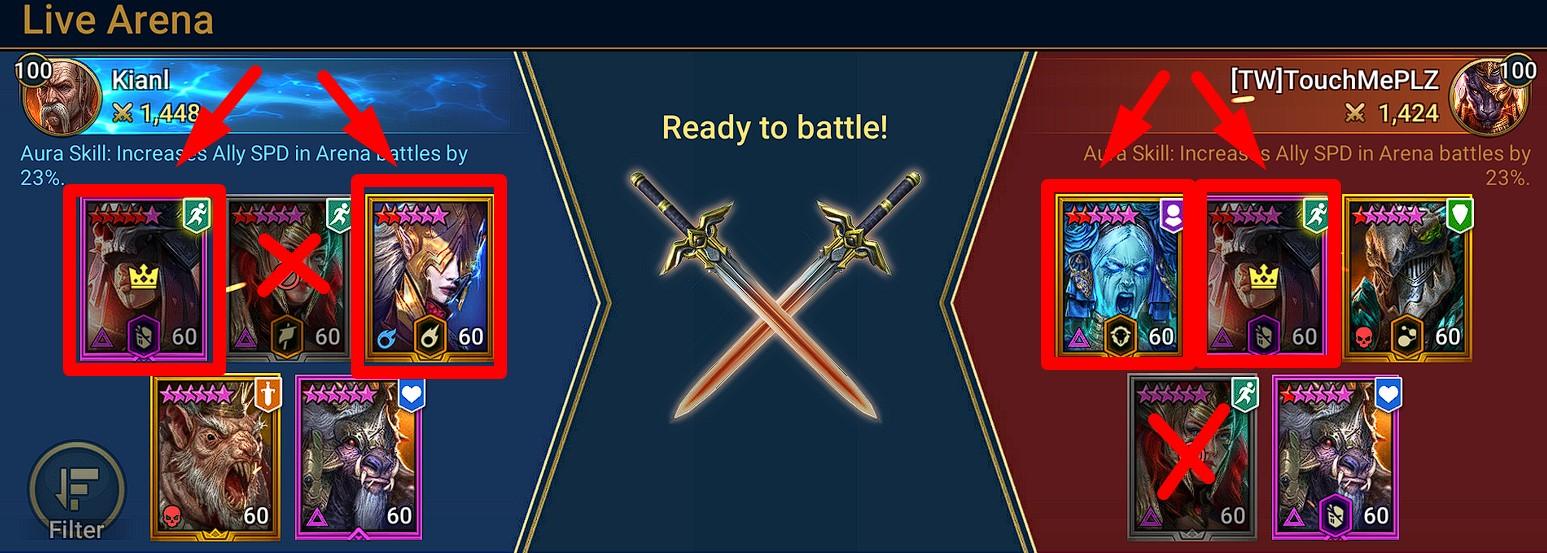
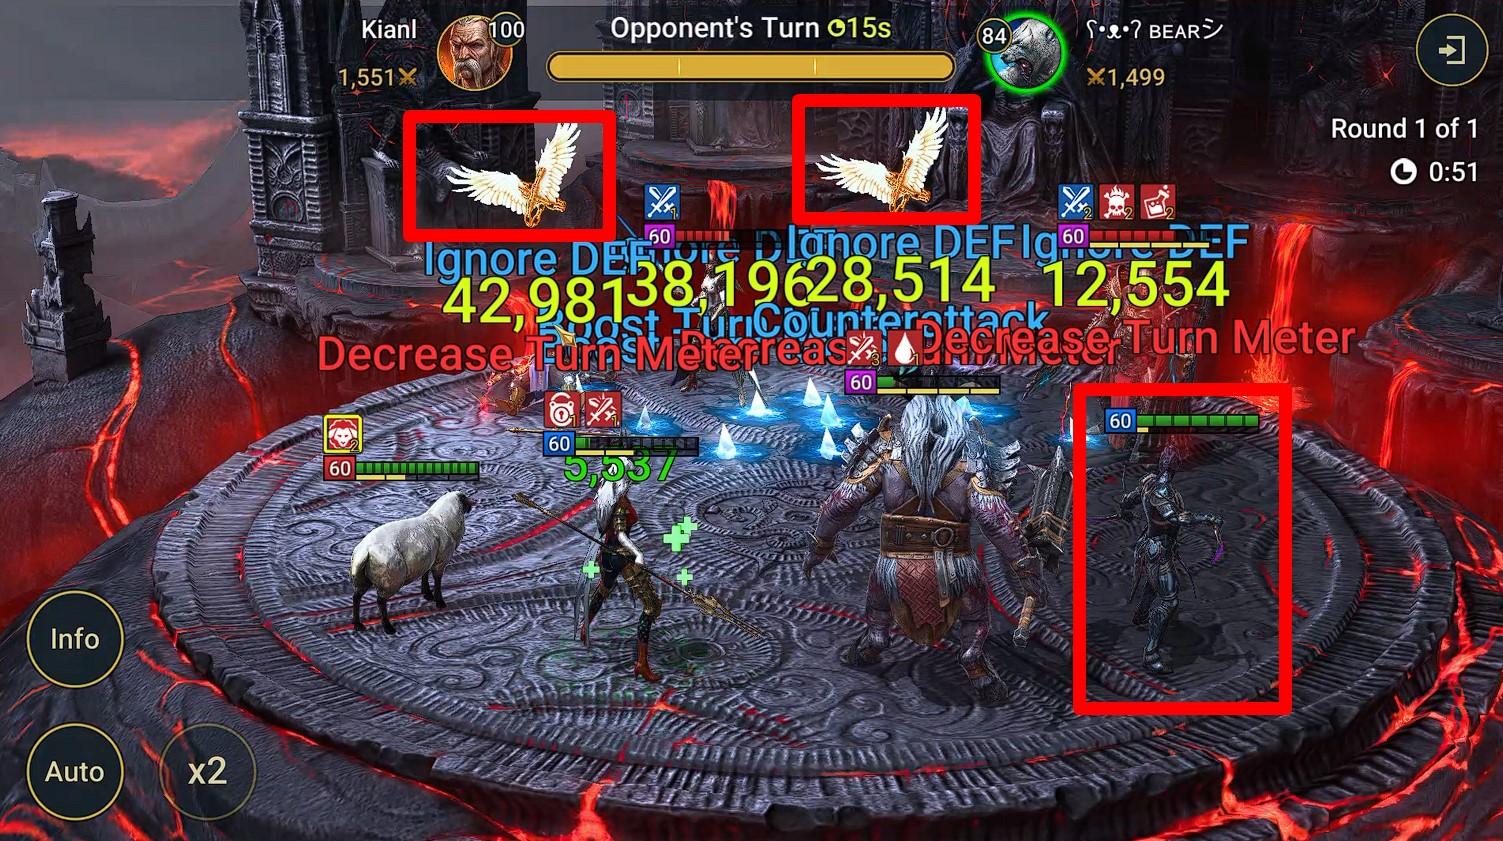
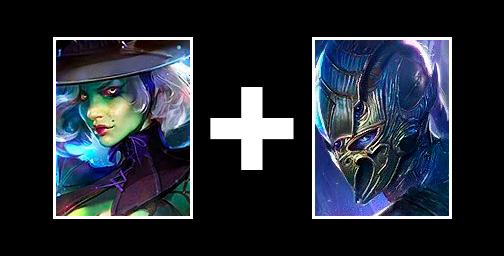
Note that in the specific case from the screenshot above, my opponent used absolutely the same tactic with the only difference being that his fastest heroine was Siphi. And despite the fact that we saw right through each other, we both still blocked Arbiter. So you can be 99% sure that such bait will work. Although this still doesn’t guarantee you victory.
Prepare for the worst-case scenario
As a wise man once said, “It’s good to be a pessimist: you’re either always right or pleasantly surprised.” Live Arena is just the case when you should be the utmost pessimist and assume that you will be up against 4 heroes in Stone Skin set with the Polymorph blessings. And if you think I’m exaggerating… think again.
In the higher leagues of Live Arena, you will almost always encounter powerful supports (and sometimes damage dealers) in Stone Skin artifact sets, and almost always there will be 1 or several heroes with the Polymorph blessing in the enemy team. That’s why, when forming your team, you should initially compose it so that it can defeat heroes in the Stone Skin set and heroes with the Polymorph blessing. Below, I will tell you how this can be achieved.
Heroes worth using on Live Arena
In the context of winning from the first move, you only have a few options.
-
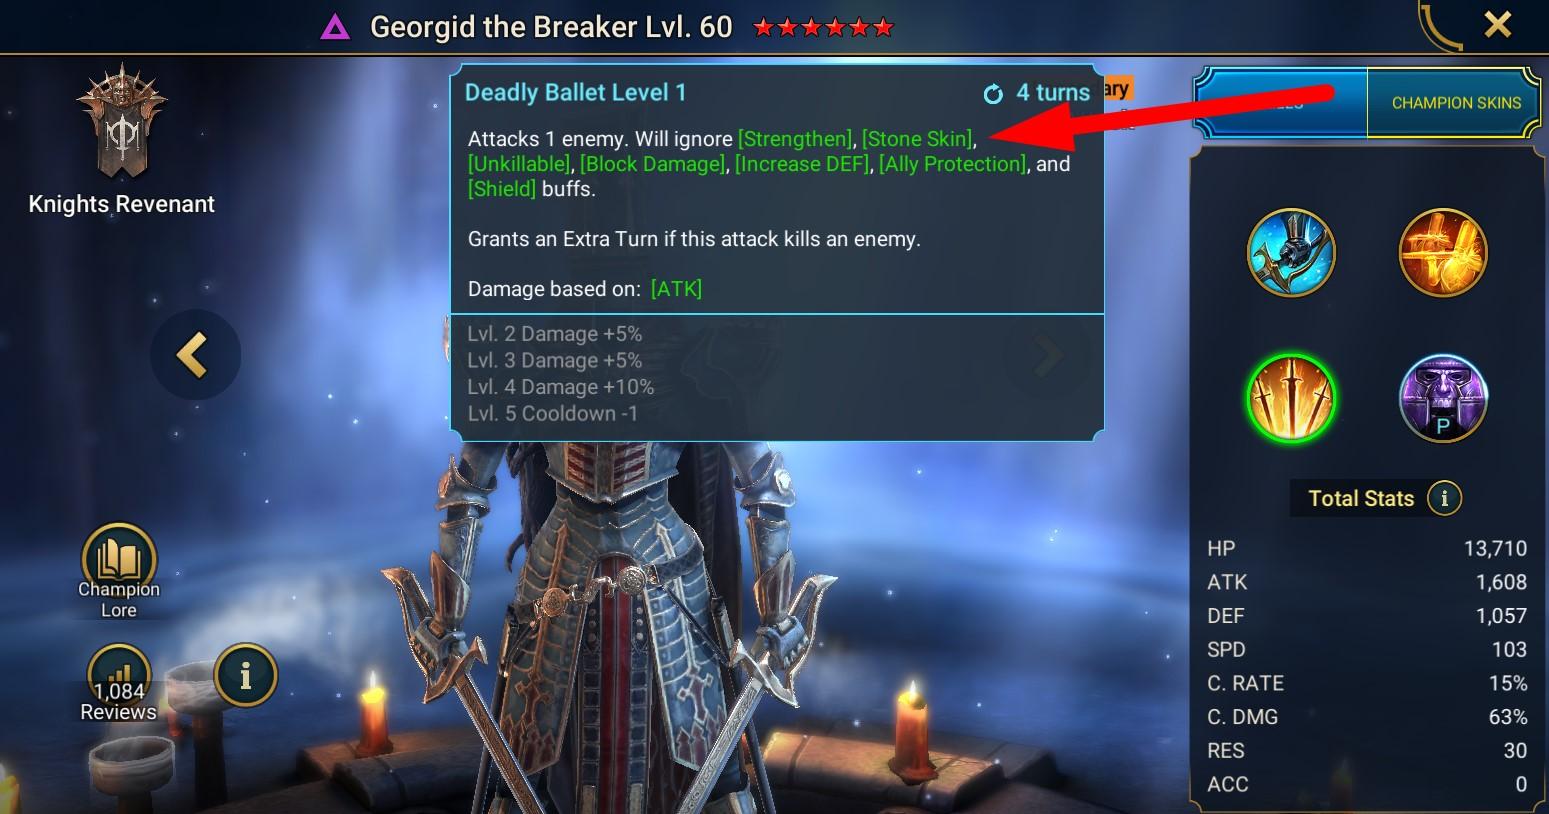
Georgid the Breaker. In the current version of the game, this is the only hero (excluding Ailil, who is much less effective in PVP) capable of ignoring Stone Skin and many other buffs. Moreover, he is not afraid of the Polymorph blessing, as he does not apply any debuffs to enemies when attacking. In the current meta, this is the best hero for battles on Live Arena.
-
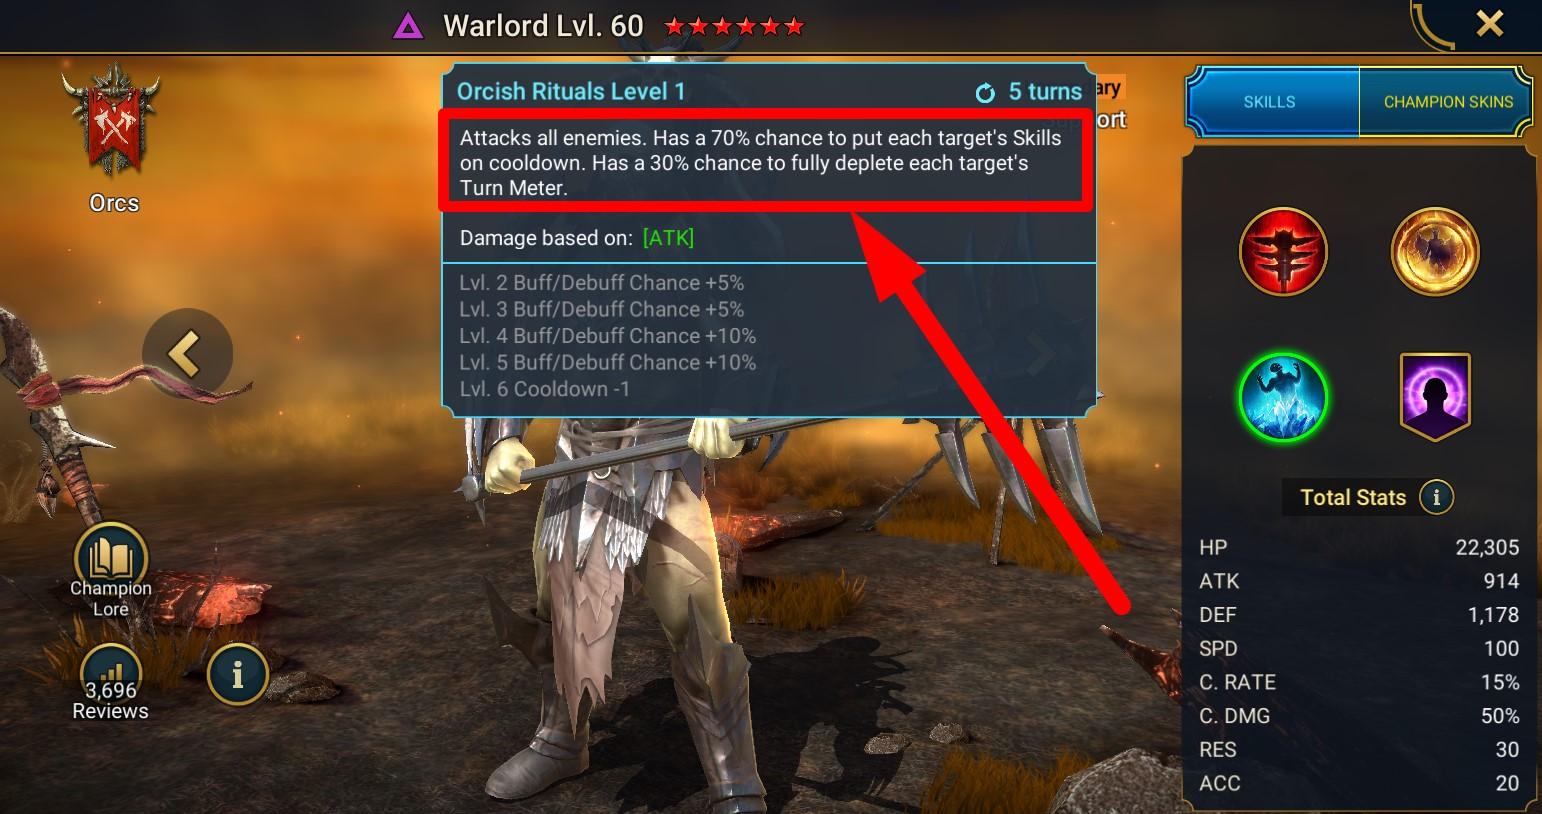
Cooldown Increasing. Putting skills on cooldown is the best way to neutralize the entire enemy team without risking triggering the Polymorph blessing. Unfortunately, there are very few good heroes with such skills: Busher, Warlord, Yumeko.
-
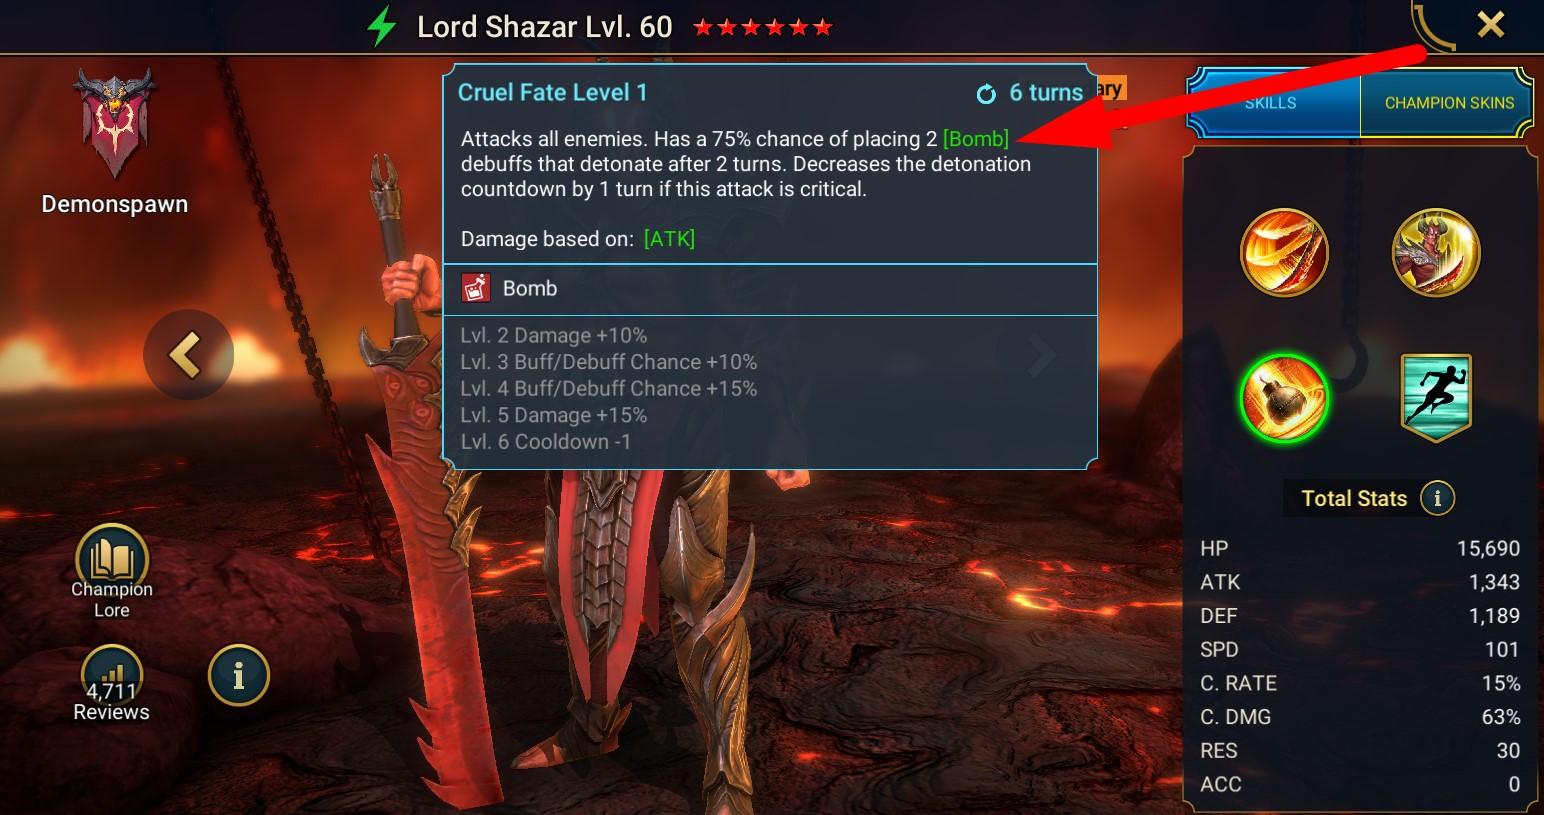
Bombs. There are more heroes with bombs, but you run a high risk of encountering Polymorph. Using bombs makes sense when there are simply no other options. At the same time, you should be vigilant about the number of heroes with the Polymorph blessing in the enemy team and ideally have a backup plan in case there are too many.
-
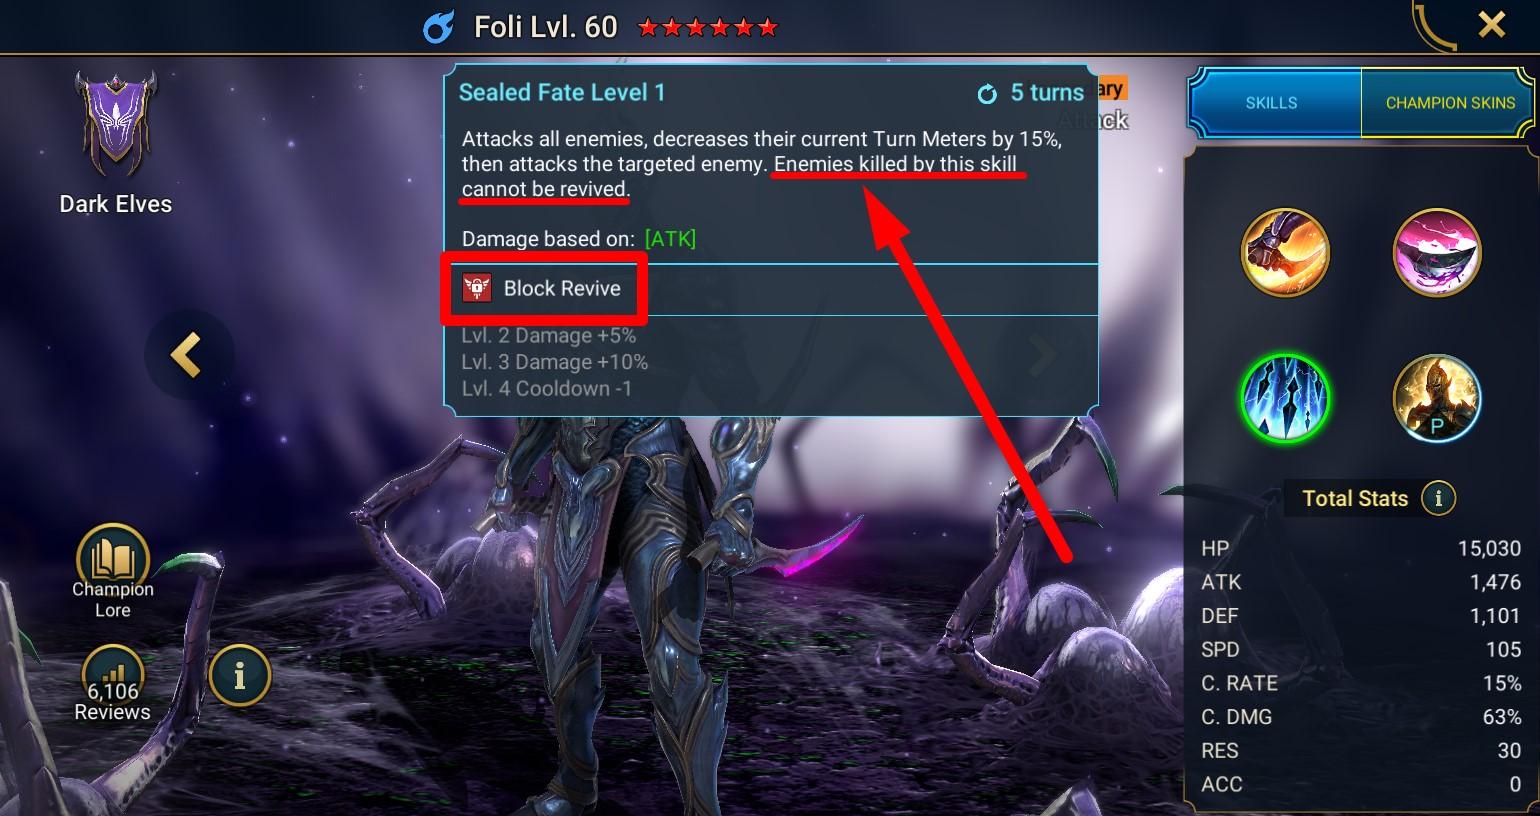
Block Revive. Skills with this feature ensure that the hero you defeated will not be revived. The problem is that there are too few heroes with such skills, and it’s not easy to use them successfully. After all, the enemy damage dealer will almost certainly be protected by jewelry from the Reaction set, the advantage of “strong” affinity, passive skills (Leorius, Skullcrown, and Candraphon send their fiery greetings), Stone Skin or Swift Parry artifact sets.
All other heroes are situational.
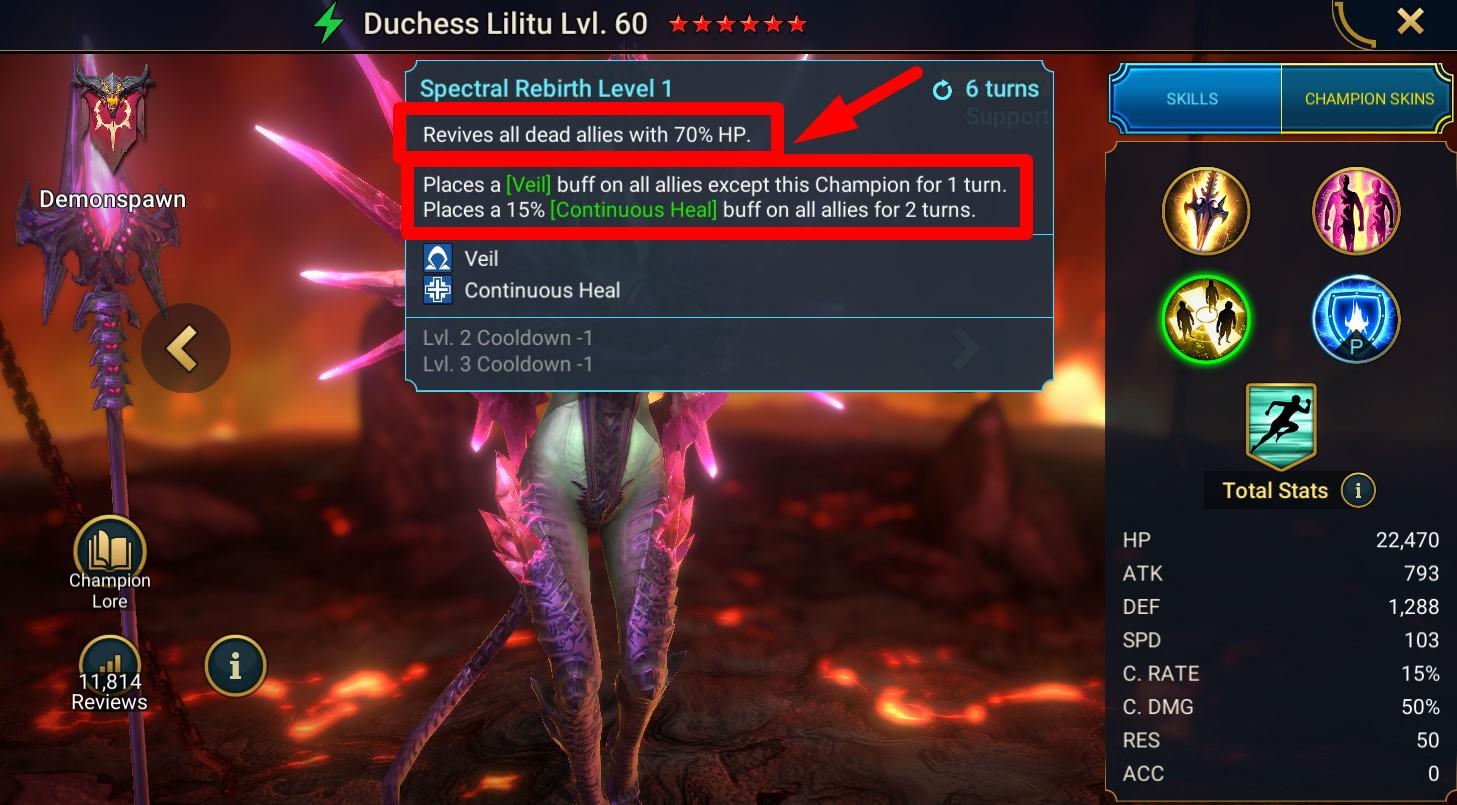
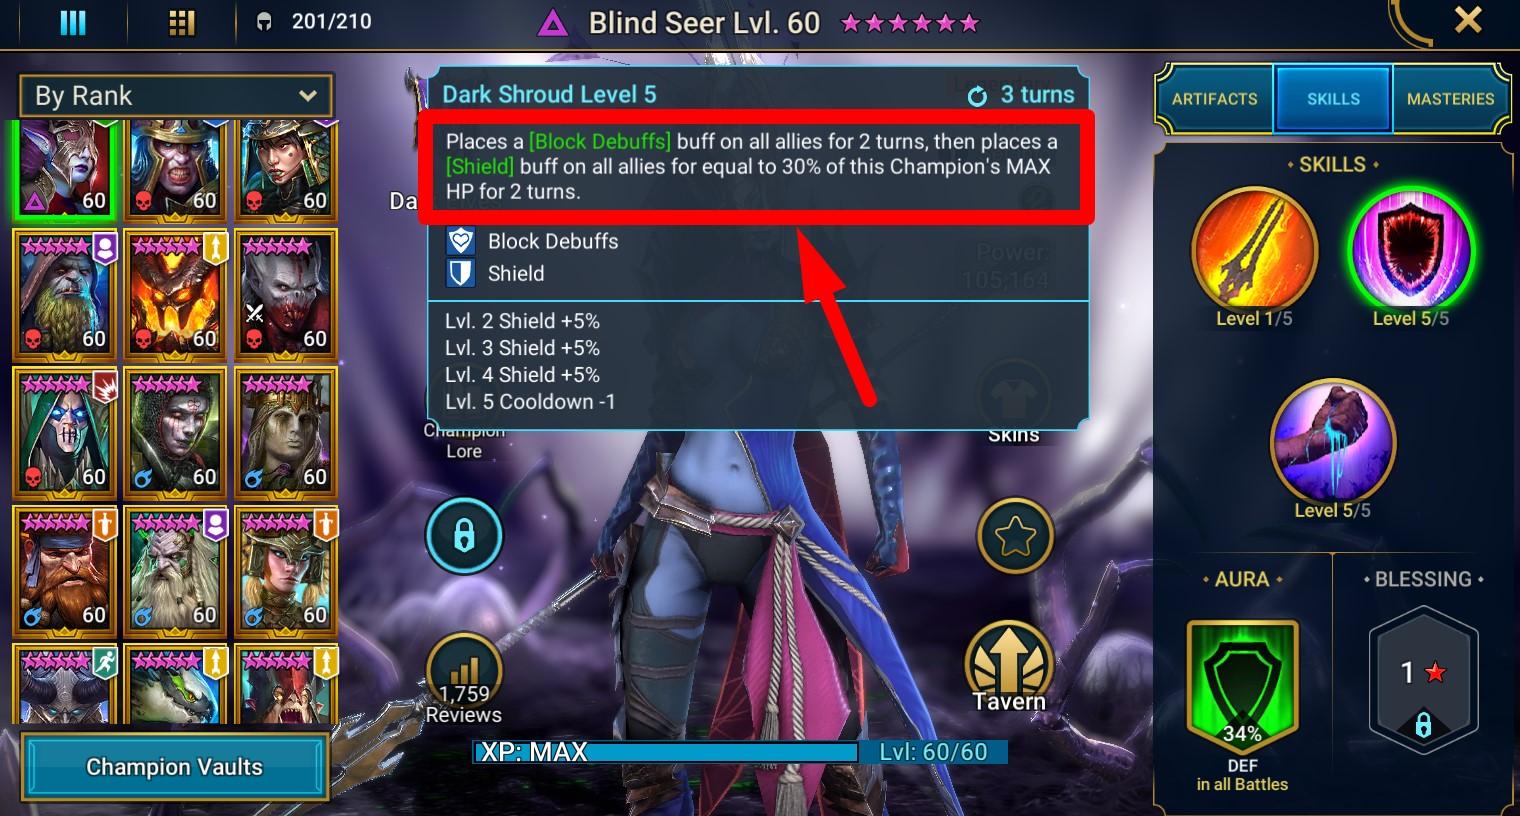
If you are playing from the second turn, you need at least 2 support heroes who have the ability to revive allies and protect them in some way after such a revival. Examples of such heroes include Duchess Lilitu (revive + veil), Ukko and Blind Seer (revive + block damage).
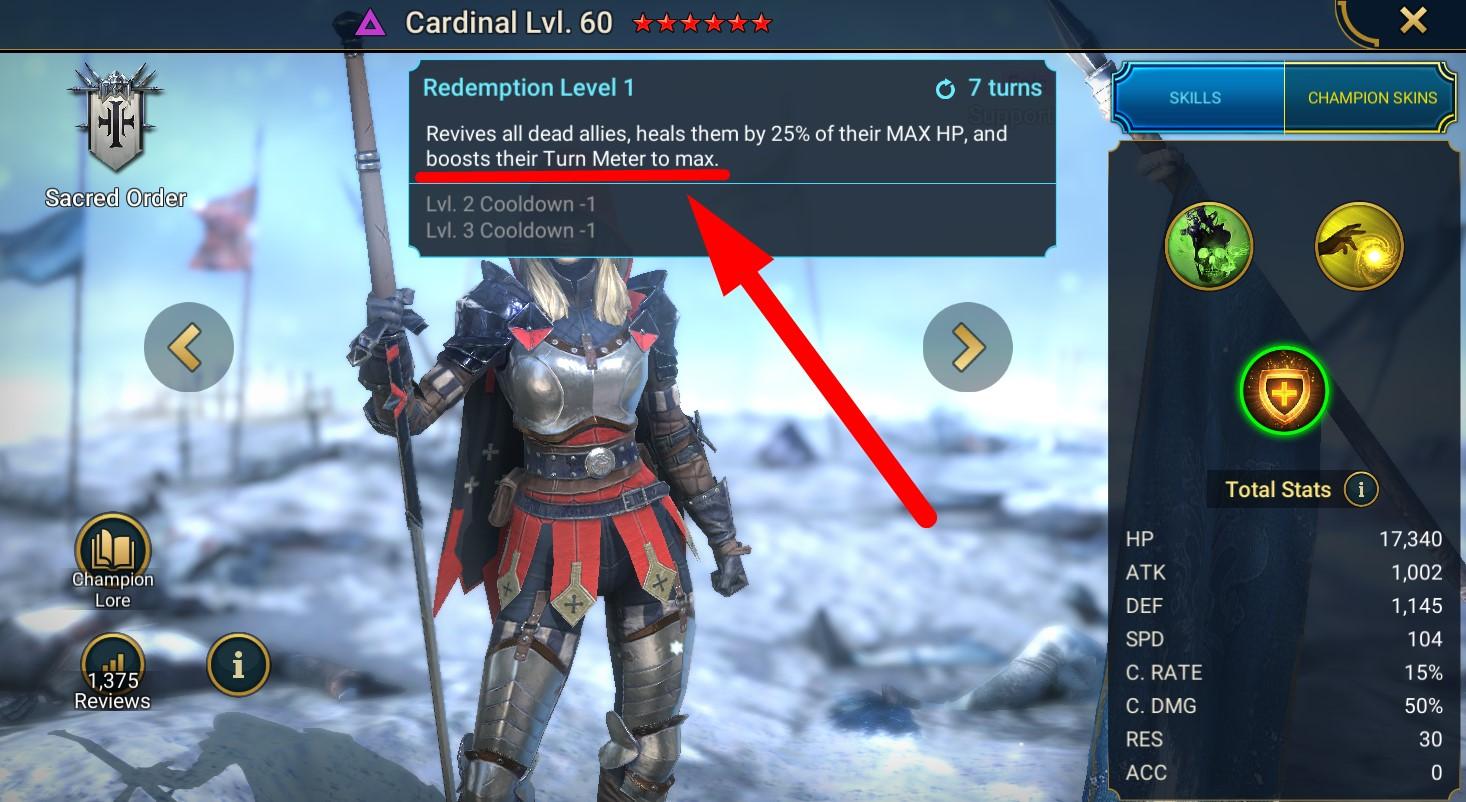
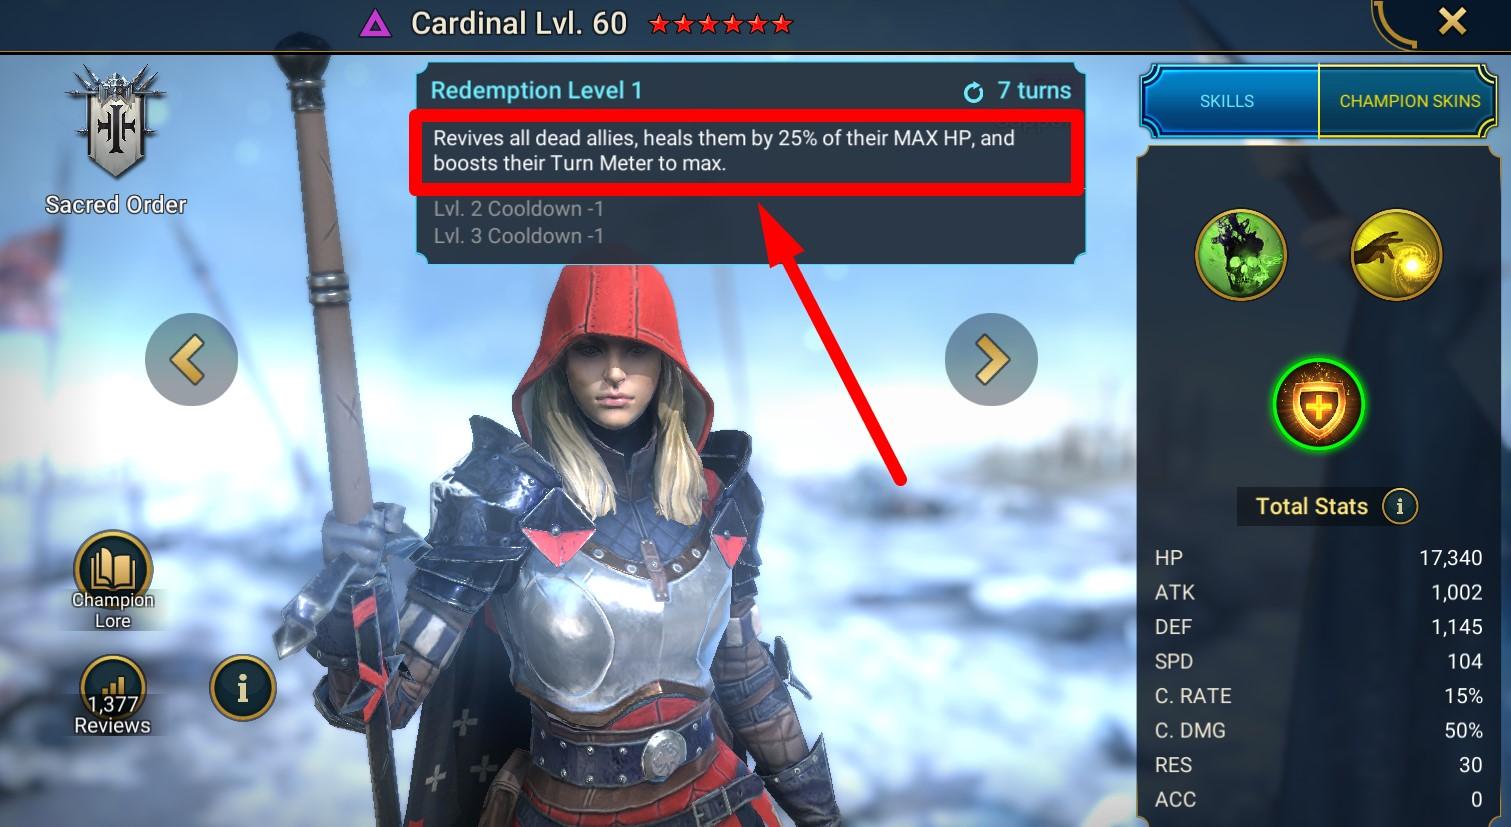
If heroes do not protect allies after revival, they should at least massively fill their turn meters. Examples of such heroes include Arbiter (A4 + A3 = 50% turn meter fill), Siphi (100%), Cardinal (max), and others.
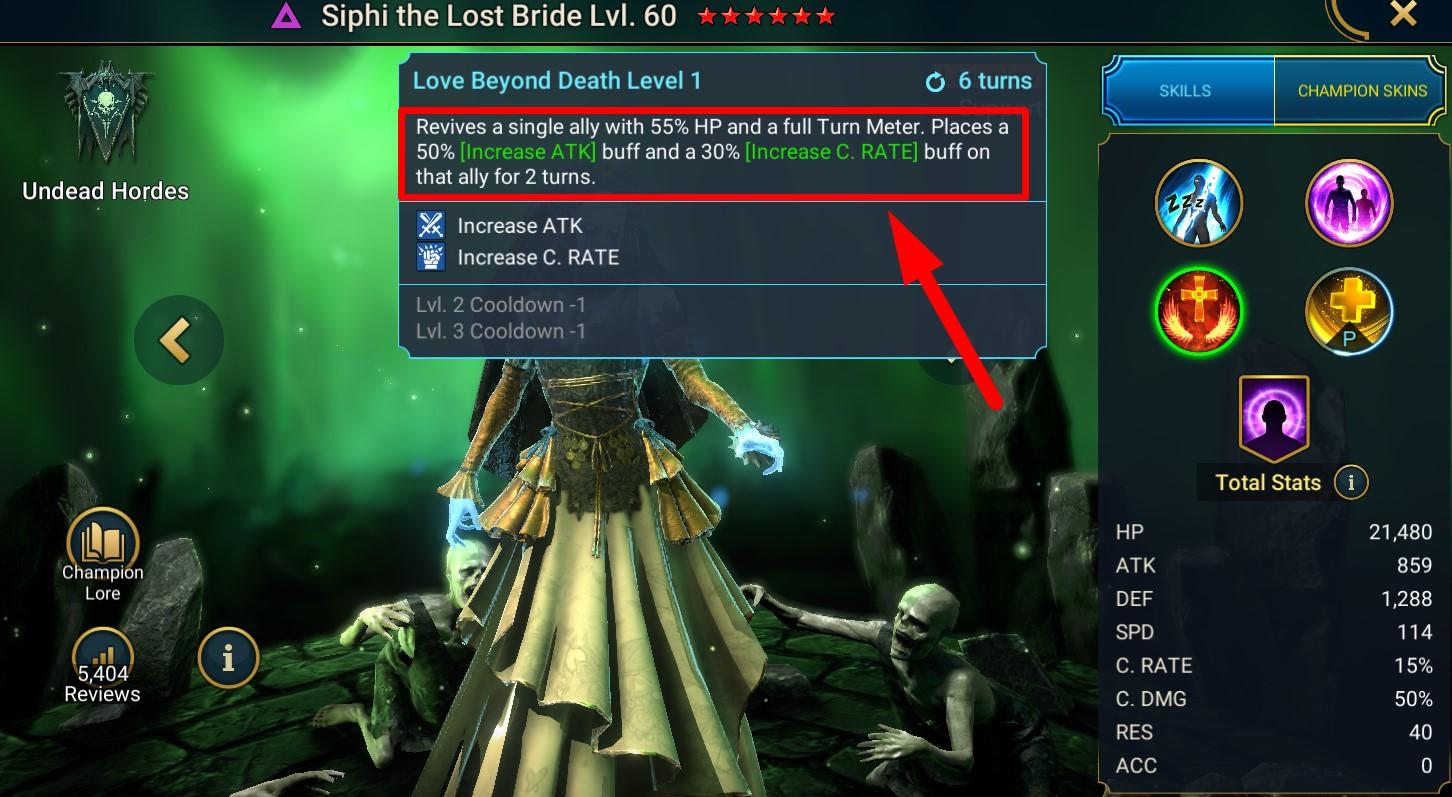
I should note separately that the turn meter can be filled more than 100%. Therefore, when a hero is revived by, for example, Siphy, their turn meter is filled to 100%, but this does not mean that they will get the turn first. If the character is revived by Cardinal, her unique mechanic fills the hero’s turn meter to the maximum possible value, which essentially equates to an instant turn.
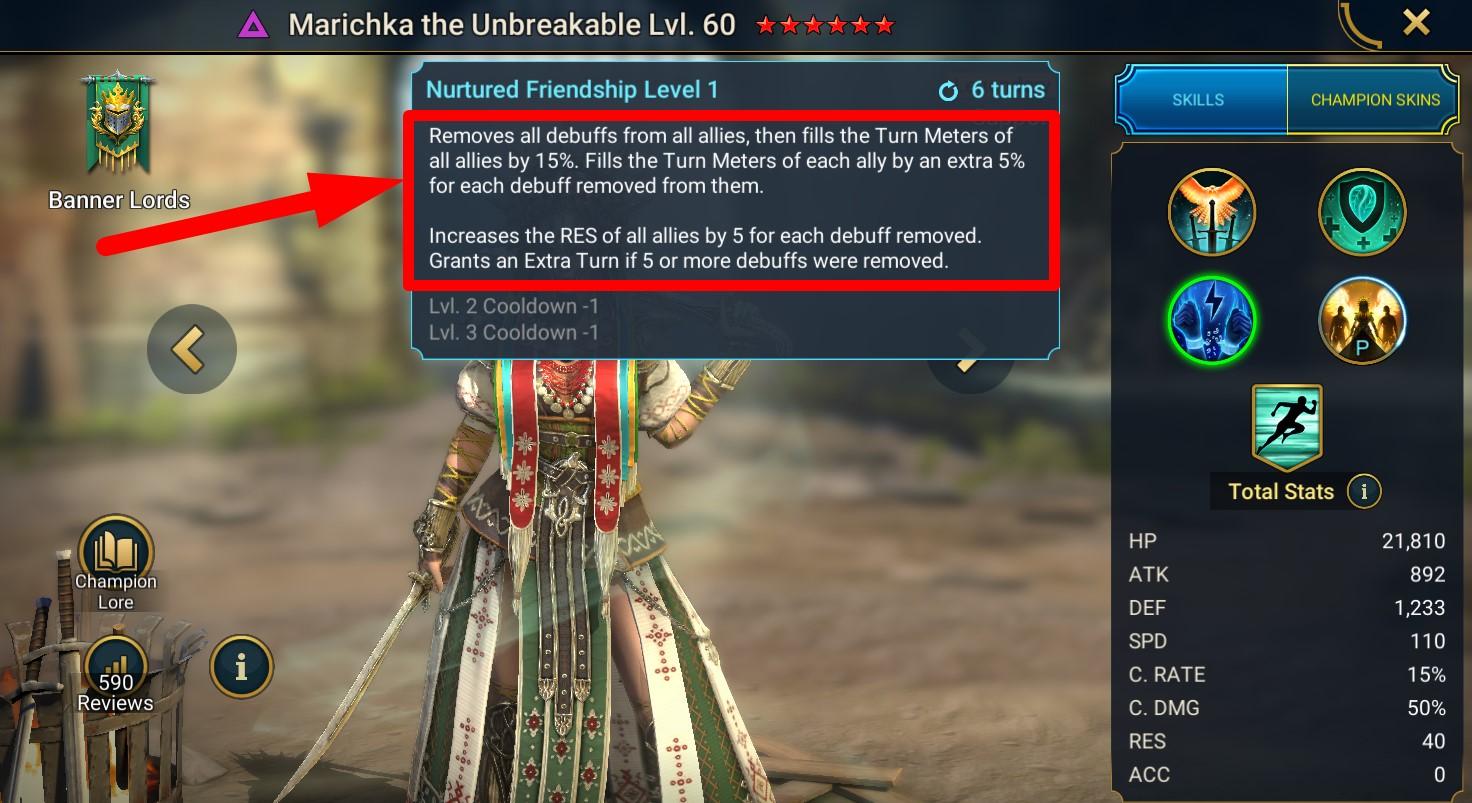
In second turn tactics, it’s important to use heroes with skills that remove debuffs from allies: for example, Pythion, Mithrala, Marichka.
And, of course, you should use ultimate heroes (the “ultimate” implies that the hero has unique or rare mechanics that are useful in arena battles). Many of them are very situational and cannot be universally applied in every battle. However, having a large pool of such heroes, you can accurately integrate them into your team when necessary. Examples of such heroes include Supreme Elhain, Yannica, Tormin, Harima, Lydia, Tramaria, Inithwe, Hephraak, Hegemon, and others. How to correctly apply such heroes, I will tell later.
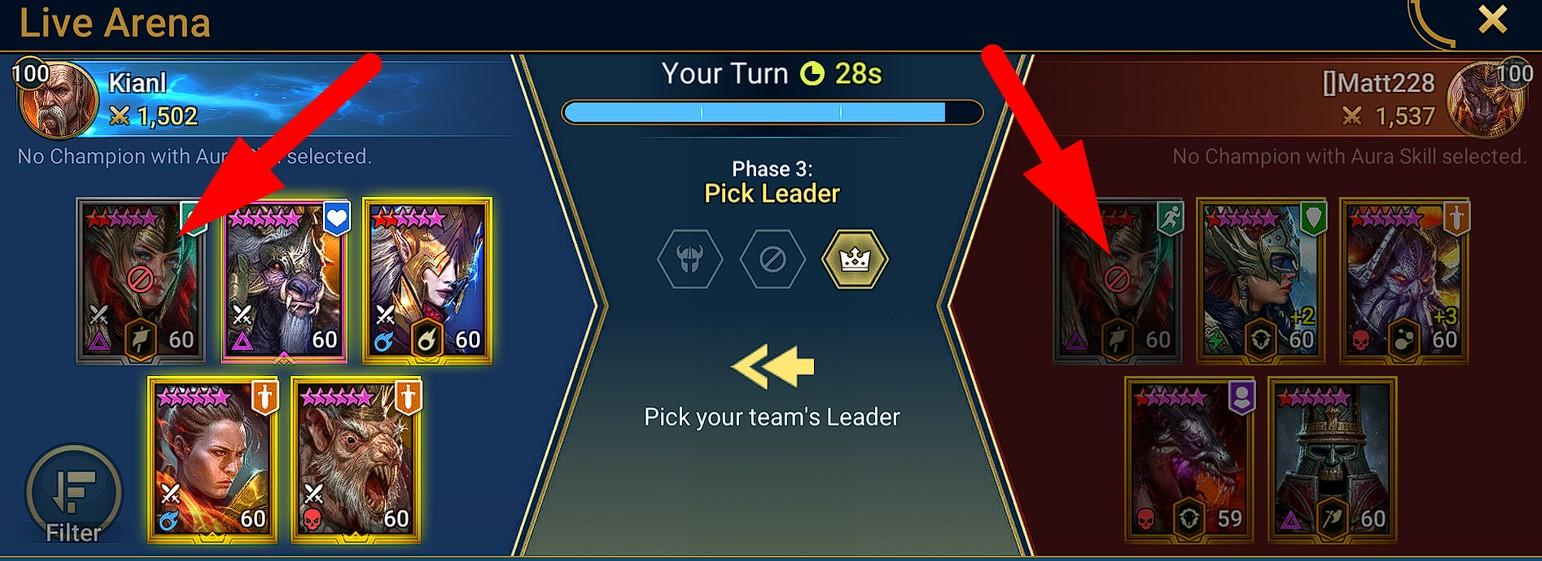
Once again: Put your opponent before an impossible choice
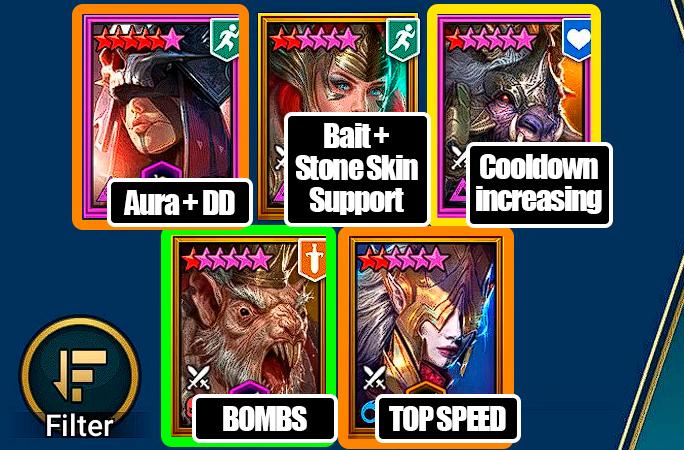
Placing your opponent before a difficult choice is a fundamental technique that will significantly raise your rating if you are not using it yet. In essence, I have already written above that each hero should have an alternative. Now I will show you what this means, using my team as an example.
Since I assume the worst-case scenario (Stone Skin + Polymorph), the best choice would be Georgid + Warlord. In this case, the opponent is faced with a difficult choice: if Warlord is blocked, Georgid will quickly kill the entire team, and if Georgid is blocked, the entire team will lose the ability to use any skills other than basic ones.
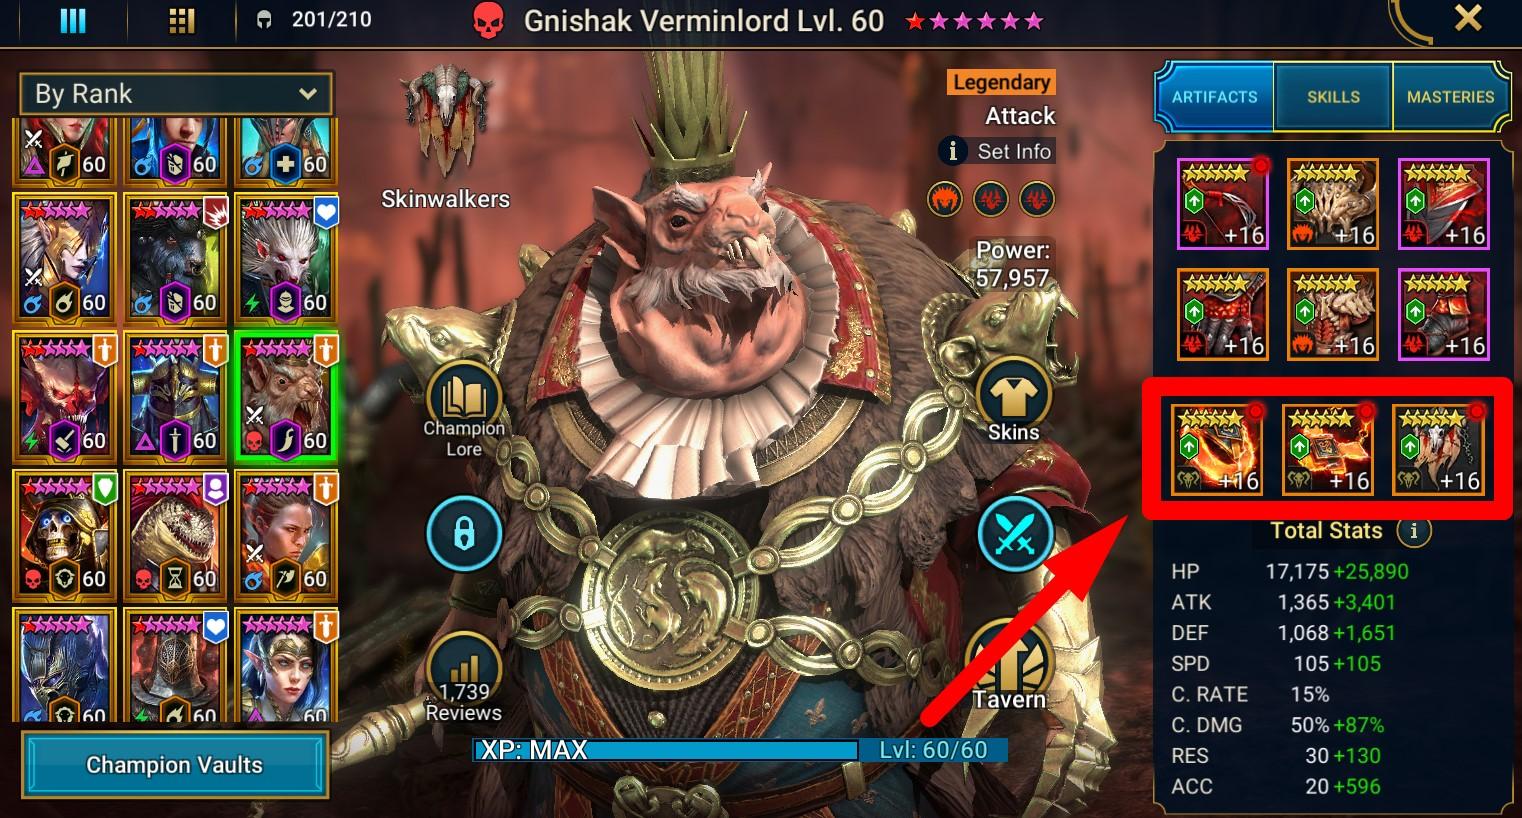
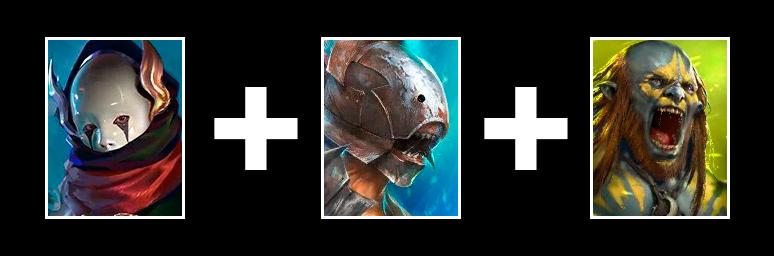
Unfortunately, I don’t have either Georgid or Warlord, so I put the opponent before the same choice using Gnishak (bombs) + Basher (cooldown increasing). In addition to these two heroes, I always take one more damage dealer, because if the opponent blocks my Gnishak, I will be left without a DD. If the opponent is banking on speed, I take Skullcrown with a speed aura, and if my speed advantage is obvious from the start, then I take the most appropriate damage dealer for the specific battle: Ronda, Foli, Supreme Elhain, Bloodgorged, others.
Naturally, Gnishak is far from the best choice due to Polymorph, but I have no alternatives, so let’s not dwell on the negatives… The key point is that this strategy allows me to slowly but surely increase my rating, and therefore, it can assist you as well.

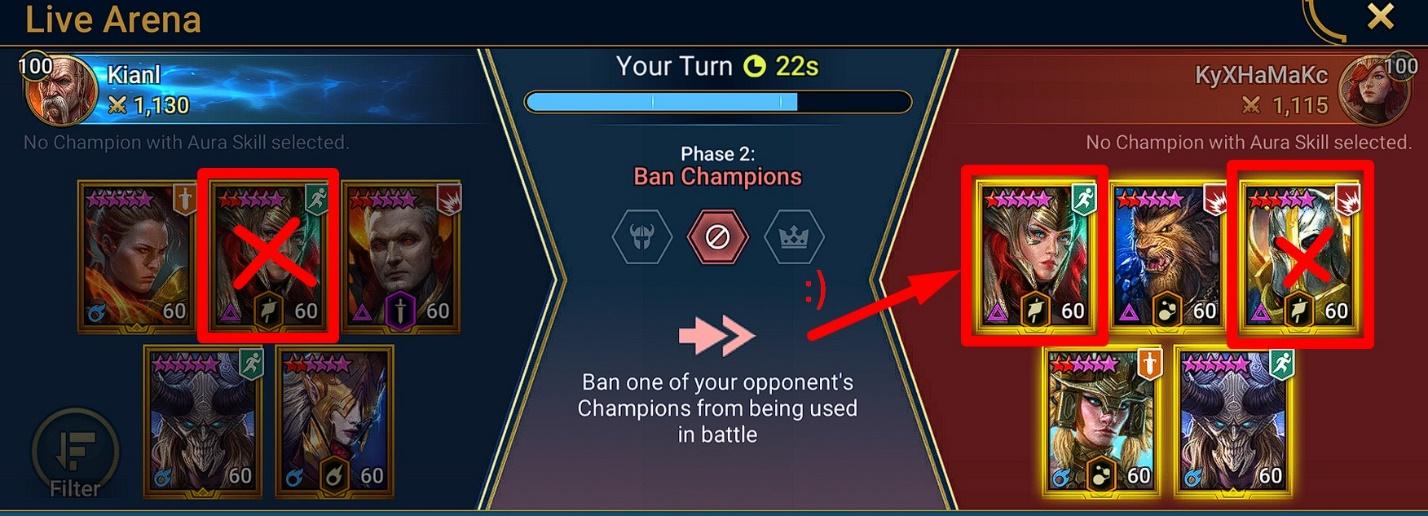
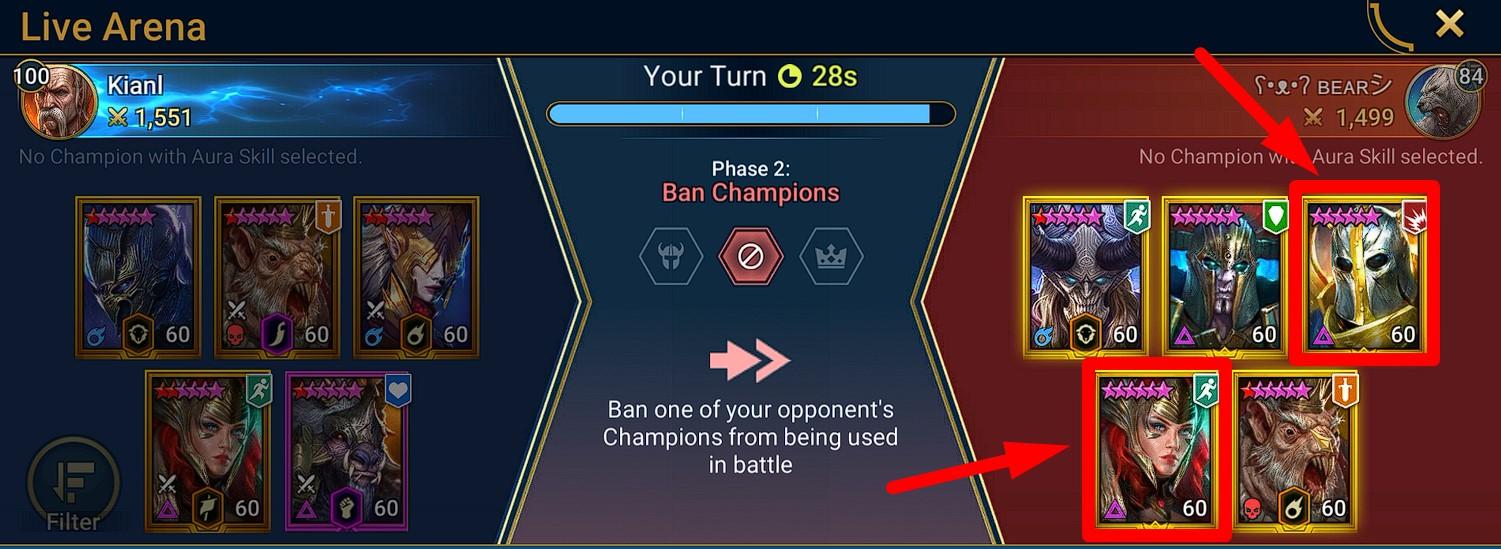
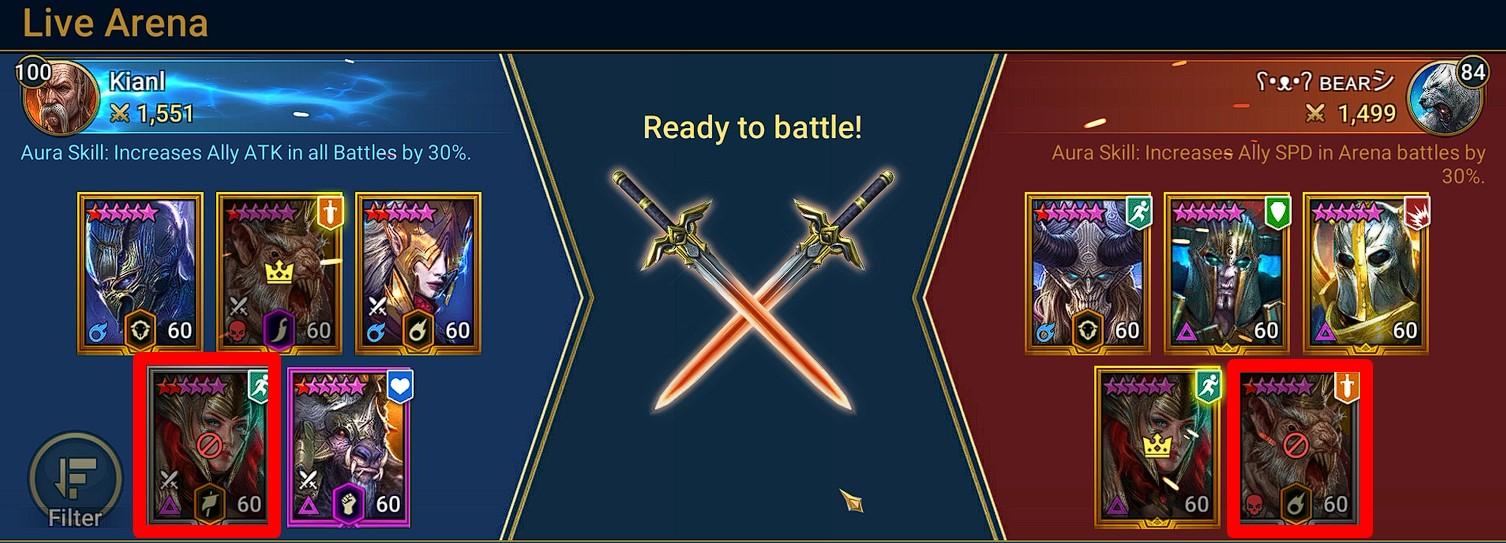
Simultaneously, my team always includes bait in the form of Arbiter, which the opponent takes in 95%+ cases (at least in Silver II).
As a result, I most often start the battle with 1) the advantage of the first move 2) bombs from Gnishak 3) the cooldown increasing skill from Busher 4) an additional DD.
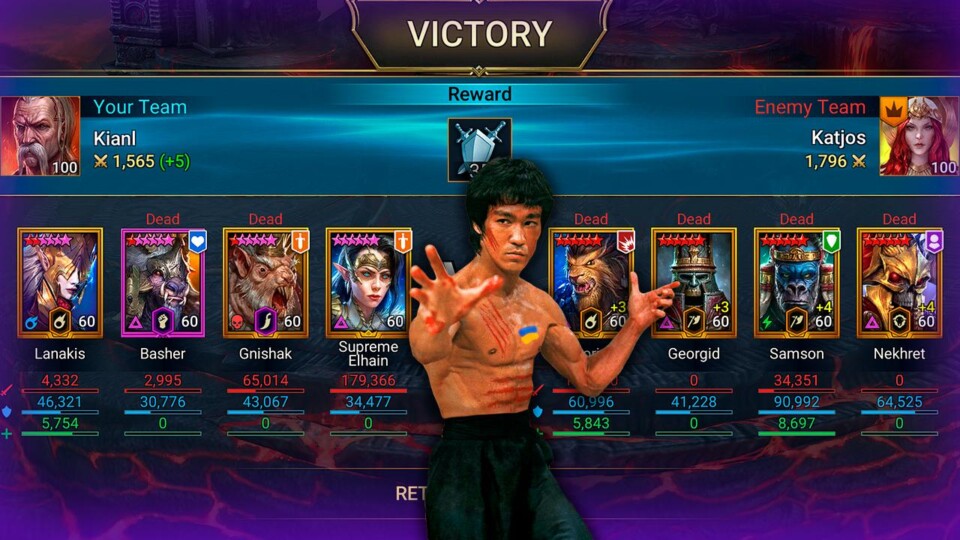
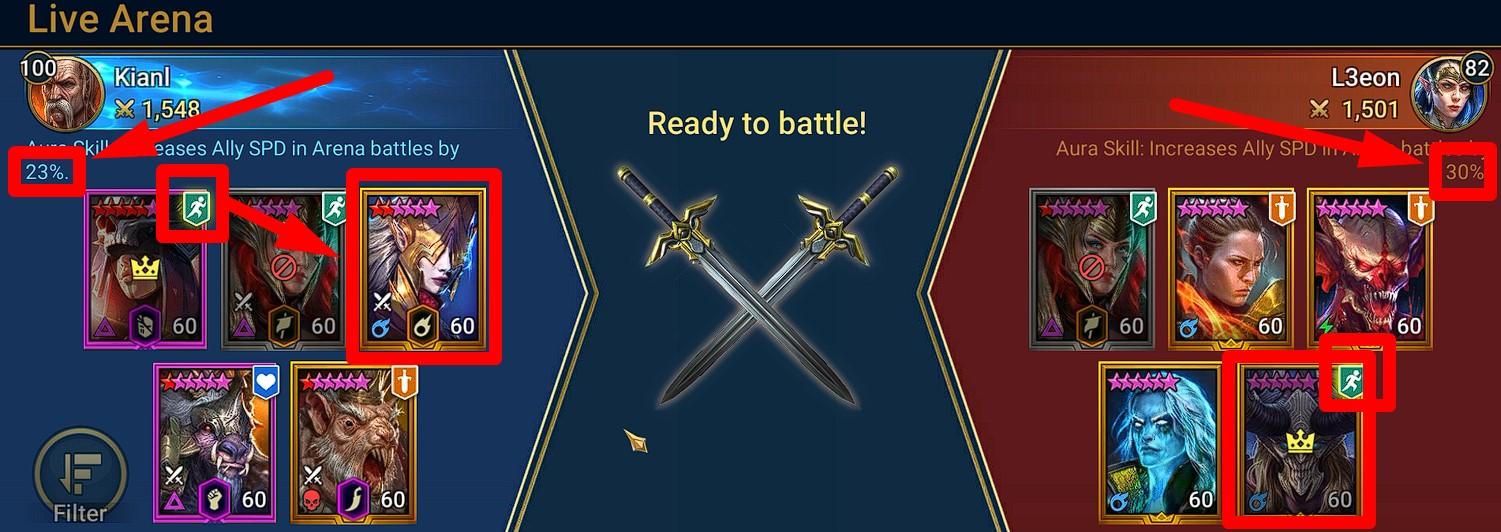
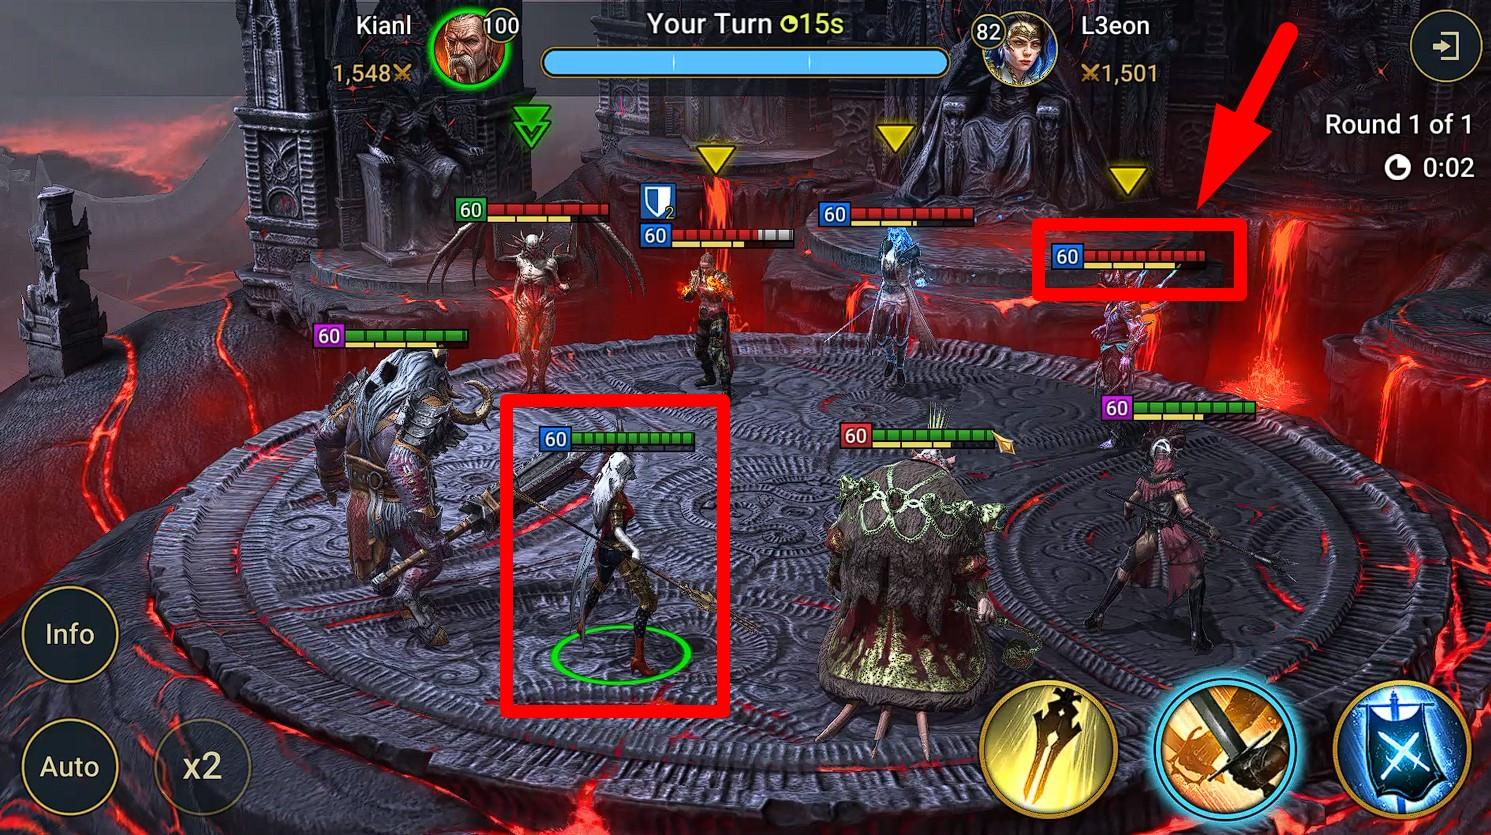
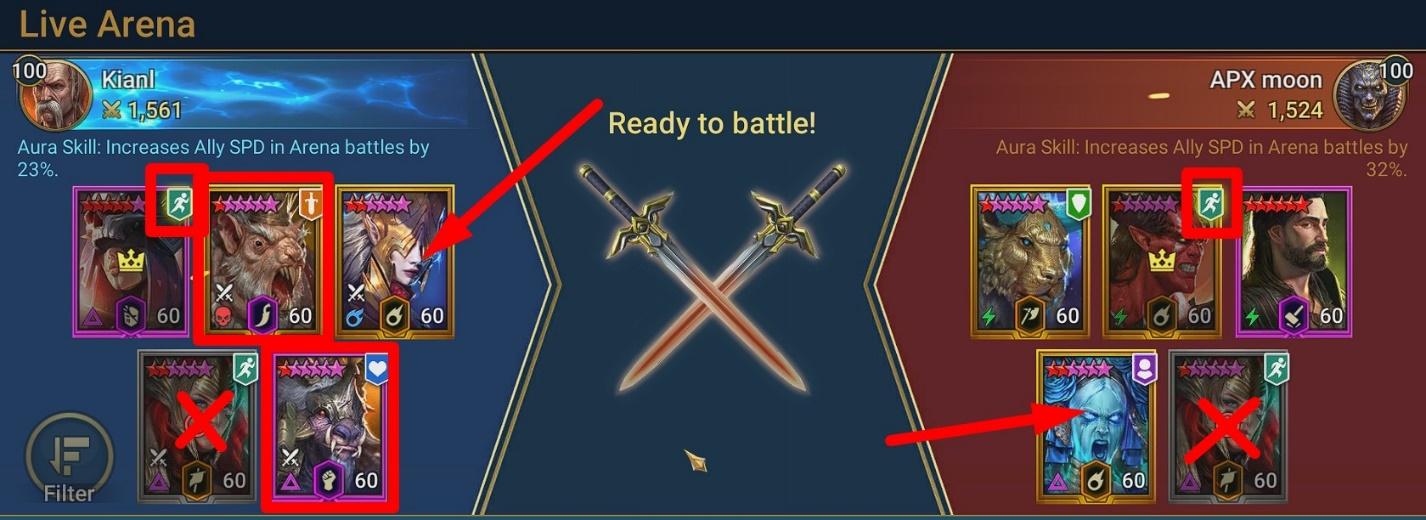
Be aware that whether consciously or not, my opponent in the screenshot above employs exactly the same strategy: they give me a choice between bombs and Block Revive + use bait in the form of Arbiter, which I’m compelled to take because my team is speed-focused, and this is my only chance to win.
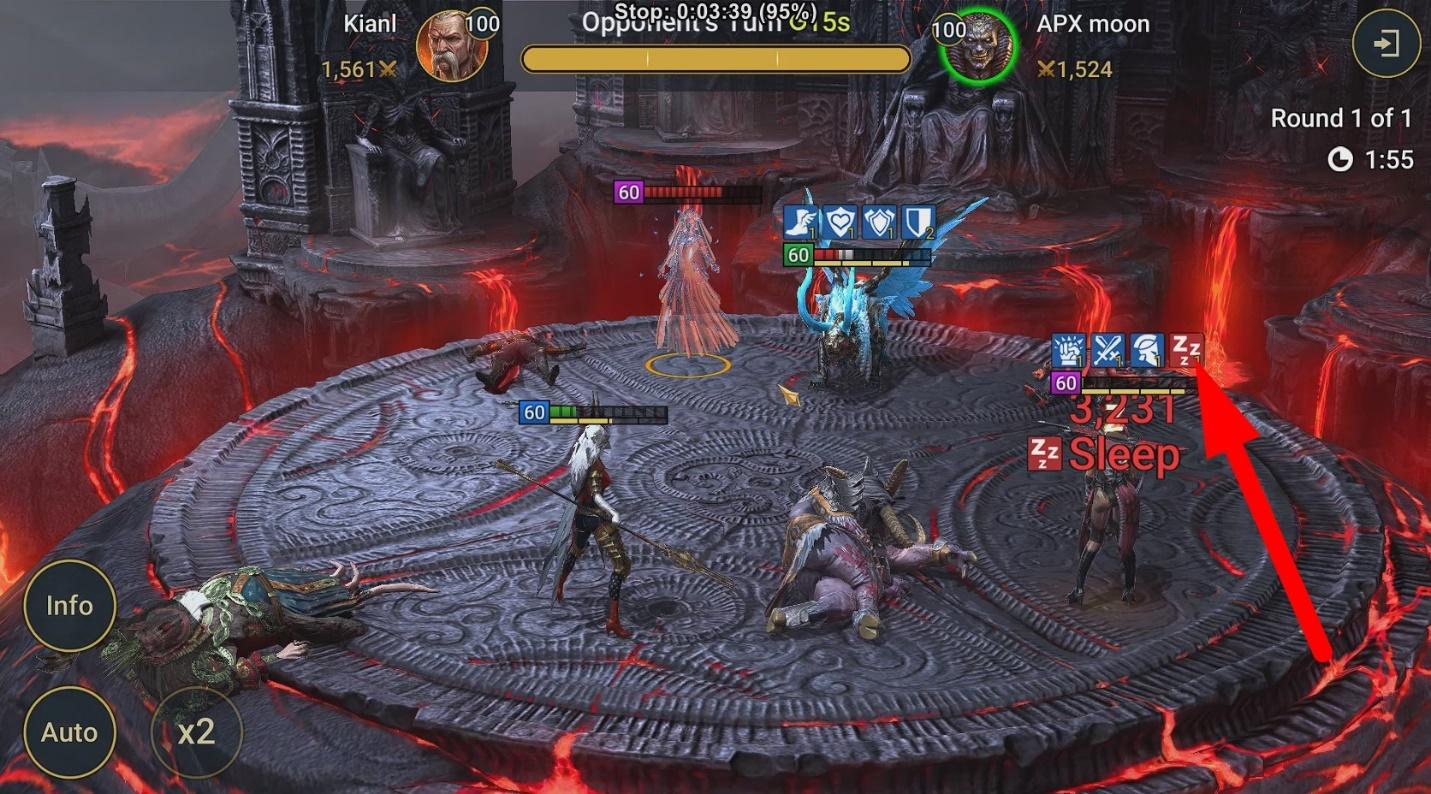
Despite the fact that the speed of my Lanakis turned out to be higher, I lost this battle. Siphi began to apply sleep with her A1 to my heroes, and in the end, I was left without a DD. I am deliberately showing you this match so that you understand that this doesn’t always work and don’t harbor false illusions. One incorrect ban (in this case – banning Arbiter) can ruin the entire game. On the other hand, if I had blocked Siphi, I probably would have lost the first move and lost even faster. However, we’ll never know for certain…
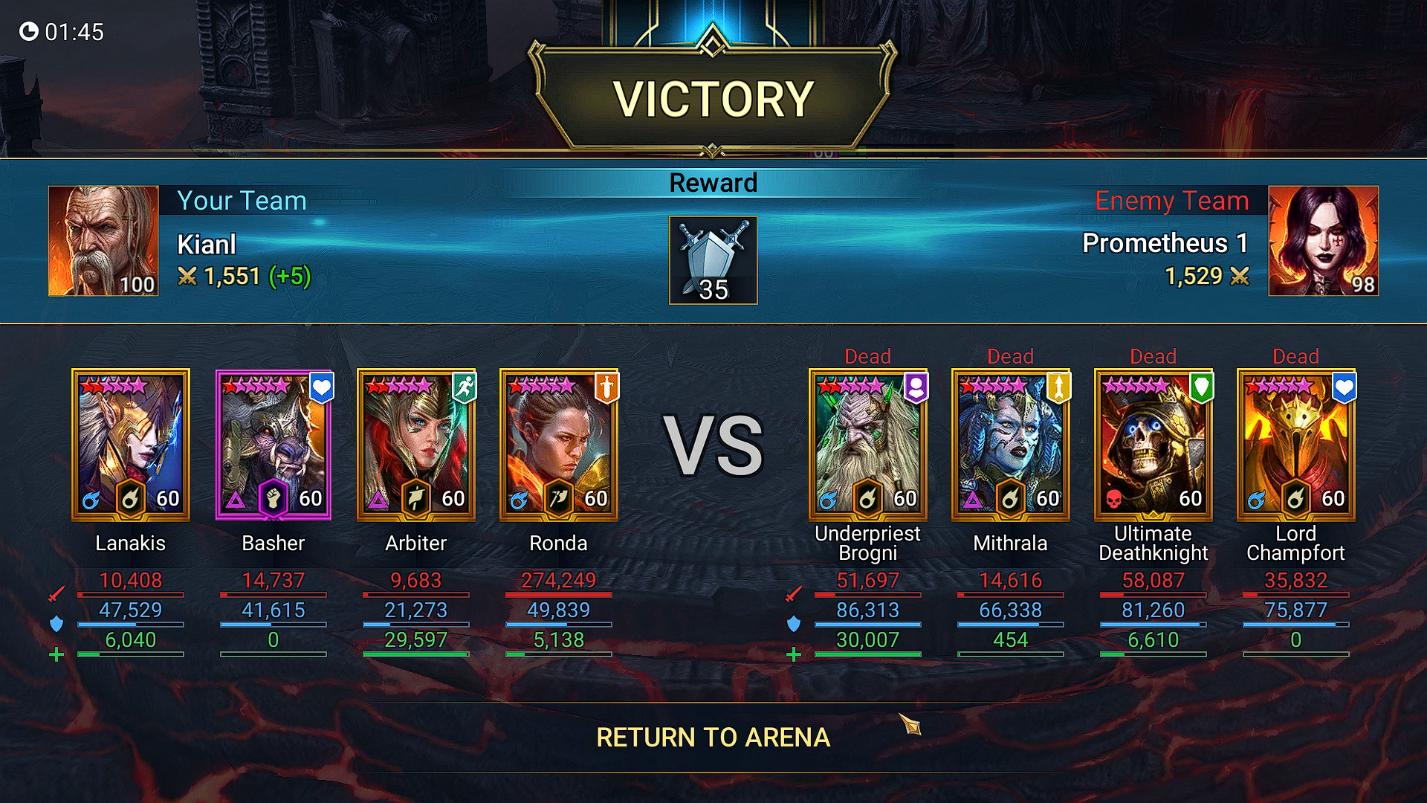
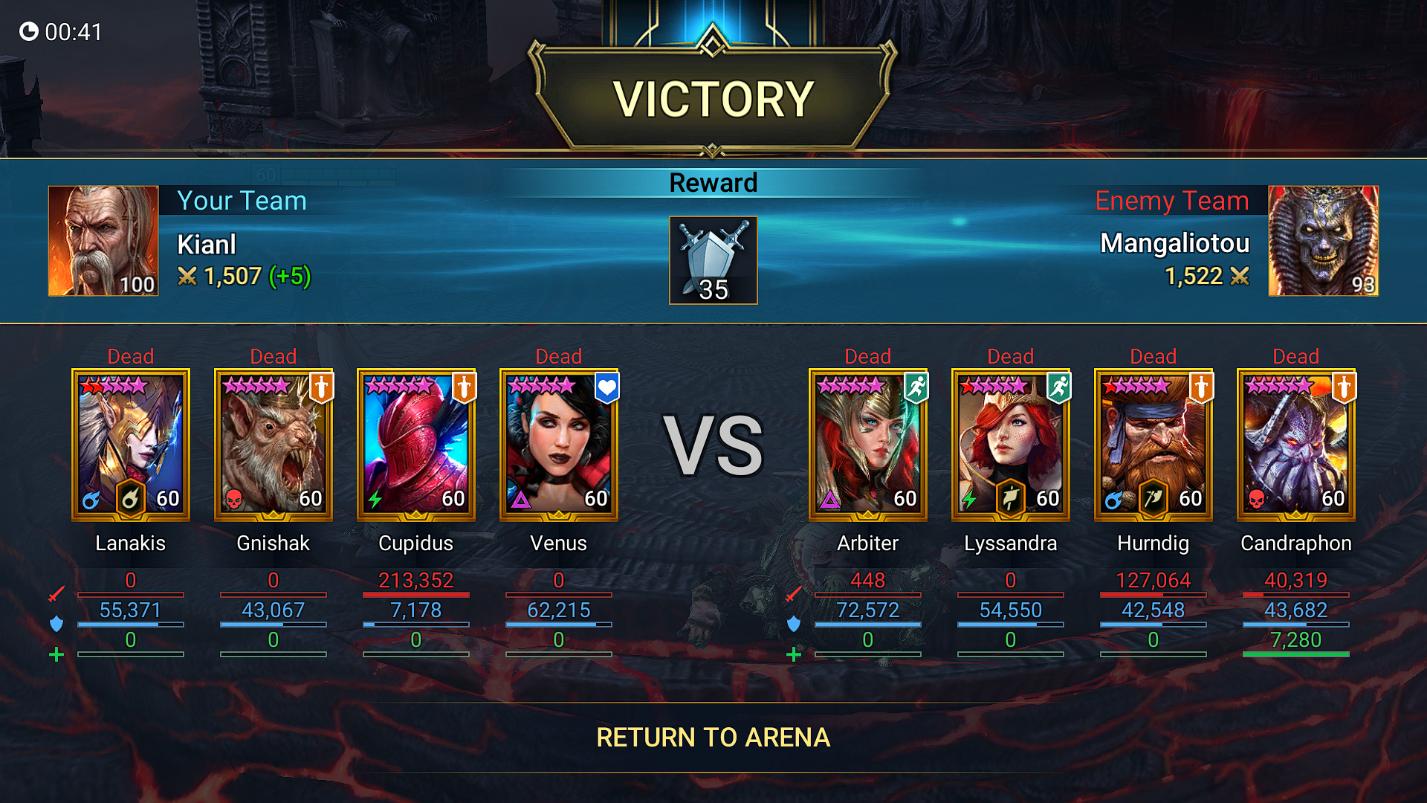
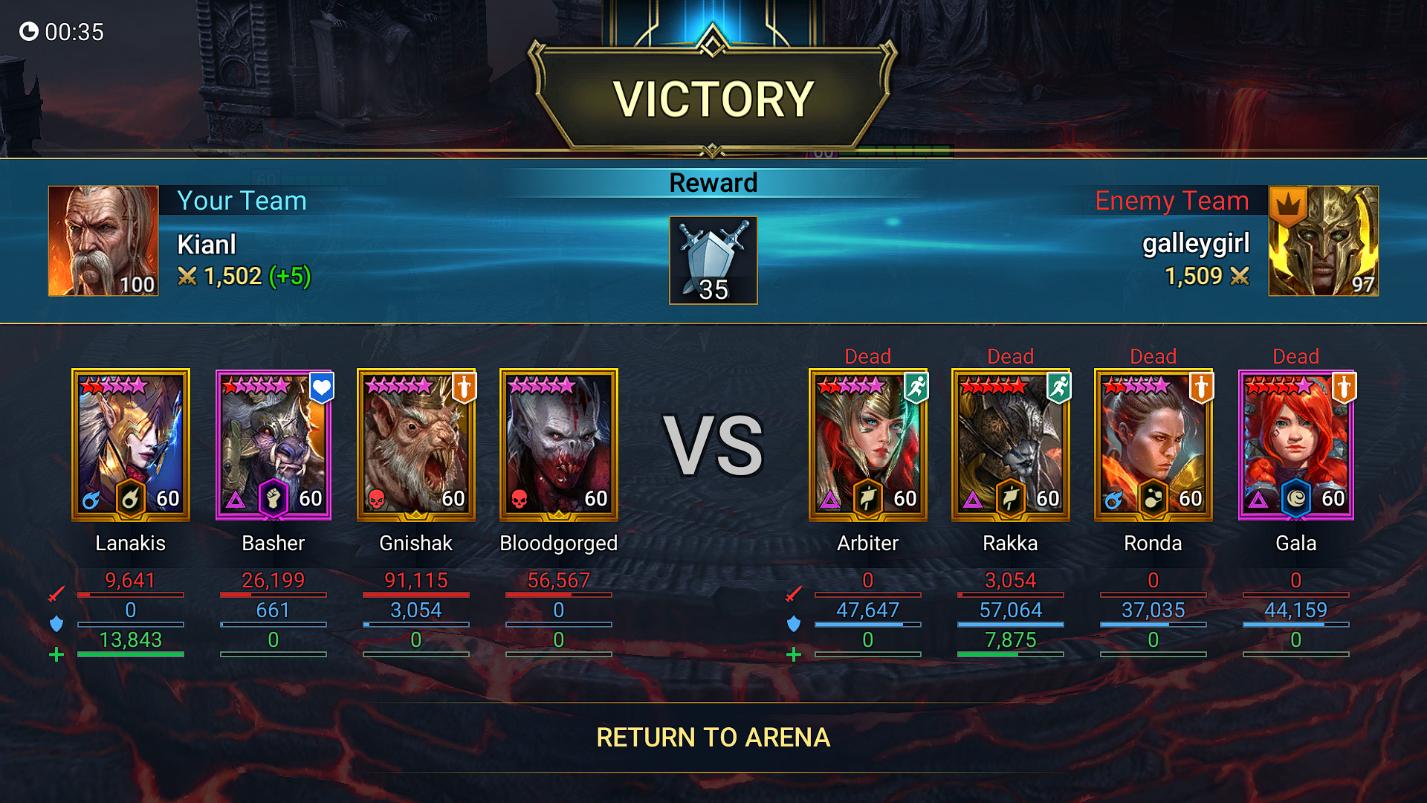
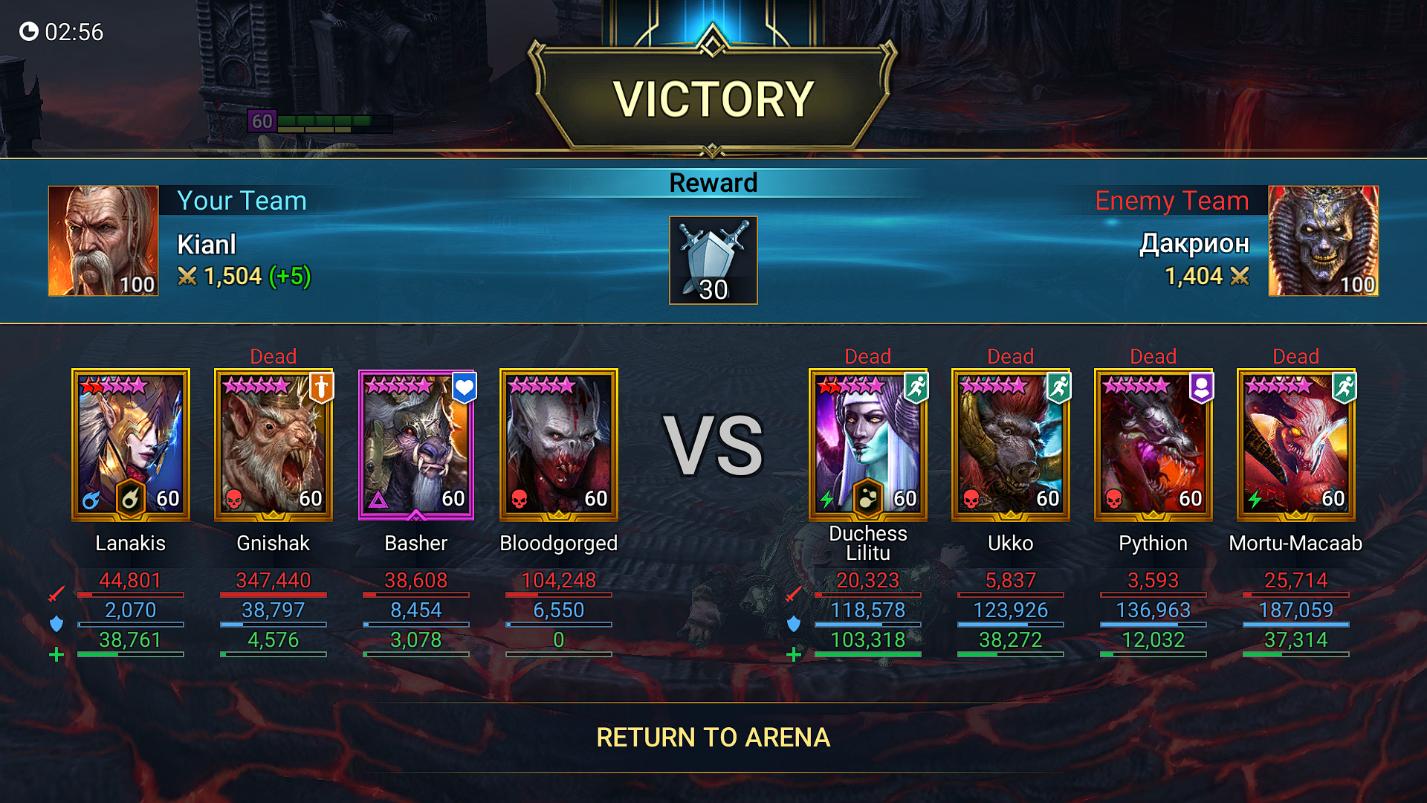
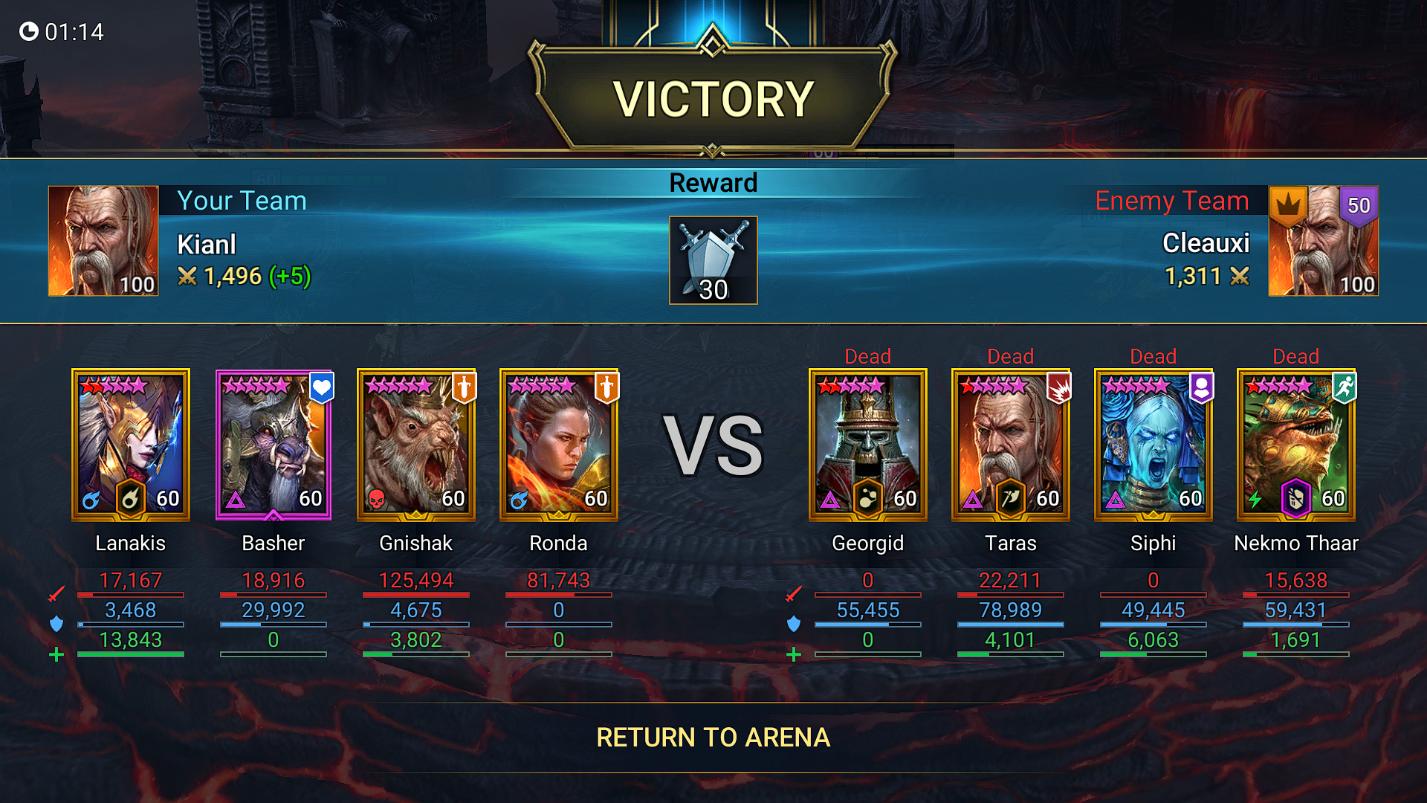
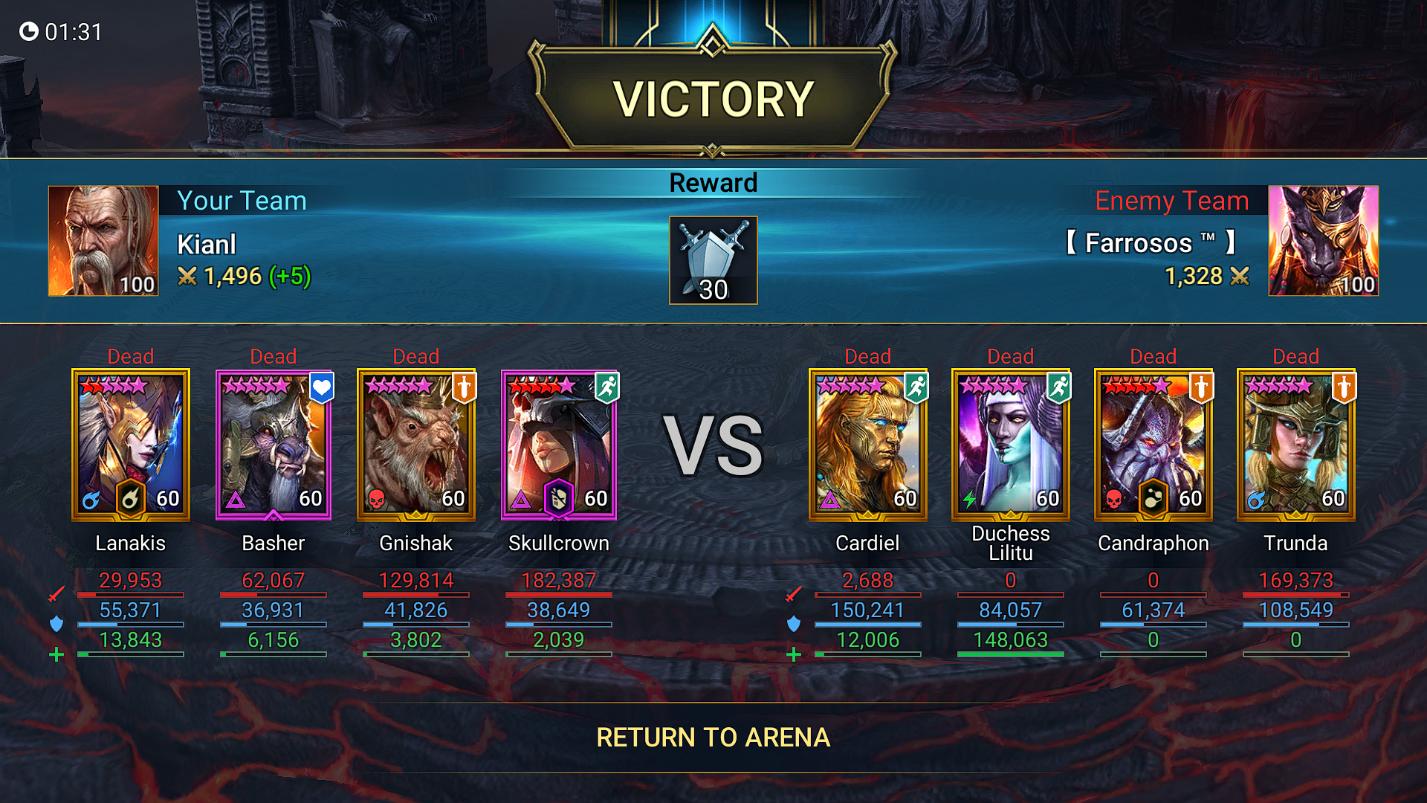
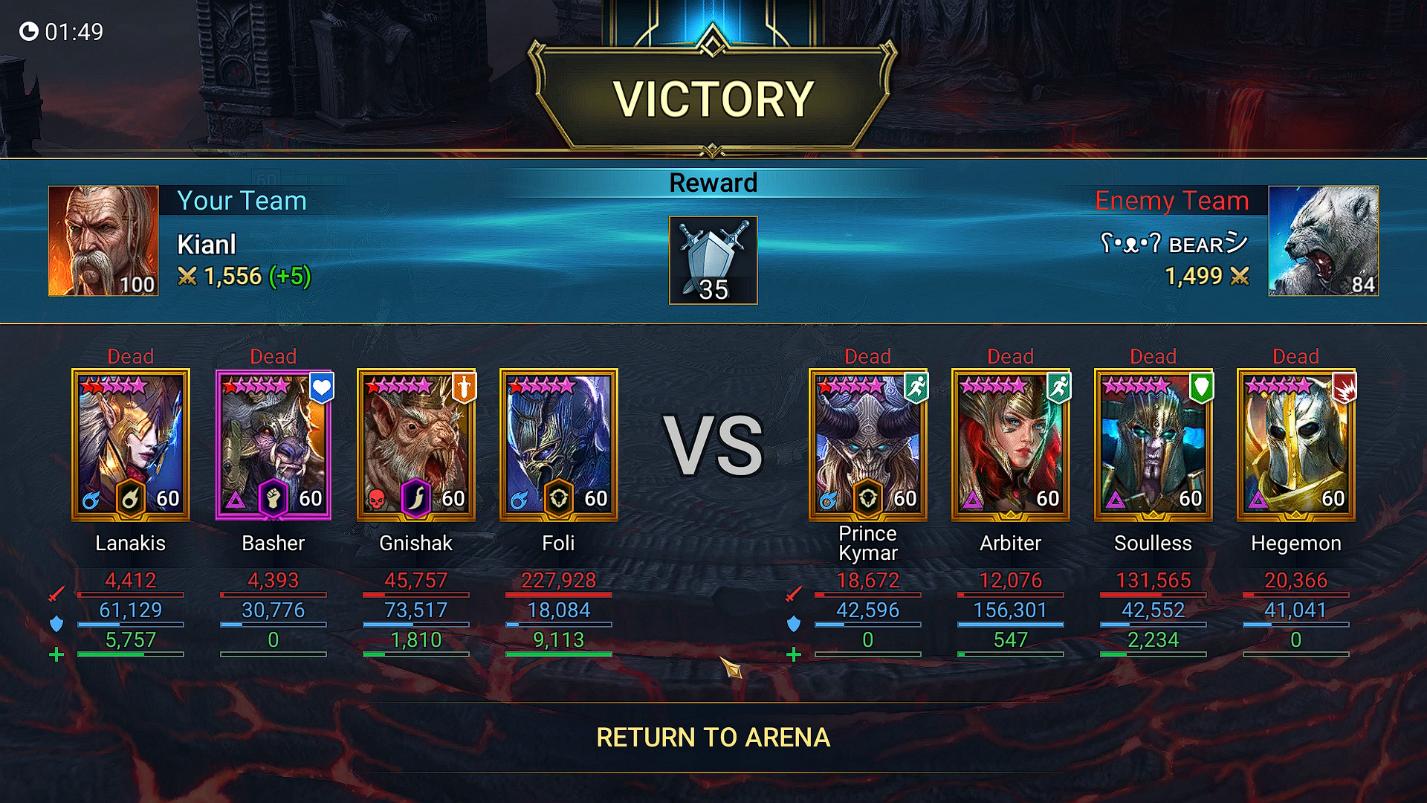
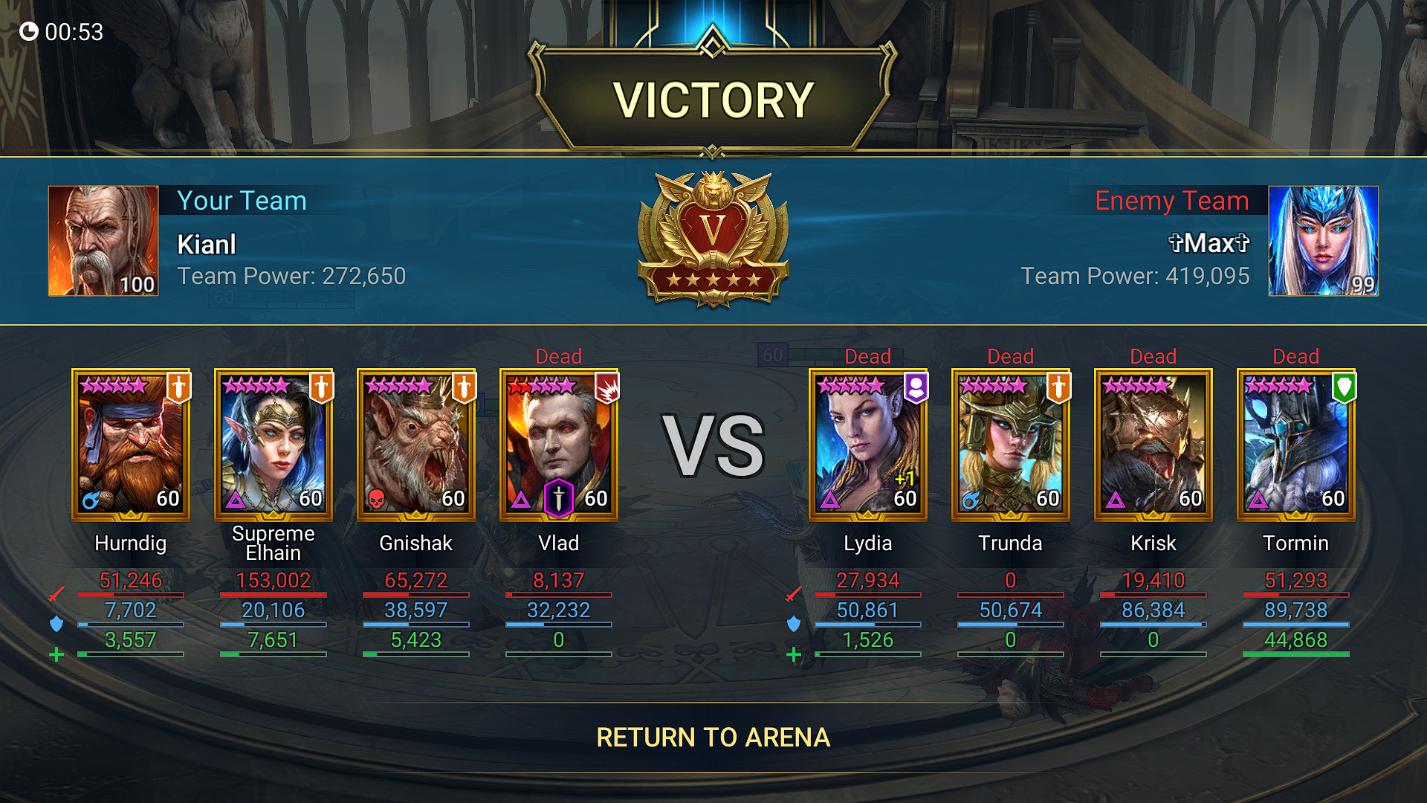
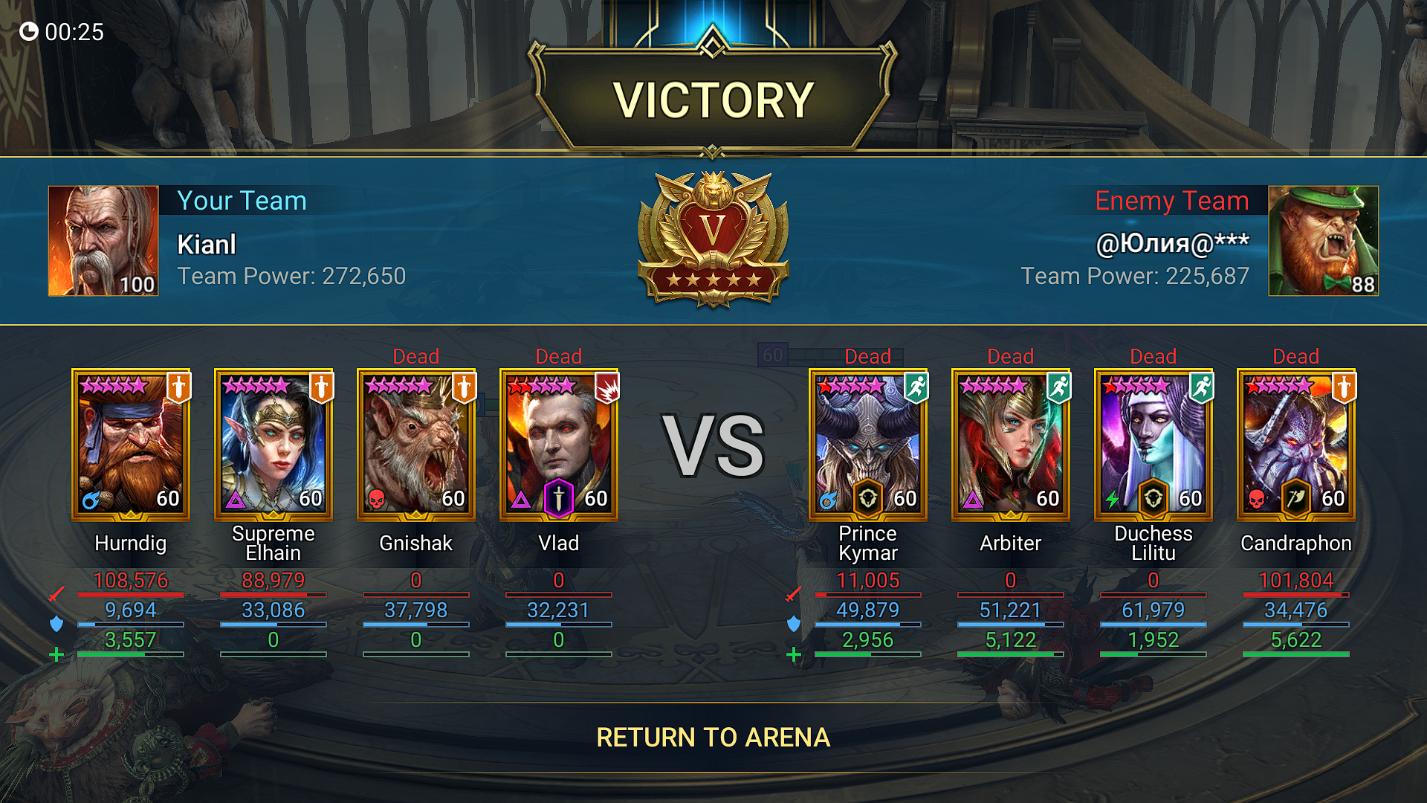
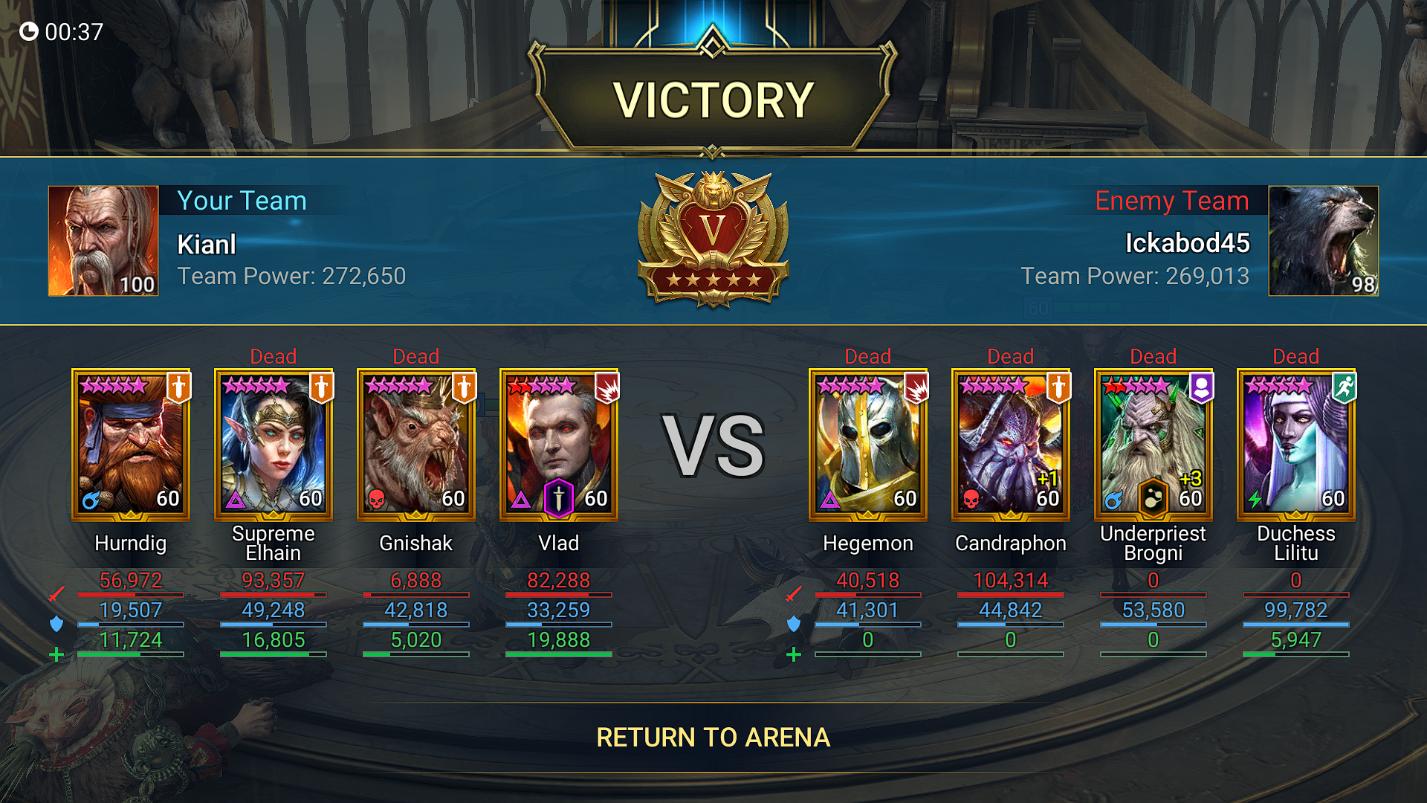
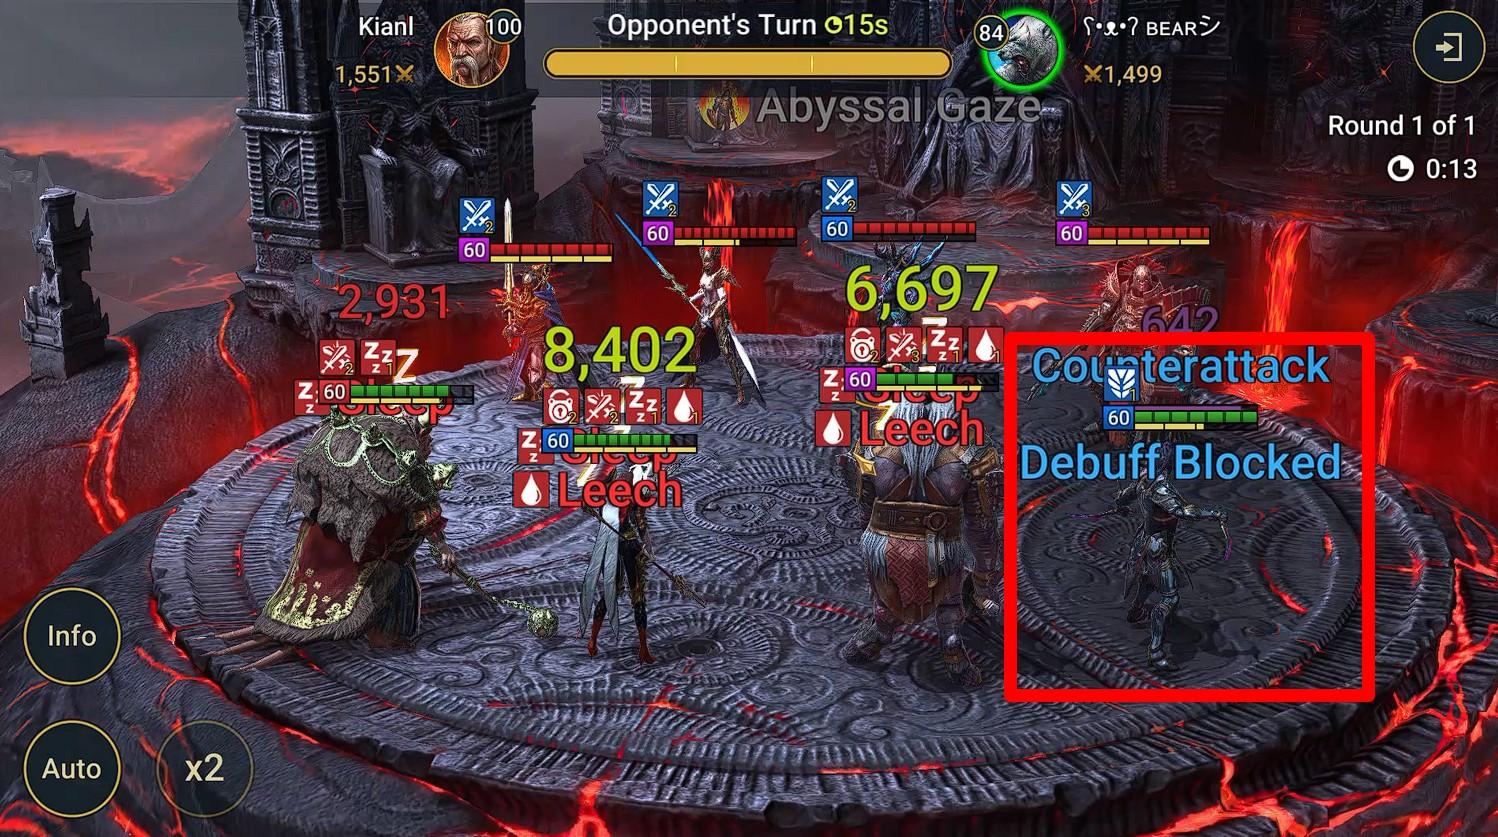
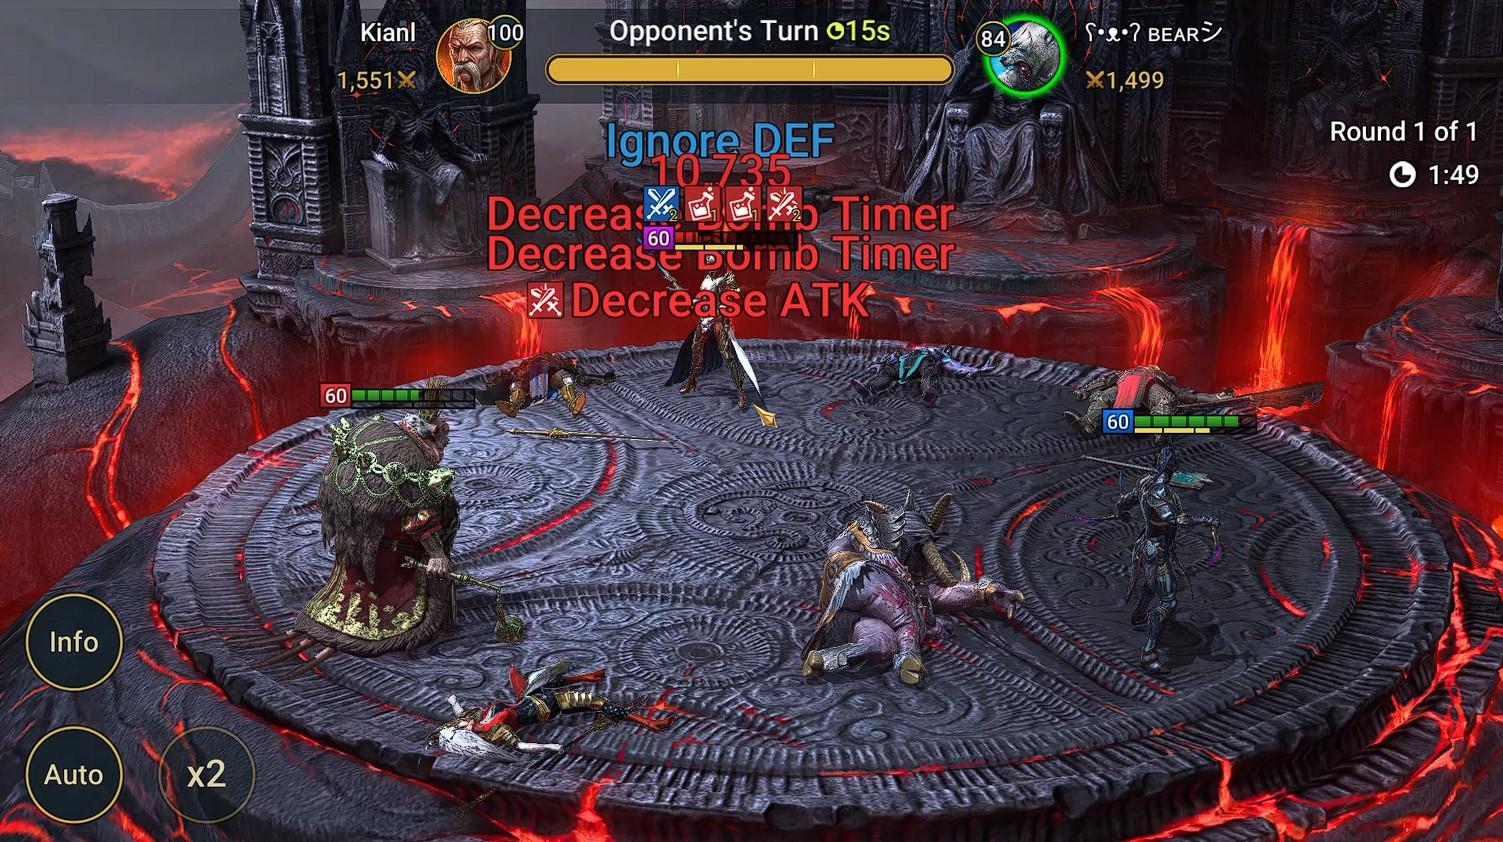
Video and screenshots of my team
I recorded several victorious battles on video to demonstrate how this works.
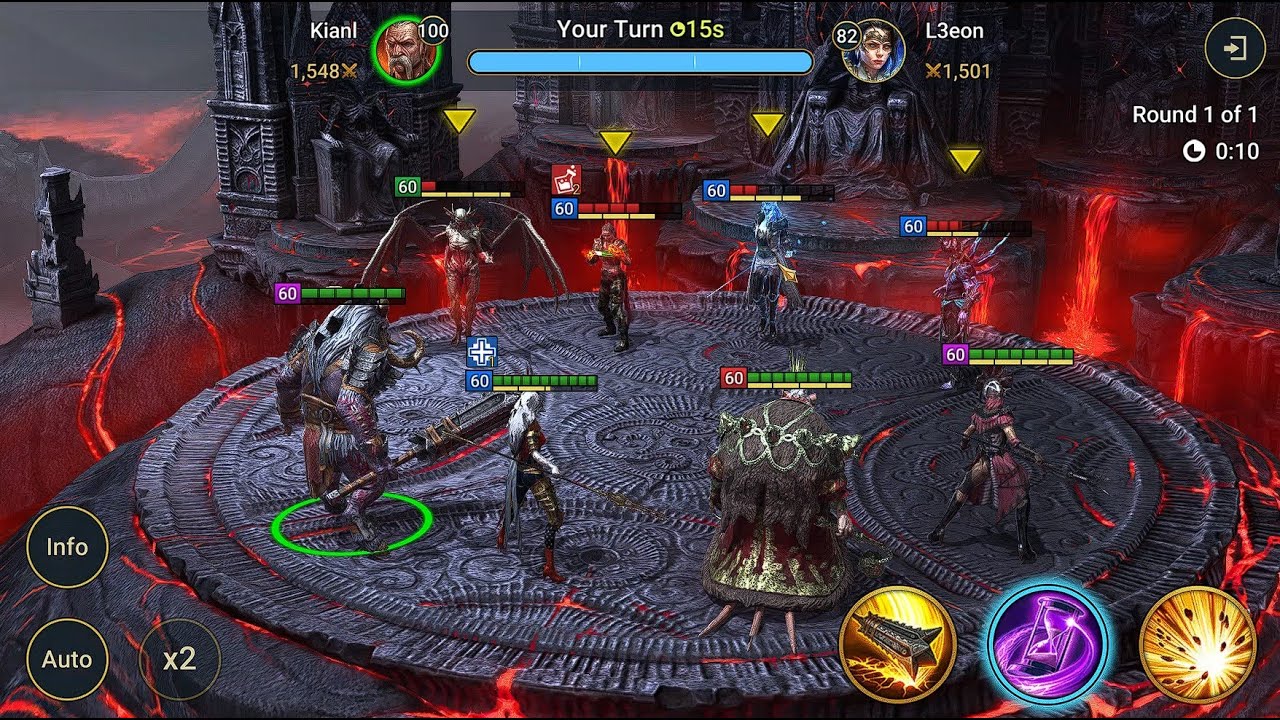
For those who don’t feel like watching, I will attach a few screenshots of victorious duels to confirm that this strategy indeed makes sense to employ.

Layers of protection: How to save your damage dealers
There are several layers of hero protection in RAID that I must remind beginners about.
-
Affinity. Damage to a hero of a “strong” affinity is reduced by 20%, the chance of a critical hit is reduced by 15%, and the hit itself has a 35% chance of being weak. A weak hit cannot be critical, cannot apply any buffs or debuffs, and its damage is further reduced by 20%. Affinity is always the first layer of protection for your heroes.
-
Reaction Accessories. Each accessory from the Reaction set (which can be obtained in clan tournaments) gives a 25% chance to receive a normal hit instead of a critical one before the first move in the round. As far as I know, these chances add up. This means that with three accessories from the reaction set, the hero has a 75% chance of receiving a normal hit instead of a critical one if they have not yet taken a turn in this round. Reaction accessories can be considered the second layer of protection for your heroes.
-
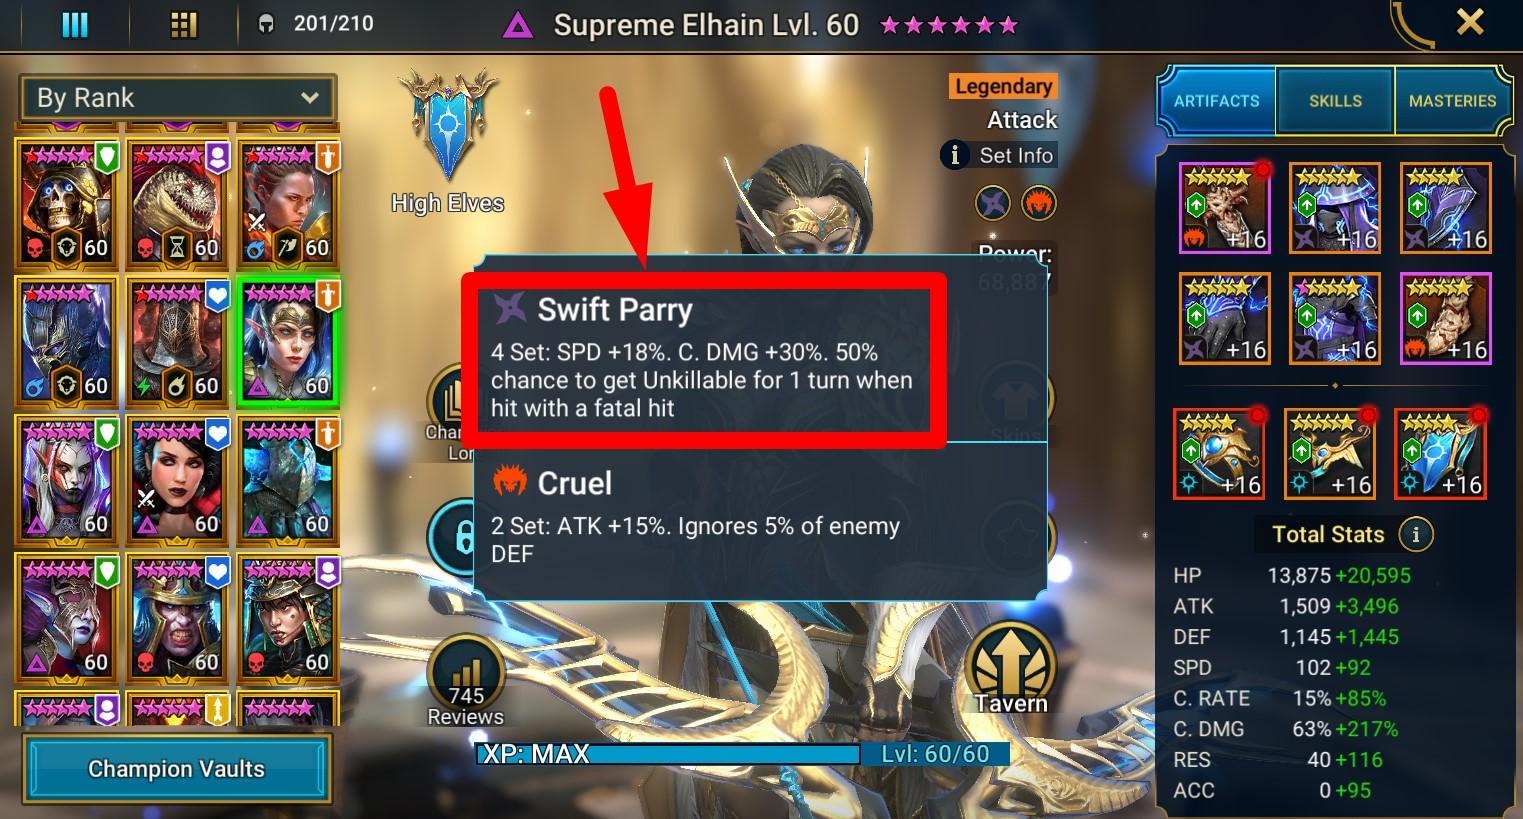
Artifact Sets. Some artifact sets (Stone Skin, Swift Parry, Immune, Shield, Bolster, Frostbite, Stalwart) protect heroes from attacks and/or negative effects. Using these sets on damage dealers is not always appropriate, as the hero may lose the ability to inflict sufficient damage for victory. Nevertheless, artifact sets are the third layer of protection for your heroes.
-
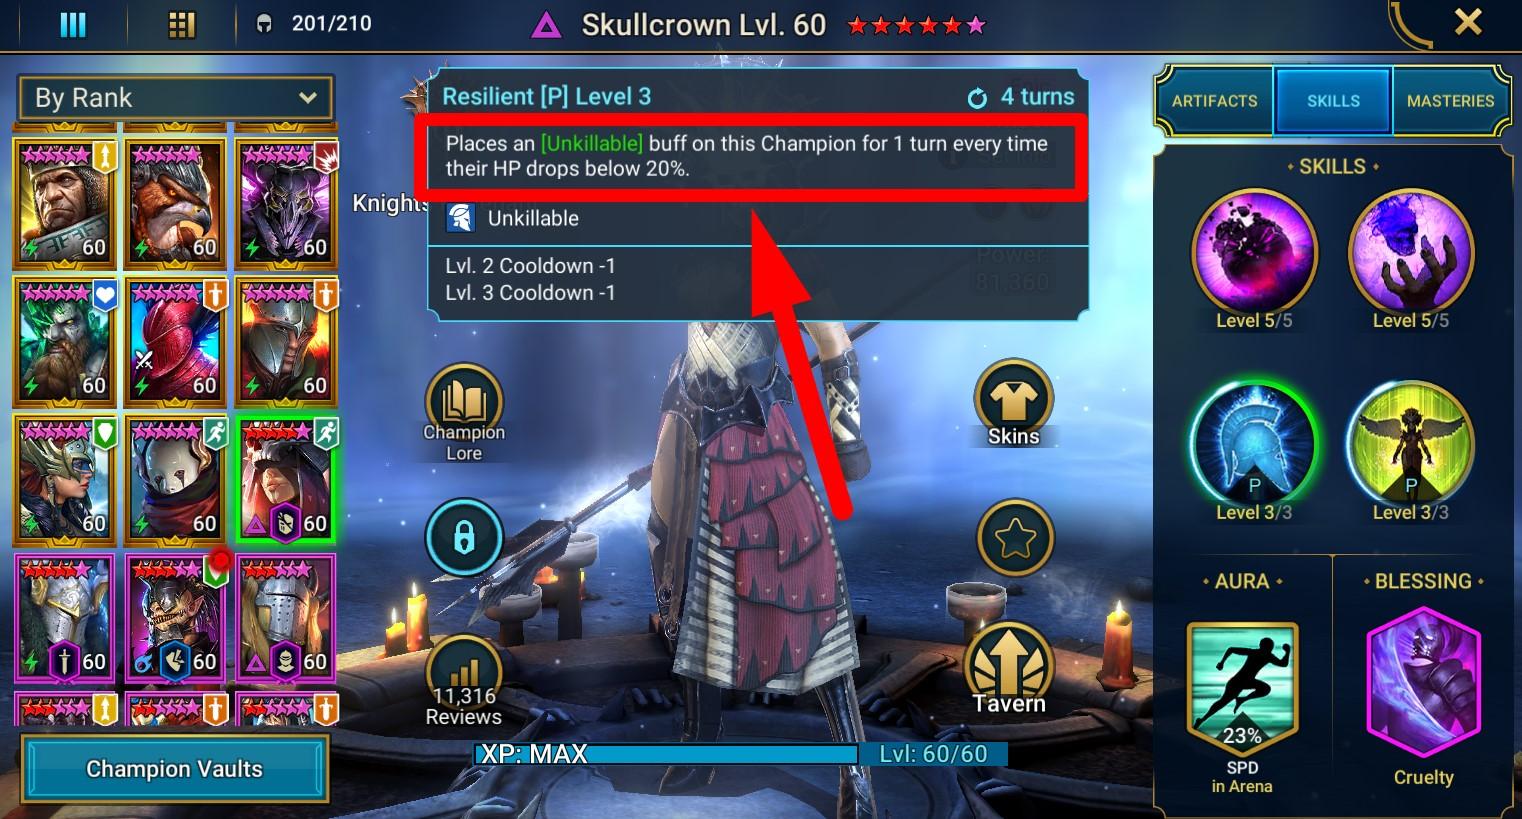
Passive Abilities. There are quite a few heroes in RAID with passive abilities that protect the team or themselves: Leorius, Skullcrown, Rotos, Foli, Krisk, Candraphon, Harima, and others. By “protection” here, I mean any passive increase in the survivability of the hero or allies, regardless of how it is achieved. This is the 4th layer of protection.
-
Active Abilities. The last resort is the active abilities of support heroes, which they will use to defend your damage dealers. From my experience, I would recommend relying on them last, as it may turn out that these abilities won’t even come into play…
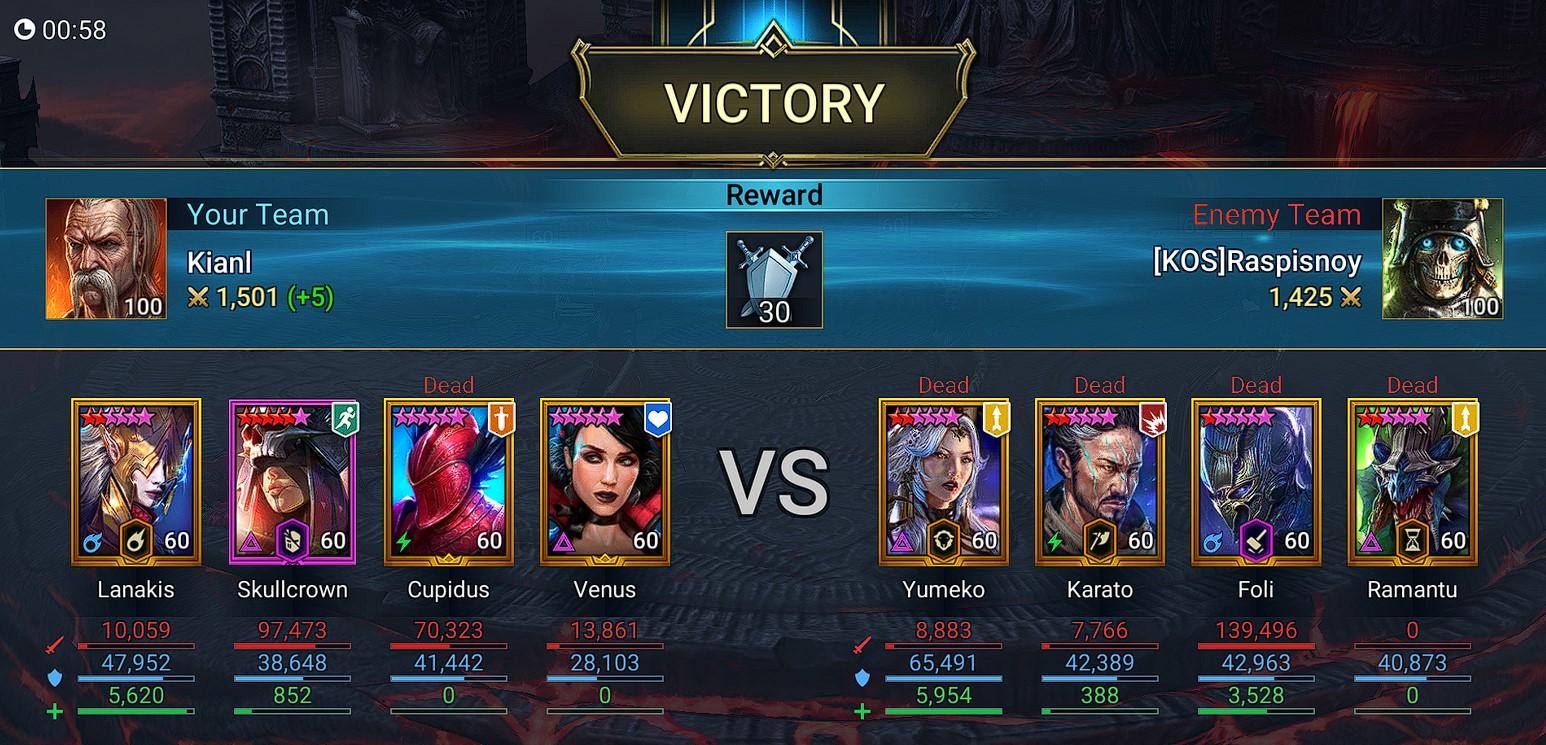
I decided to write about this because, as it seems to me, many players underestimate the importance of having at least 1-2 layers of protection on their heroes. And they really shouldn’t, as these layers can drastically change the outcome of the battle. For example, having 4 damage dealers with 1-2 levels of protection each can easily farm medals in Gold V (with a win rate of 80-90%), simply by fielding them together and relying on randomness. Here are a few screenshots to back up my words.

Who and why should aim to play from the first move?
The reader might reasonably object that it is much more profitable to let the opponent move first, after which they will lose several layers of protection and it will be much easier to defeat them. On the one hand, you are absolutely right. But on the other hand, to do this you need very strong heroes with very powerful equipment and specific skills. Personally, I do not have such equipment yet.
You see, when the battle is just beginning, we have the opportunity to negate the advantage of more advanced players in equipment by simply not letting them fully unleash their potential. We kill them, cut their turn meter, increase skill cooldowns, paralyze with control effects, and so on. In the middle of the battle, when the enemy damage dealers have a veil and a damage resistance bonus from Pythion due to 6-7 defensive buffs, they become much harder to kill with simple heroes like Skullcrown or Ronda.
For this reason, from the perspective of a free-to-play player, it seems to me that it is much more beneficial to take the initiative into my own hands and start pressing the enemy from the very first move, not letting them recover. As you may have noticed, 3 out of 6 main heroes that I use on Live Arena are free or were obtained through fusion, and another 2 are epic. So, I think, you will agree that there is a point in this. After all, if I lost the advantage of the first move, all these heroes would have been useless.
So, if you need advice, I recommend using a speed team on Live Arena in the following cases:
- You are significantly inferior to more advanced players in terms of equipment quality (my case)
- You don’t have ultimate supports like Lilitu, Ukko, and Pythion (this is also my case)
- You don’t know how to play from the second move or simply like to play from the first (overall, this is also about me).
In any case, I am convinced that it is possible to reach the TOP 100 with both defensive and offensive teams.
Tactics of Picks and Bans
Picks and bans are the most important part of Live Arena gameplay that sets this mode apart from old arenas and largely determines the outcome of the battle. An incorrect order of choosing your heroes increases the likelihood of your defeat, as the opponent will quickly understand your plan and take countermeasures. Due to an incorrect ban, you can lose the match even before it starts, and in the most frustrating way.
Hide Your Plan
You have a team you want to use in battle. On the champion selection screen, you should place them in such an order that the opponent understands the concept of your team as late as possible. If they understand it from the first 1-2 heroes, they will have enough slots to put out counter-heroes with equally dangerous alternatives. For example, if you put out Arbiter and Lyssandra first, the opponent might respond with Hegemon and Tormin, which almost guarantees your defeat.
As long as the opponent doesn’t understand what you’re trying to put together, it’s much harder for them to interfere. In the Gold Leagues of Live Arenas, where only 1 copy of each specific hero can participate in battle, the situation and priorities are likely different. But until the Gold Leagues (which a beginner won’t reach for a very long time), stick to this principle. For example, in my case, the first 3 slots are Lanakis, Busher, Gnishak / Arbiter.
Regardless of whether you are playing by forming a team “on the go”, or using a pre-prepared one, it makes sense to put out those heroes first, who are the most versatile and who you will use in any case. Otherwise, the choice may be dictated by your individual tactics, which you will inevitably develop over time.
In the last two slots, there’s always a Boogeyman
As I’ve already said, we should always assume the worst-case scenario. In the context of picks and bans, this means that in the opponent’s last two slots, there’s ALWAYS your worst nightmare that will ruin all your plans, and you should be prepared for this initially.
For example, if you’re assembling a speed team, you should default to the assumption that the opponent’s last two slots will be x2 Hegemon or x2 Tormin. And if you think I’m exaggerating again, you’re very much mistaken.
RAID is literally teeming with donators who, for various reasons, are unable to properly implement the potential of their top heroes, which is why they have to stay in the bronze leagues and occasionally spoil the life of beginners.
So if you want to win, you should initially think about how to defeat the heroes from the opponent’s first 4 slots (or 3 + 1 your worst nightmare, which you have to come up with yourself). The last slot you will always be able to block, right? There’s only one problem (and I think it’s the same for both of us) – where do you get so many heroes to cover all the weak spots?.. 🤨
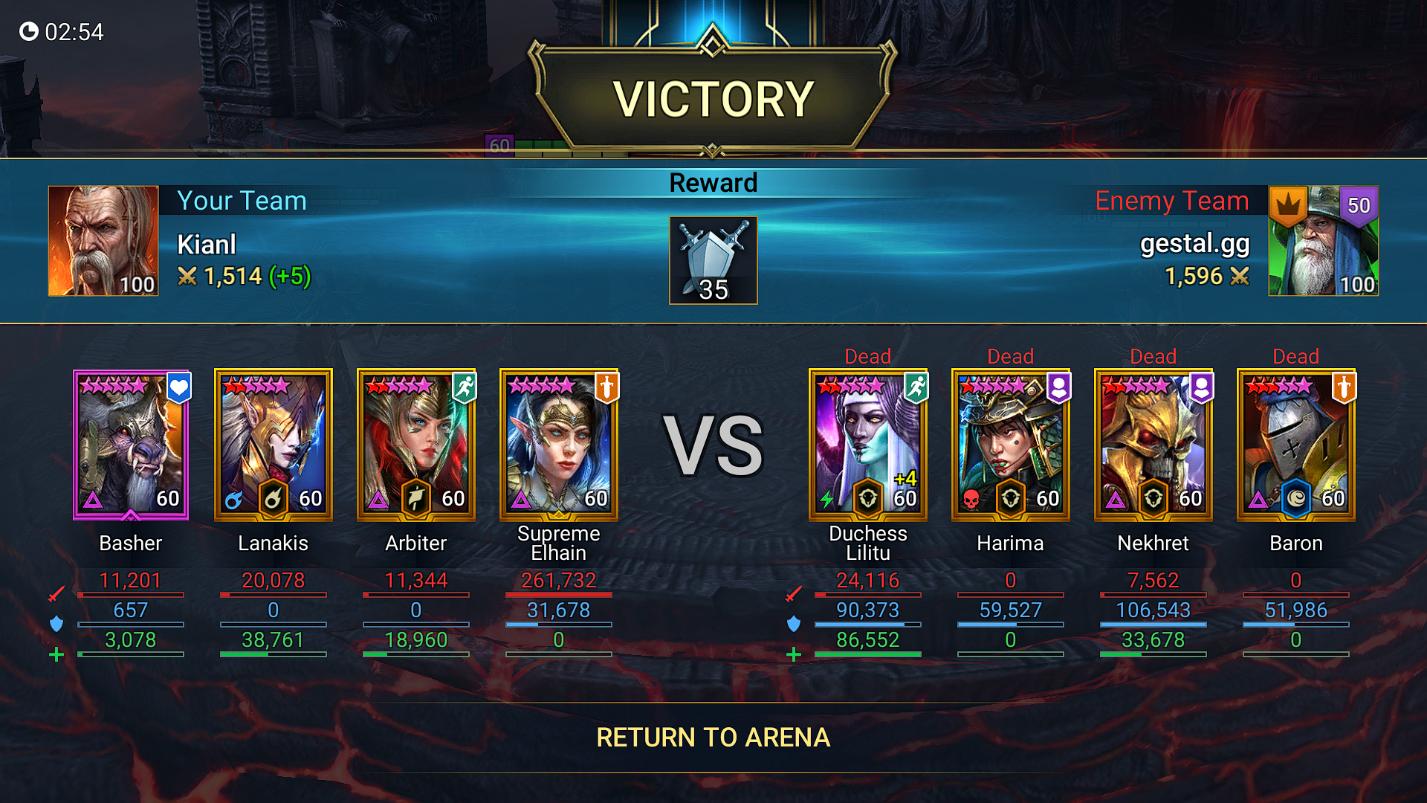
Break the Opponent’s Plan
The opponent’s team always has some kind of plan (or principle / concept, if you will). Your task is to decipher and disrupt this plan in your favor. You only have 2 tools for this: counter-heroes and blocking. As you’ve already understood from this guide, a correctly composed team is difficult to dismantle with a hero block, as it contains alternatives for each of its components. That’s why you should learn to soberly assess the possibilities of how events might unfold even before the battle begins. This can ensure your victory when you don’t have the opportunity to put out counter-heroes.
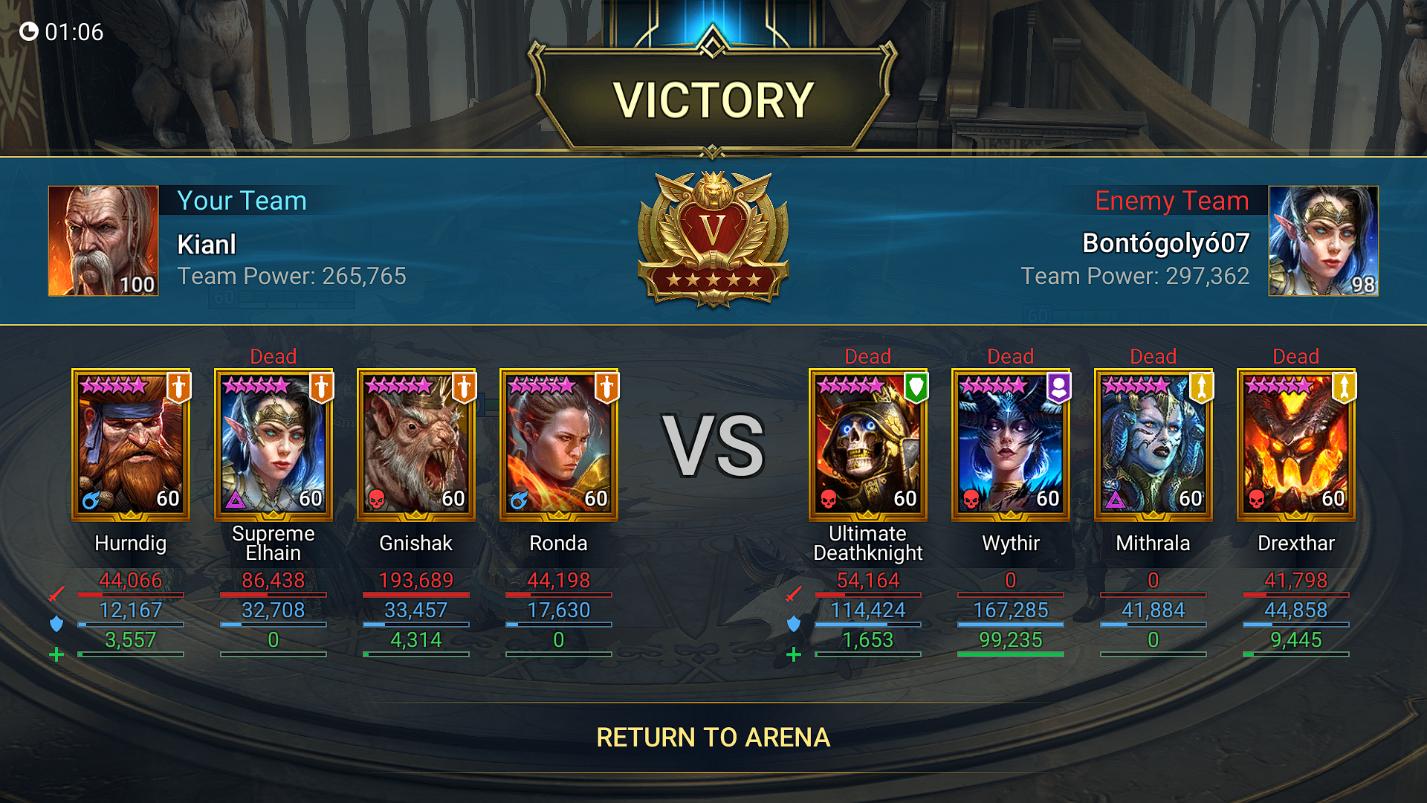
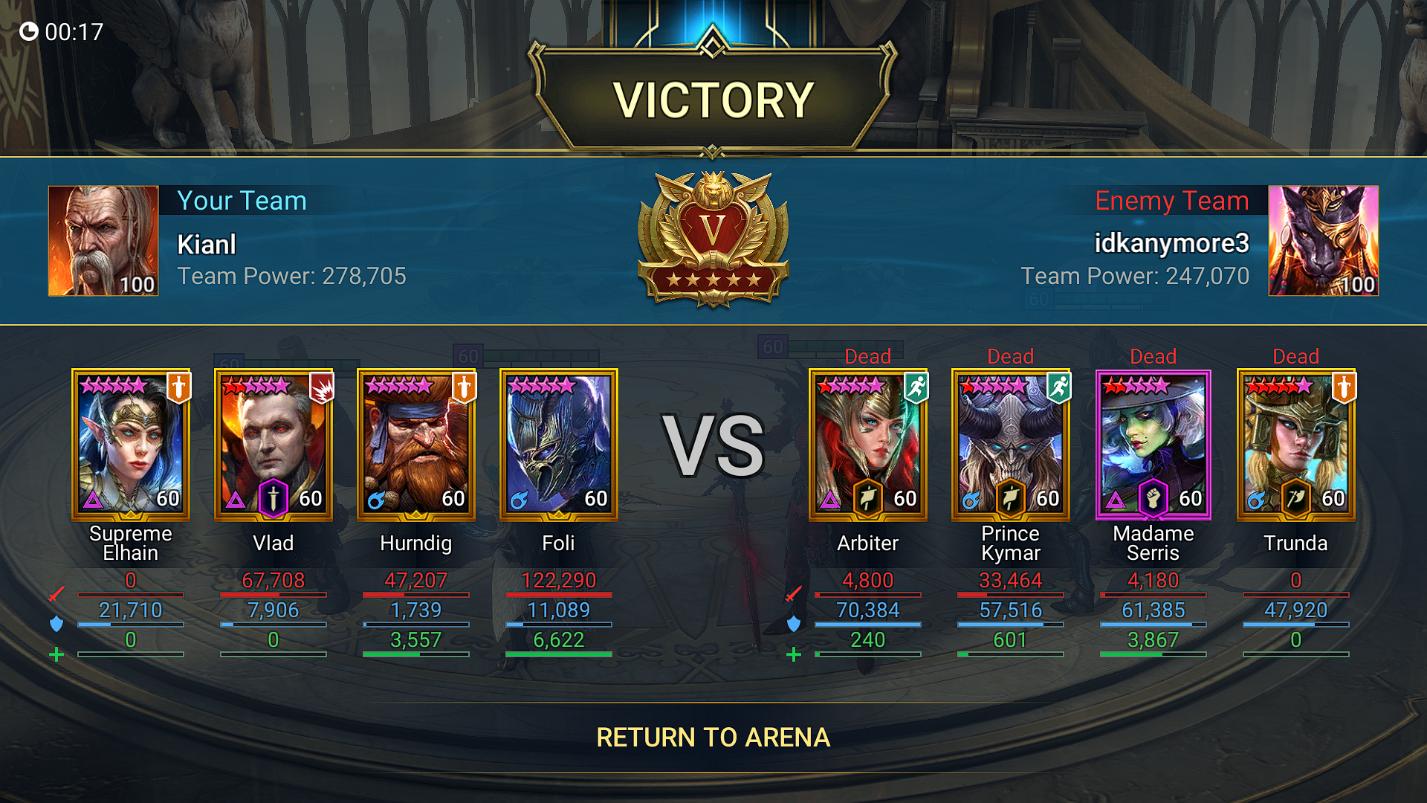
As an example, I will show you a battle that I should have lost, but won, thanks to everything I’ve written above, and a bit of luck.
- It so happened that I found myself in a difficult situation, because the opponent put me in a very clear condition: Arbiter or Hegemon. In the first case, I almost certainly lose on speed due to a weaker aura, and in the second, I definitely give up the initiative of the first move to Hegemon.
- Assessing the risks, I decided that the most reasonable option would be to deprive my opponent of his main weapon – Gnishak. Thus, my Foli and Arbiter in Stone Skin will be in relative safety, even if Kymar removes this bonus, and I will have a chance. The opponent, as usual, blocked my Arbiter, which was a big mistake on his part, because now Foli will inevitably kill part of the enemy heroes under any circumstances.
-
Prince Kymar puts the team to sleep, but he can’t do anything with Foli for obvious reasons.
- The opponent’s team irretrievably loses two key heroes due to Foli’s Block Revive.
-
Soulless’s skills are on cooldown, so Foli and Gnishak (who have been successfully protected by Reaction set accessories all this time) easily finish off the remnants of the enemy team.
- Victory.
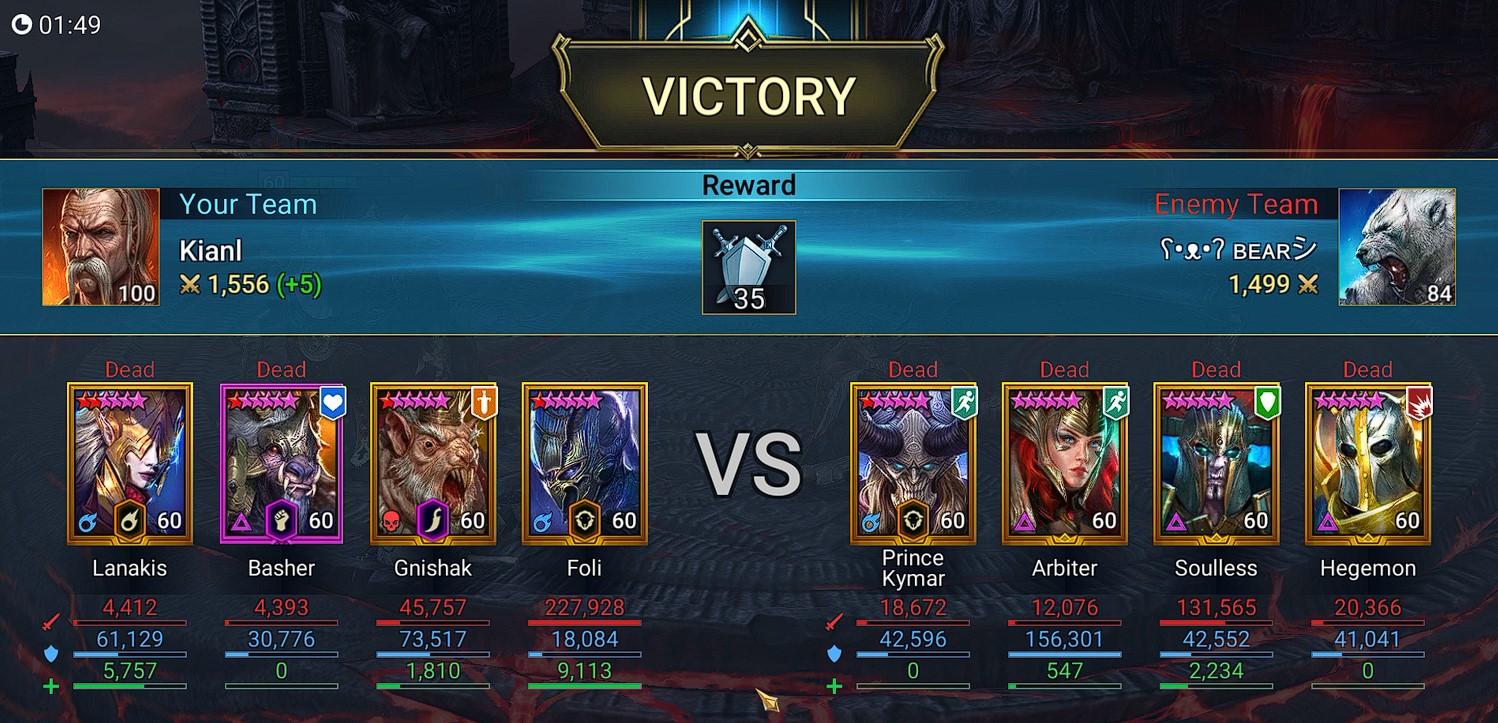
This is another example of how even 1-2 layers of protection, as mentioned above, can turn the tide of battle in your favor, and how 1 correct hero block can turn a match that was a priori lost into a potentially winning one.
Ready Tactics
Finally, I decided to list a few ready-made Live Arena battle tactics. I must stress that I haven’t had a chance to test all of them. Most of them only exist “on paper” for now.
Speed Team with Arbiter Bait (functional)
I use this team all the time. You already know how it works. Items from Arbiter are put on another hero with the turn meter fill skill, and Arbiter herself serves as bait for the ban. It’s best to equip her with a Stone Skin set, turning her into a budget version of Lilitu. This way, even if your main speed hero is blocked, you still have a chance to play from the second turn, relying on Arbiter and several layers of protection on key damage dealers.
For damage dealers in this team, you should either use heroes with bombs, or Georgid. To protect such heroes from being blocked, the enemy must face an equally frightening alternative in the form of skill cooldowns (Warlord, Busher, others) or a similar damage dealer.
If you don’t have such heroes, you can use Madame Serris or Prince Kymar. The logic will be as follows: either the enemy blocks your Madame Serris and gets bombs, or blocks the bombs / Georgid but risks losing Stone Skin. Unfortunately, I haven’t come up with anything more budget-friendly and universal.
Block Revive against 1 Damage Dealer (presumably functional)
The tactic was partially tested, so no guarantees are given. The idea is that if the enemy team has 2 damage dealers, you can block one of them and then kill the only one left with Block Revive. Thus, the enemy team is left with 3 Supports, and your chances of winning increase significantly.
This tactic is situational, as you will most likely not be able to kill the enemy damage dealer in one go. Most likely, this tactic is more suitable for playing from the second turn.
Buff Removal + Block Revive (untested)
The idea is to survive the first attack of enemy DDs, thereby depriving them of Stone Skin and passive protection from Reaction set accessories. Then you need to remove all bonuses (like Veil and Shield) from the enemy damage dealers and easily kill them with Block Revive. Here’s an important clarification: we’re talking about removing bonuses specifically from damage dealers, so we don’t need 800 Accuracy – 300 will suffice. An example of such a combination: Foli + Madame Serris (both in Stone Skin x4 or x6). You can also protect the combination with Unkillable + Block Debuffs (Maneater says hi).
However, to make all this work, you need to meet several challenging conditions.
- First, you need to protect the Foli + Madame Serris combo from being blocked, preparing for the enemy an equally scary scenario in case one of these heroes is blocked.
- Second, the enemy team should not have anything that could disrupt your tactics: bombs, skill cooldowns, buff removals, Georgid, etc.
After full testing of the tactics, this section will be updated.
Team via HP Exchange / Equalization (untested)
In RAID, there are several heroes who can exchange health with an enemy, and no accuracy is required for this. This is an easy way to kill powerful enemy supports. The idea is to protect a combo of heroes with such skills (for example, Astralith + Nogdar) with Unkillable + Block Debuffs buffs. In this case, enemy attacks deplete the heroes’ health but don’t kill them, then an exchange of health follows and the team loses at least 2 of its supports / tanks.
The problems with implementing such a team are the same as with the previous one: you need an alternative scenario in case one of the key heroes is blocked, and the enemy team should not be able to disrupt the scenario. After full testing of the tactics, this section will be updated.
Team Using Cardinal (untested)
Few people in RAID are not familiar with teams of this type. The fact is that after the heroes are revived by Cardinal, they essentially get an extra turn due to maximum turn meter fill, and can immediately attack the enemy in turn.
Implementing such a team on Live Arena will also be very difficult, as the enemy will almost certainly block your Cardinal. From this it follows that this team has the same problems as the previous ones: 1) the necessity of a no less dangerous alternative scenario 2) the enemy team should not be able to disrupt your tactic. After full testing of the tactics, this section will be updated.
Conclusion
If I haven’t forgotten anything, then at the moment this is all I know about Live Arena. Obvious things like (Ukko + Lilitu) I didn’t detail because everyone already knows about them. I hope this knowledge and ideas will be useful to someone. When I discover or come up with new tactics, the guide will be updated. Thanks for reading, Glory to Ukraine, and good luck 😎💙💛.