Table of Contents HIDE
In this guide, we will take a look at electricity in 7DTD. And this should begin with good news for you: the electrical system is very simple. It is enough to know how to connect electrical devices to each other with wires and what functions they perform.
For our testing, we will use the Creative mode. If you want to use it too, create a new world, then open the console (F1 or maybe another key – nobody knows why different people have different keys to open the console), and then enter commands “dm” (debug menu) and “cm” (creative menu). Use the “U” key to open the item menu. So, let’s begin.
How to connect objects to each other using wires
This is done with the Wire Tool. You can find it in boxes with electrics. This tool does not break when used. The wires it provides are also unlimited, so don’t worry of that.
For example, let’s connect two Electric Fence Posts.
-
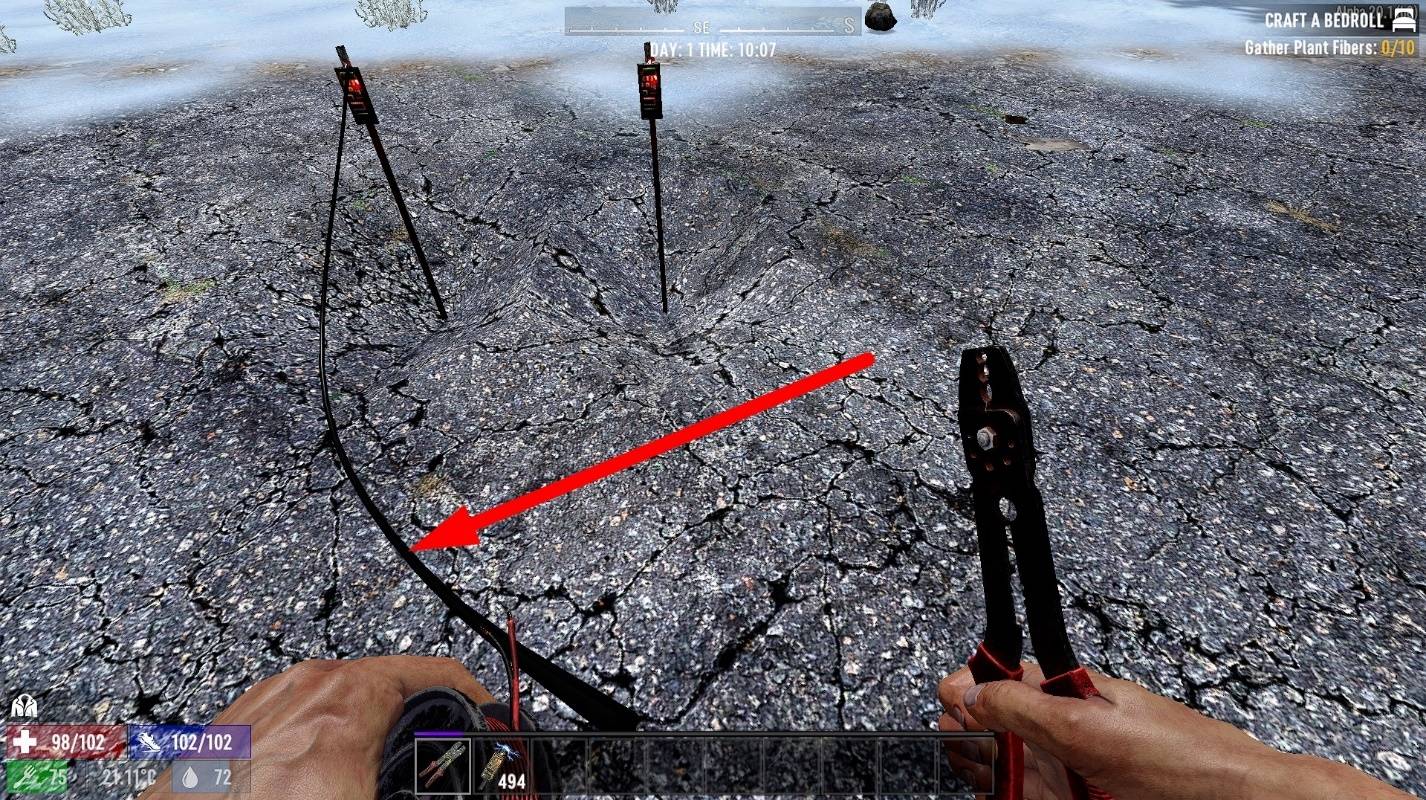
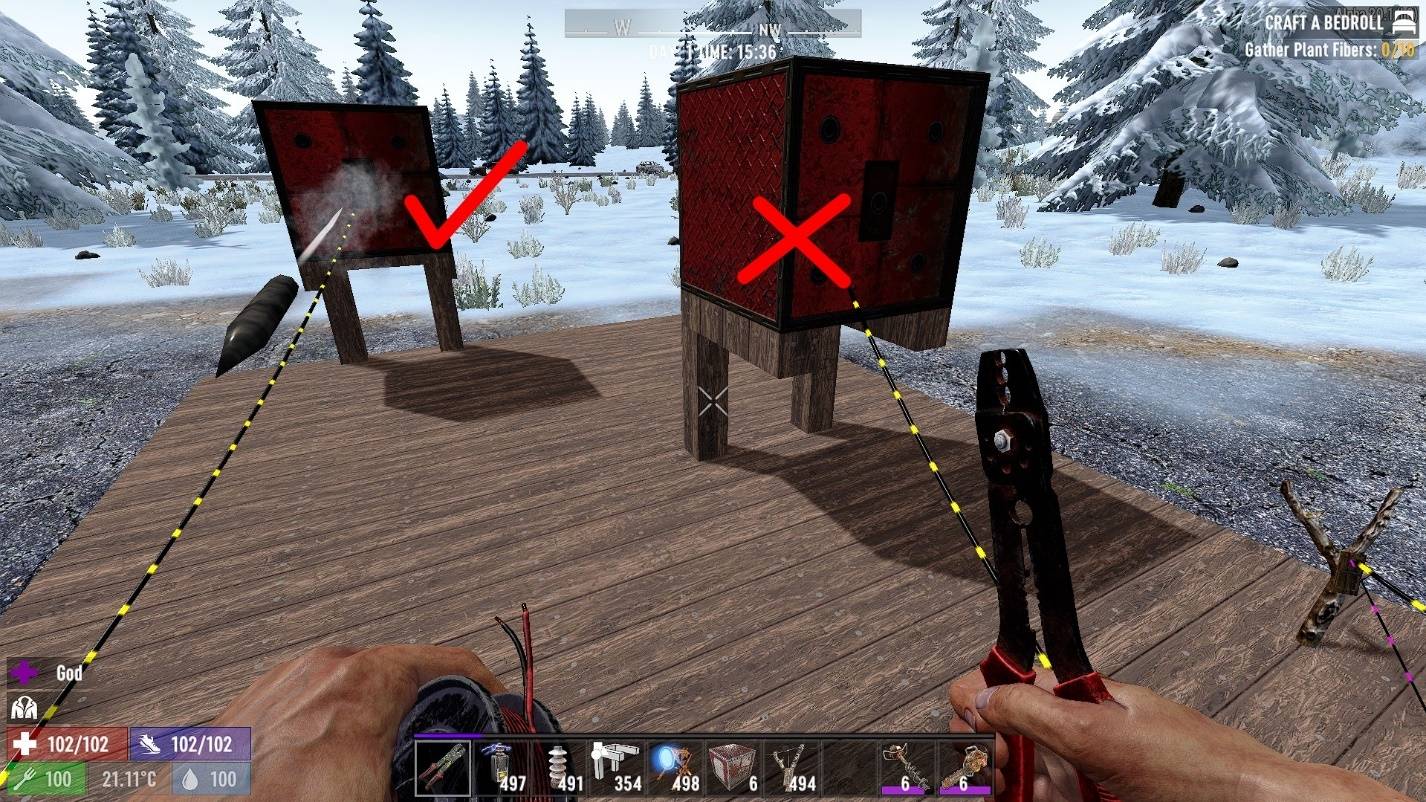
Take the Wire Tool and look at the first object.

-
Right-click and wait about 1-2 second while the connection animation plays. You will see a wire connected to this object. If you click LMB now, the wired connection will be cancelled.
Wire length is limited to about 14-16 blocks (depending on how you reach it from object to object – I got a maximum 16 blocks). -
When you look at the second object and right-click, you will create a link.
As long as you hold the Wire Tool, you will see an animation of the direction of the energy on the wire. Now it shows that the first object is the source of energy, and the second object is its receiver. This means that if the first object is a generator, its energy will power the second object, but only on the condition that wire is linked from it to the second object, and not vice versa. -
If you want to break the connection, you should look at the object-receiver (not the source!) and left-click. It will delete the incoming connection.


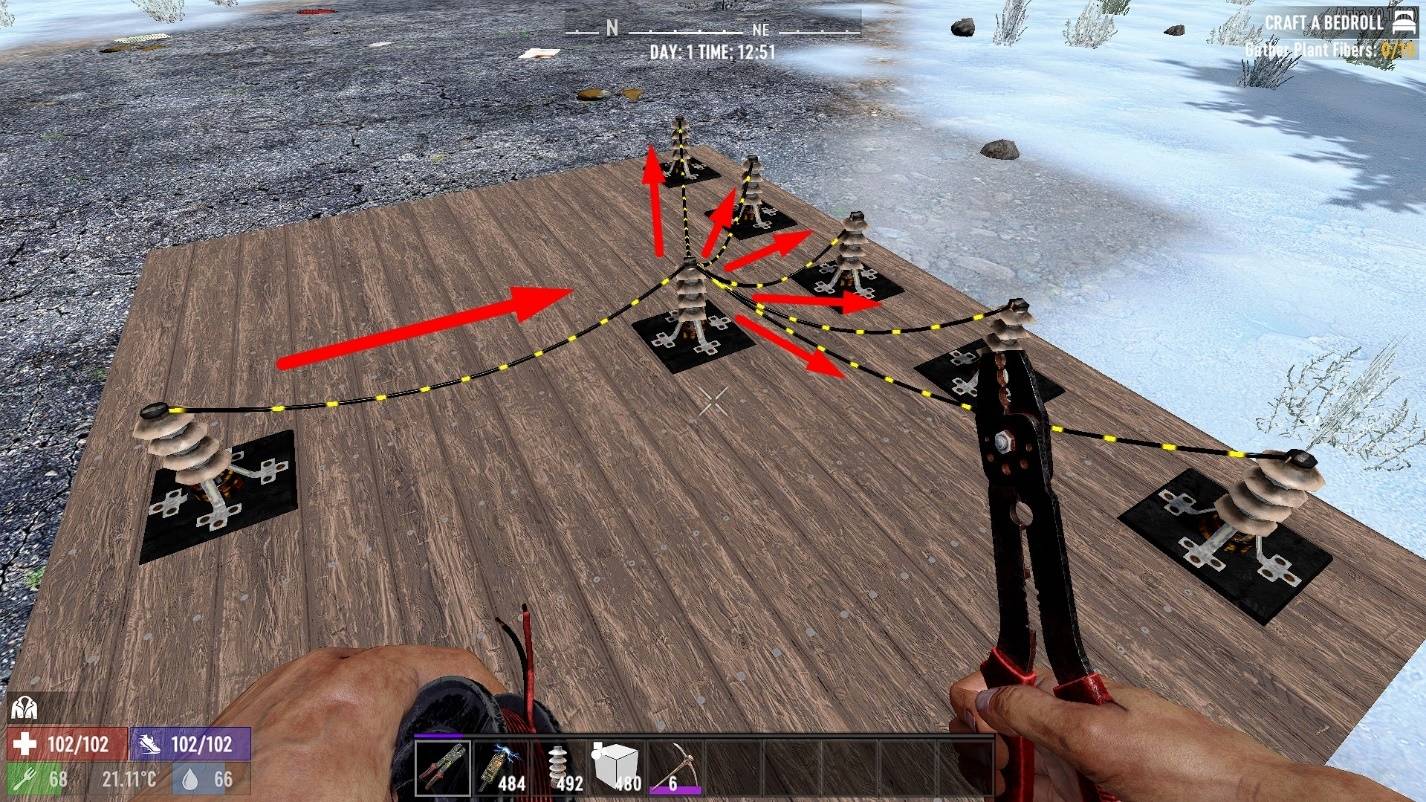
An Important Rule: one object in 7DTD can have only one incoming connection, but it can also have several outgoing ones.
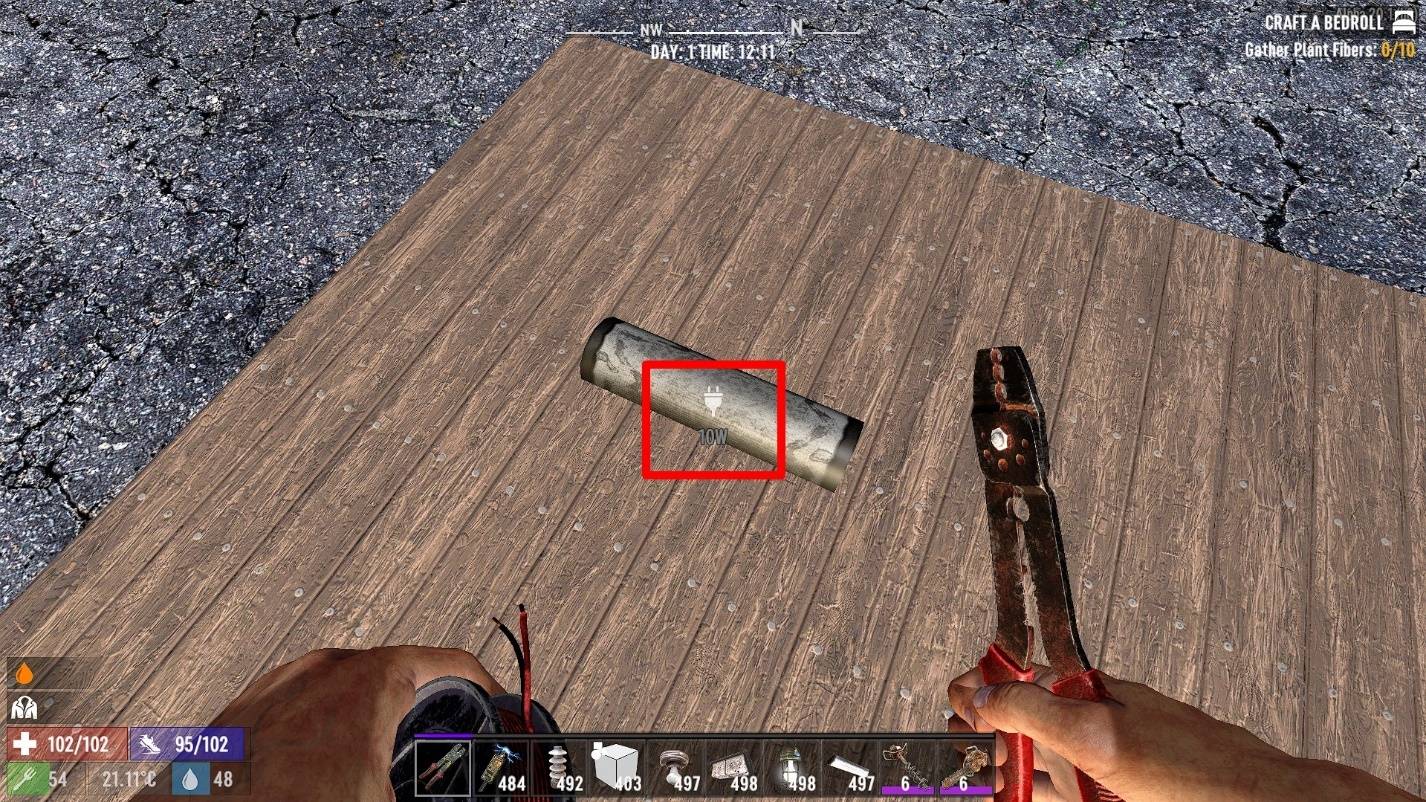
When you look at an electrical device with the Wire Tool in hand, you can see how many watts of energy it needs.
Electrical appliances and how to use them
Now we will consider how to use electrical devices in 7 Days to Die. As said above, you only need to install some device somewhere and connect a power source to it using the Wire Tool. Thus, here we will consider only the functions of electrical devices and simple schemes for creating protection systems.
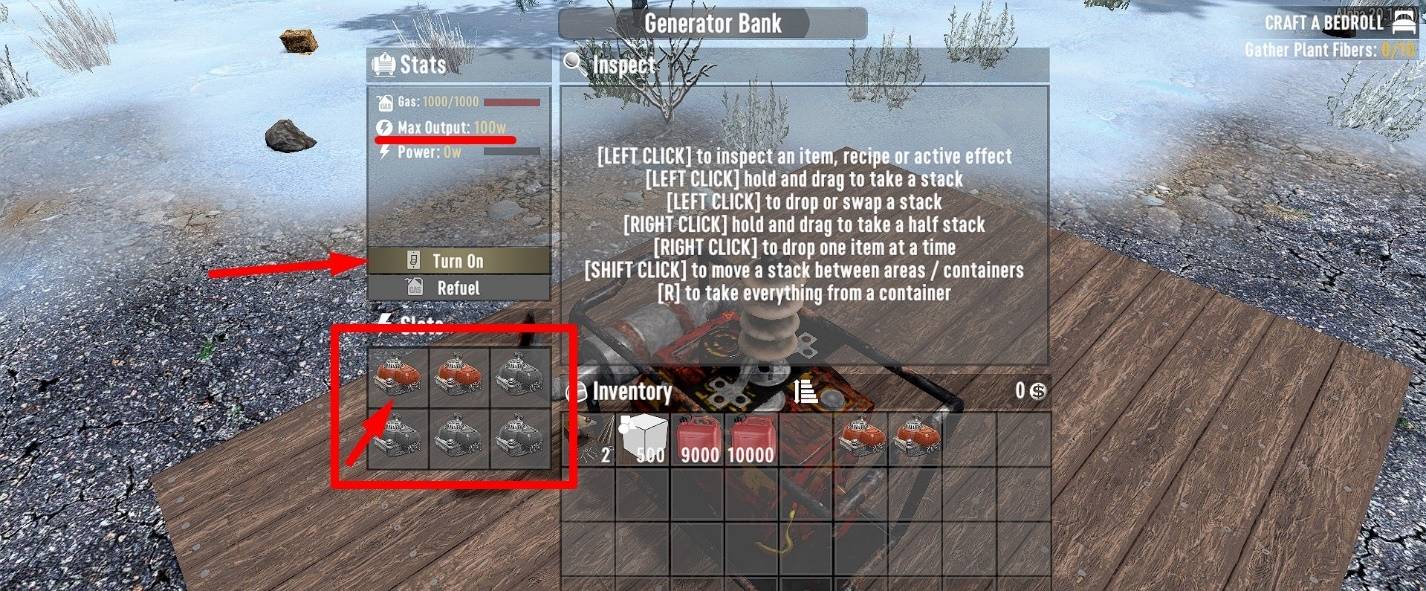
Generator Bank
This is the basic source of energy. It runs on gasoline.
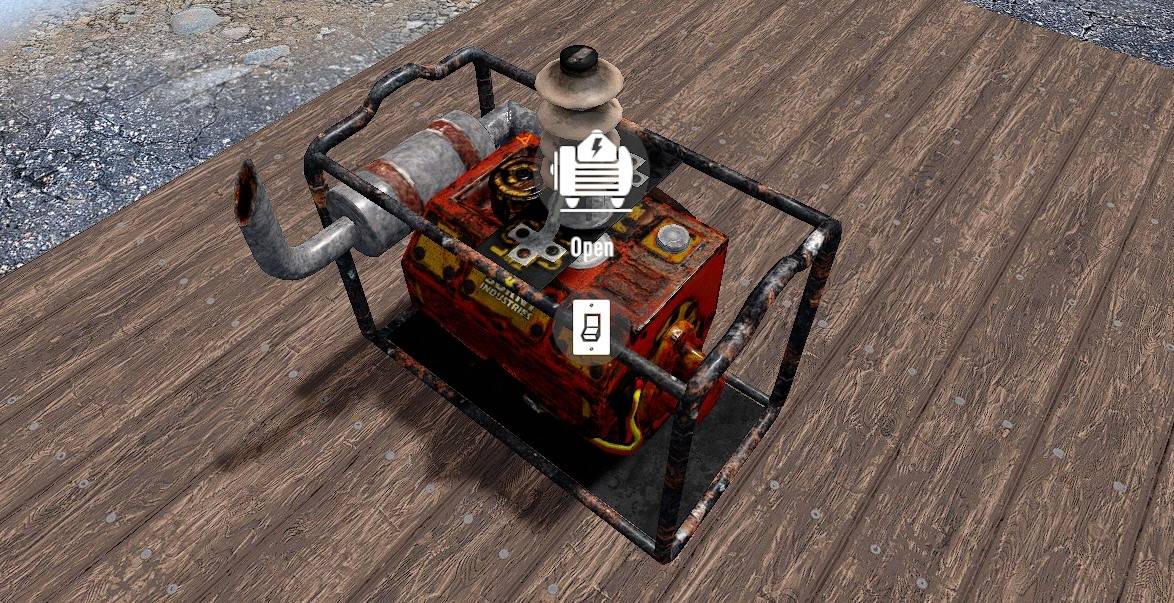
But it needs at least one engine to work. Engines are installed in special slots in the Generator Bank interface. Each engine produces 50W (watts of energy). You can install up to 6 engines in it and it will give you 300W output power if you turn it on.
Solar Bank
The second source of energy, which is more difficult to obtain, is the Solar Bank. It works like a Generator Bank, but only during the daytime and without any fuel.
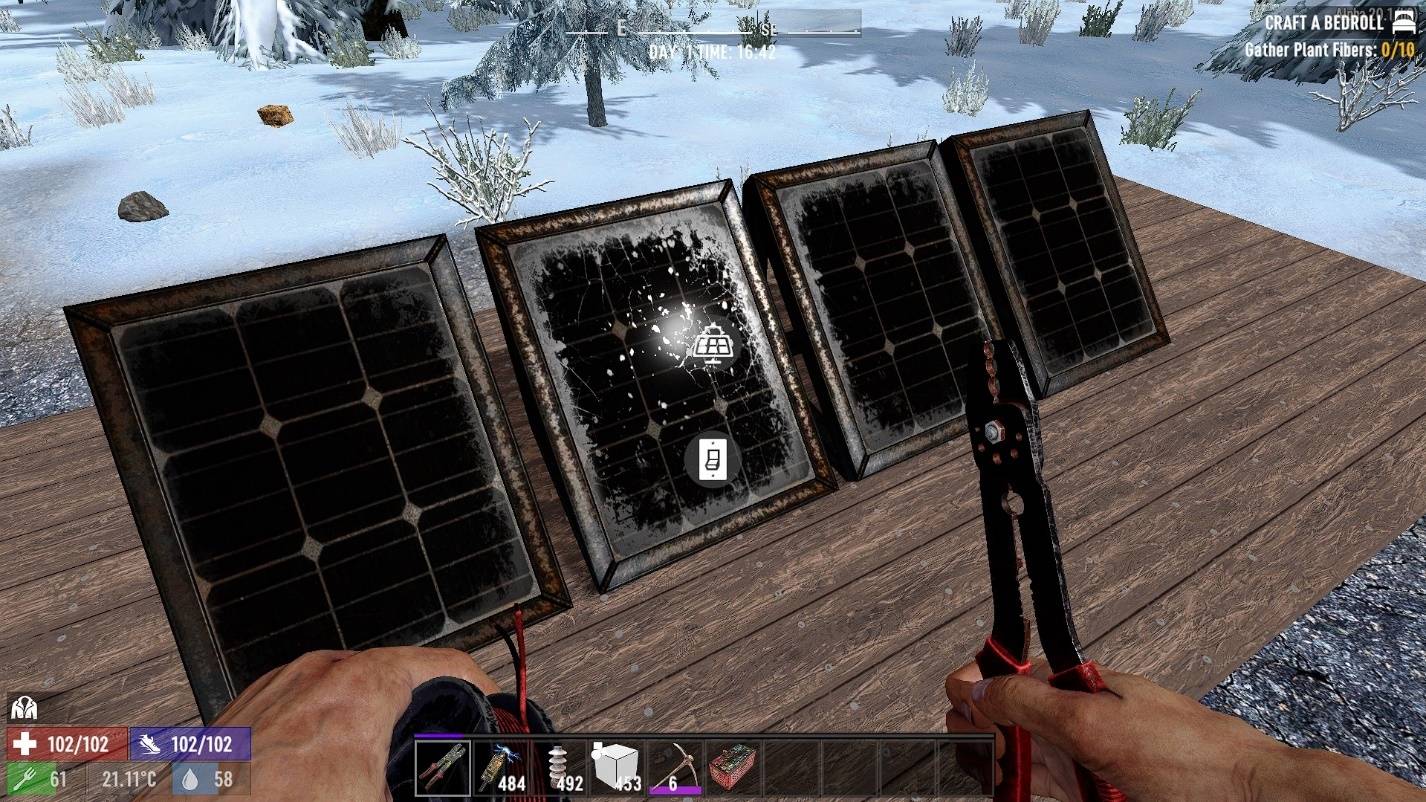
For it to work, it is necessary to install Solar Cells in special slots – the same as the engines installed in the Generator Bank. After that, it can be turned on.
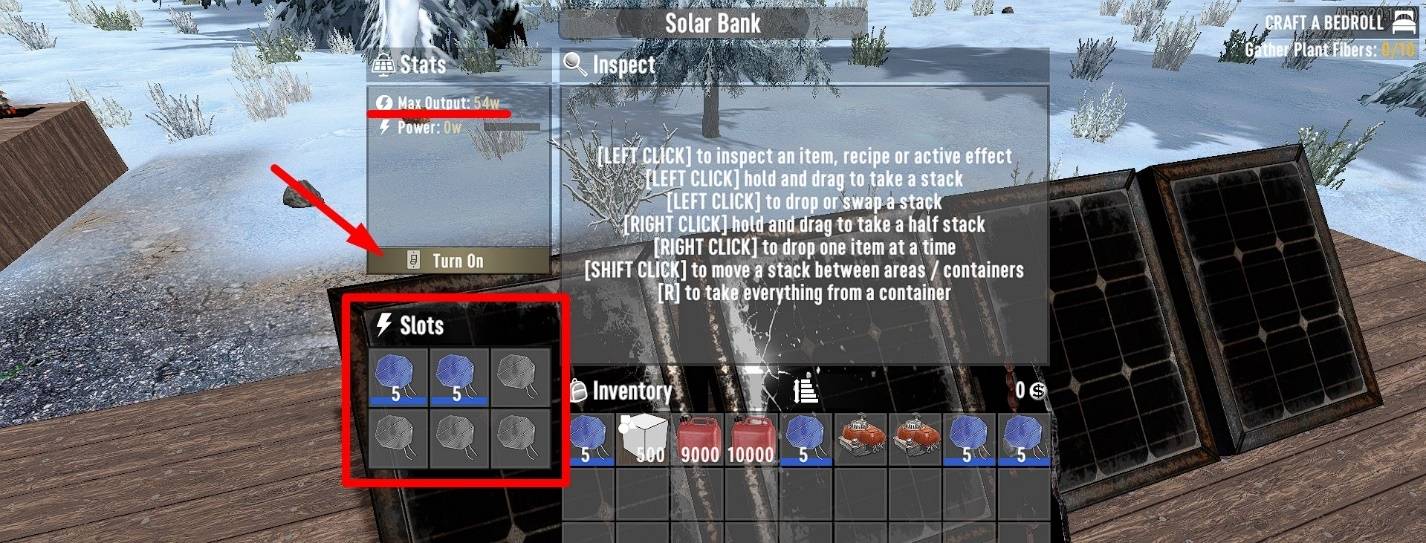
Each Solar Cell will produce 27W of energy. You can install up to 6 items on it and they will generate a total of 162w.
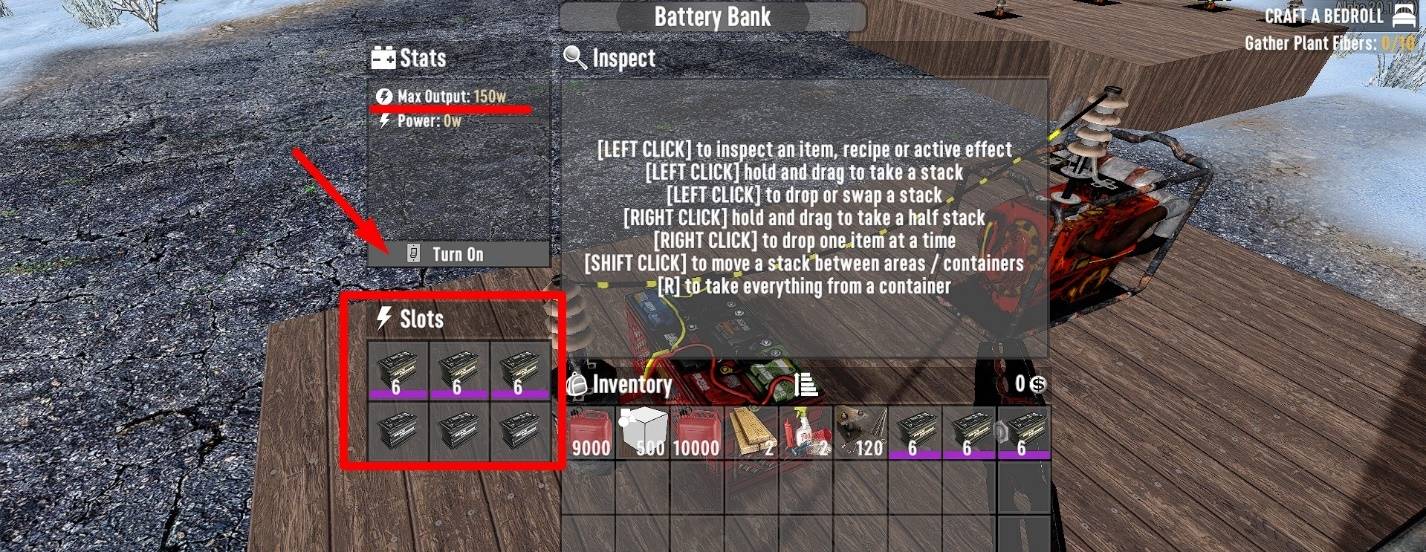
Battery Bank
But the energy has to be stored somewhere. Especially if you use Solar Bank to generate electricity because it doesn’t work at night. That’s why you will need a Battery Bank.
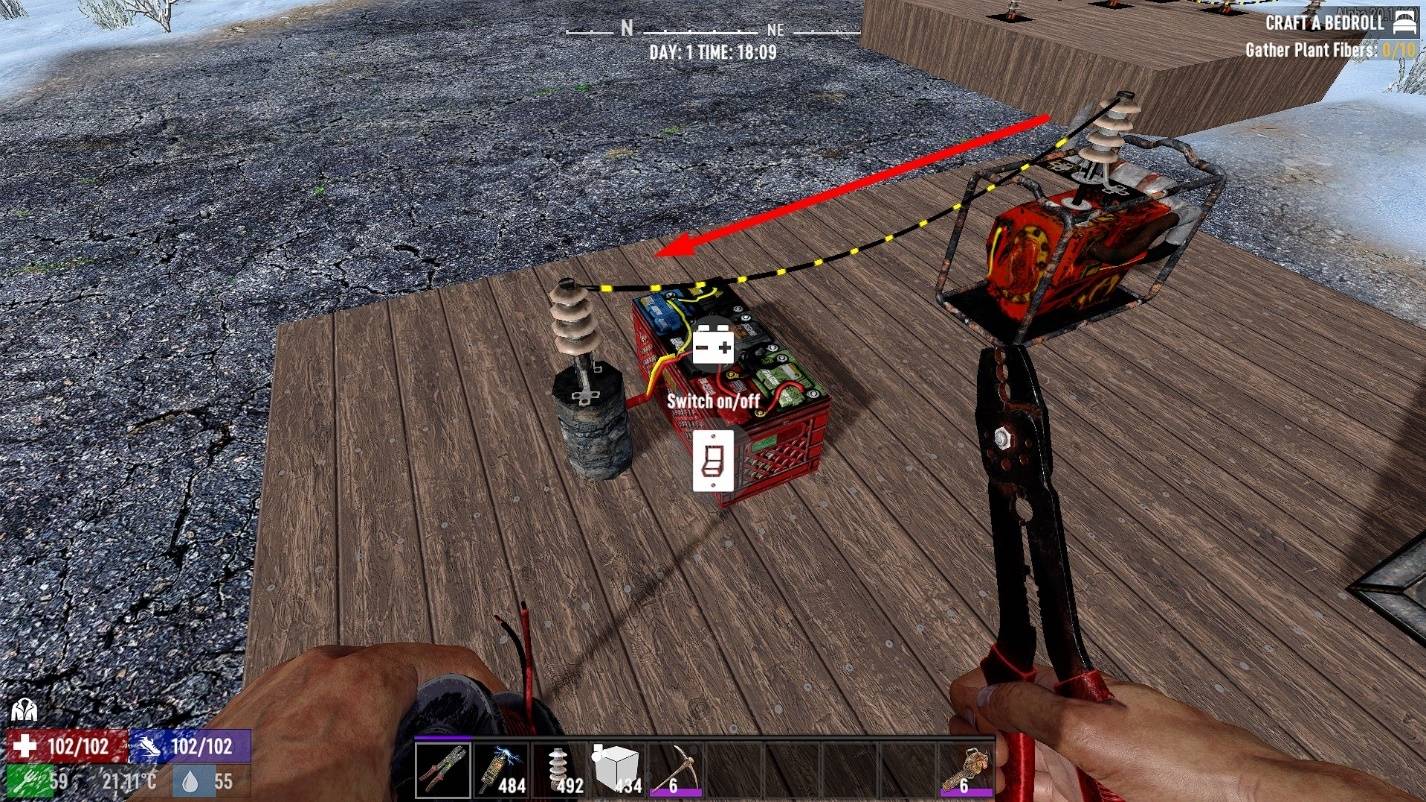
This is an energy storage device that uses Lead Car Batteries. You can install up to 6 Lead Car Battery on it, each of which will produce 50w. It is not known, how much energy a Lead Car Battery can store. But the better the item, the more energy can be stored in it.
Place the Battery Bank nearby to your generator and connect it with the Wire Tool. Don’t forget that the connection must proceed from the generator to the energy storage, and not vice versa.
Lamps
The simplest electrical appliances are lamps. They just glow and nothing more. Now we have four electrical lamps.

You can connect multiple lights to a power source by connecting them in series with each other.
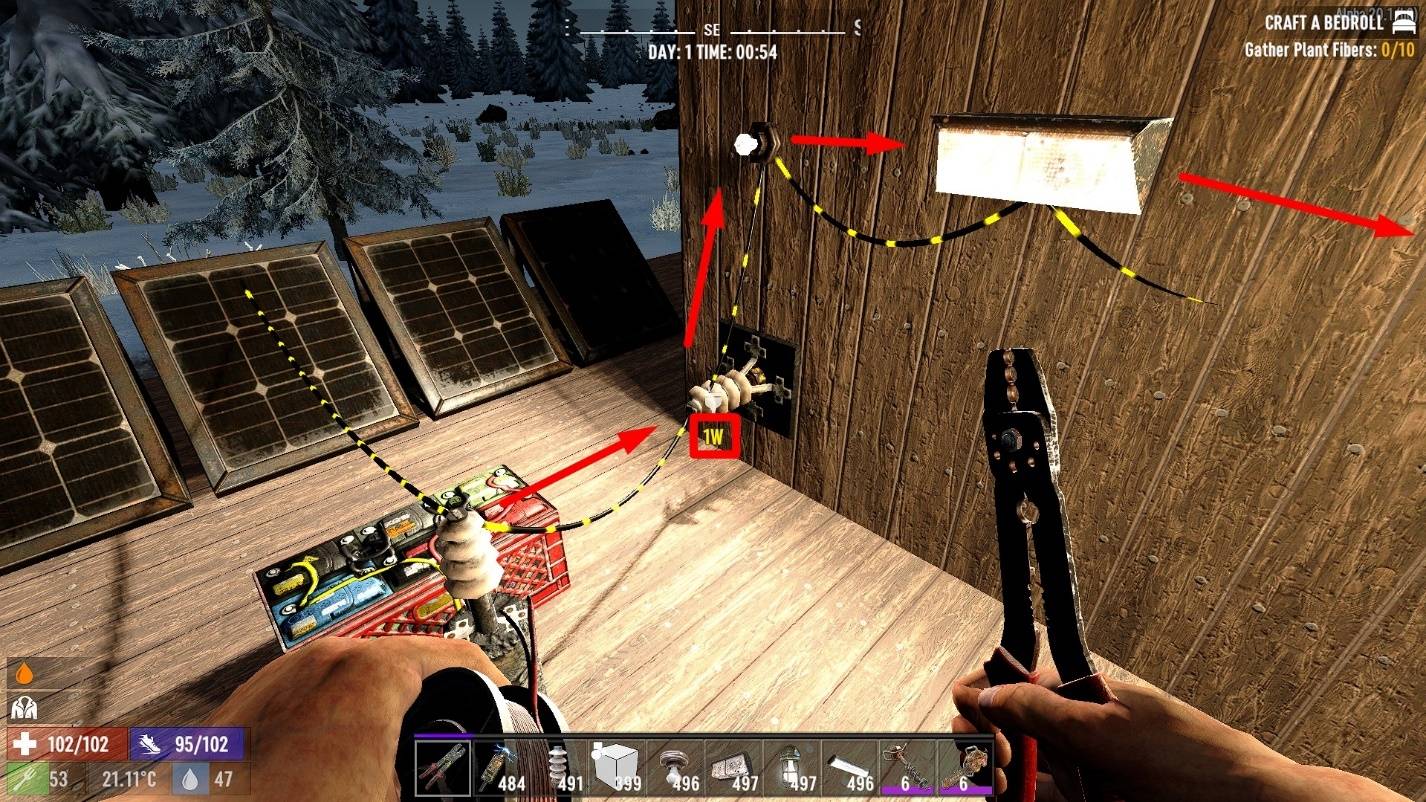
Electric Wire Relay
This item is used to place wires and requires 1w. Just place it somewhere and use it to create neat wiring.
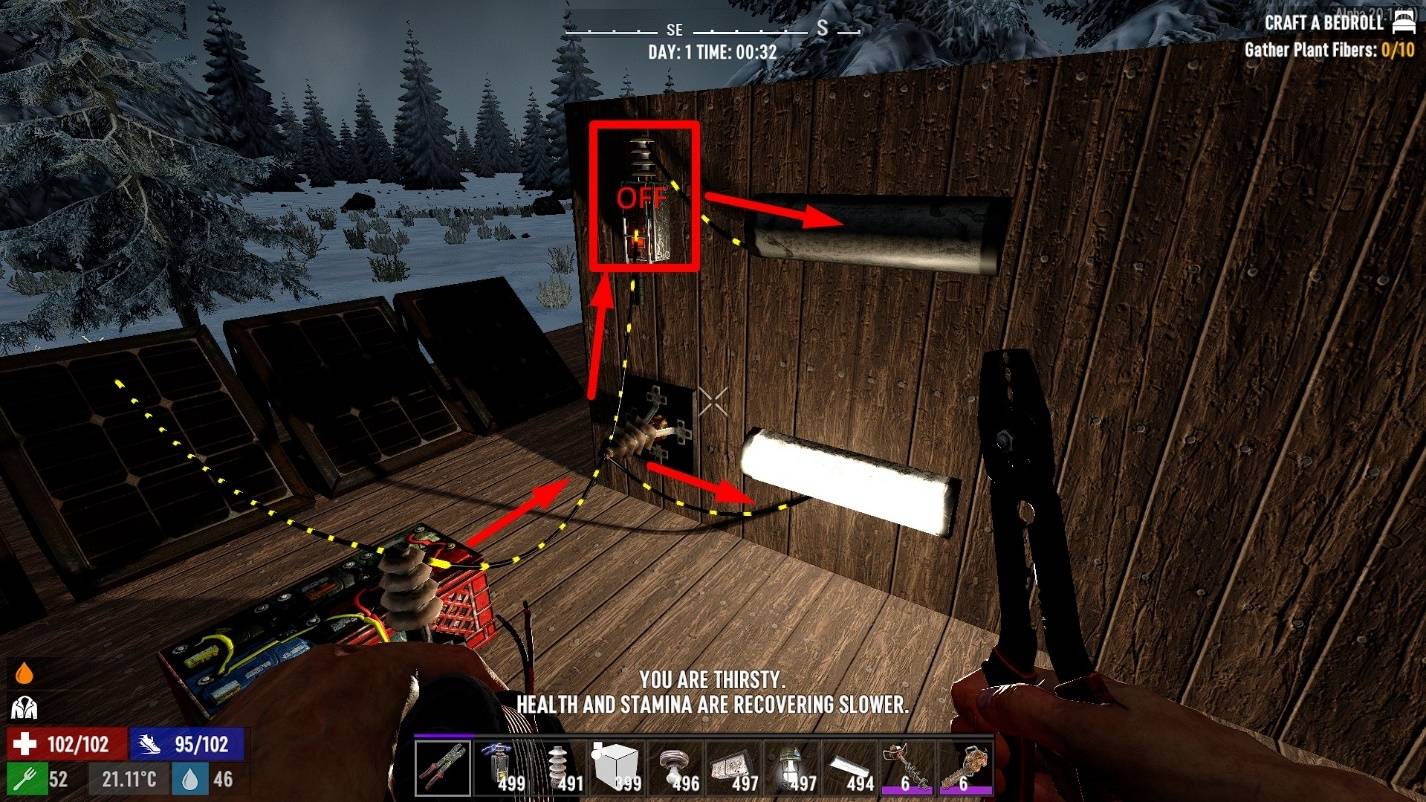
Switch
The next device is the Switch. This is a simple power switch that can be used to turn connected devices on/off.
Spotlight
A powerful light source that can be aimed after installation.
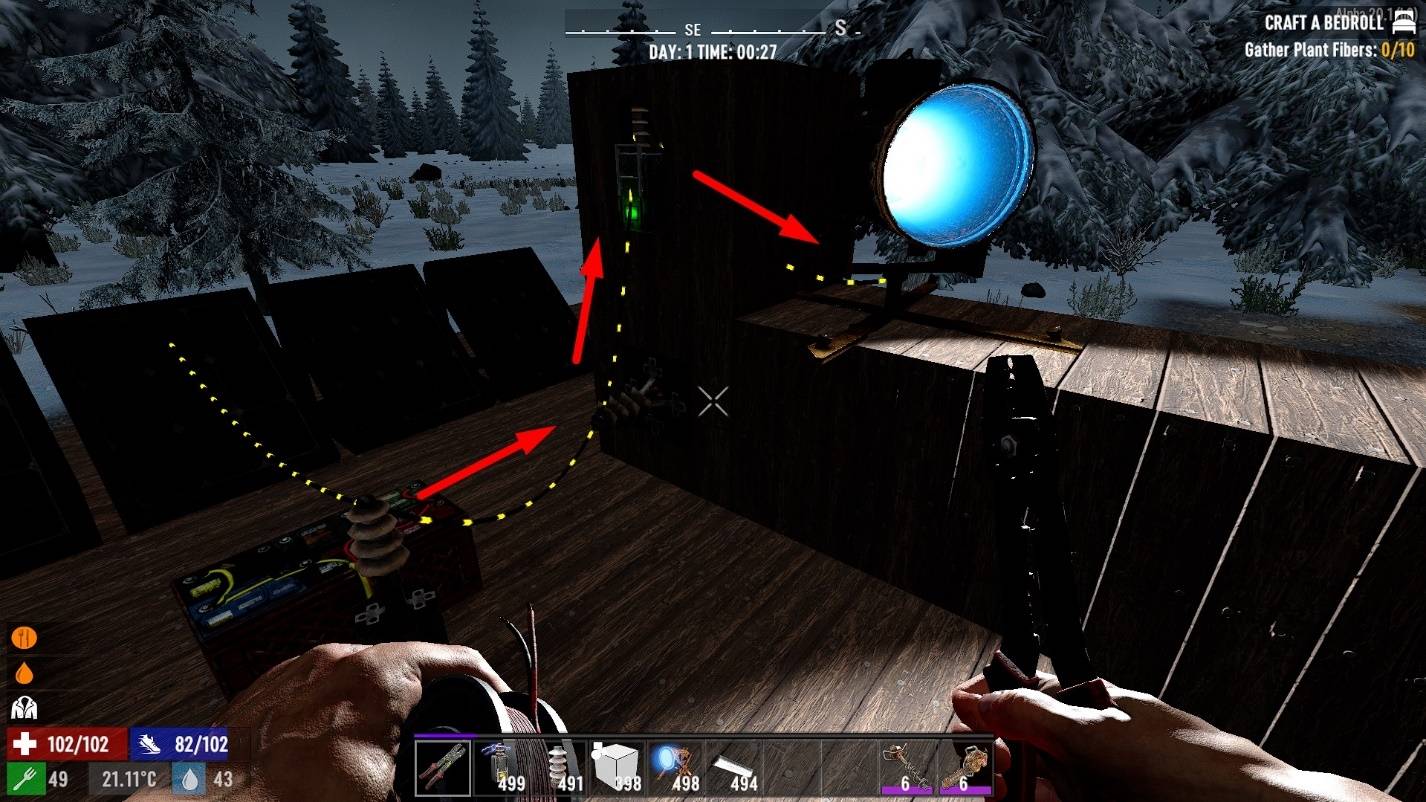
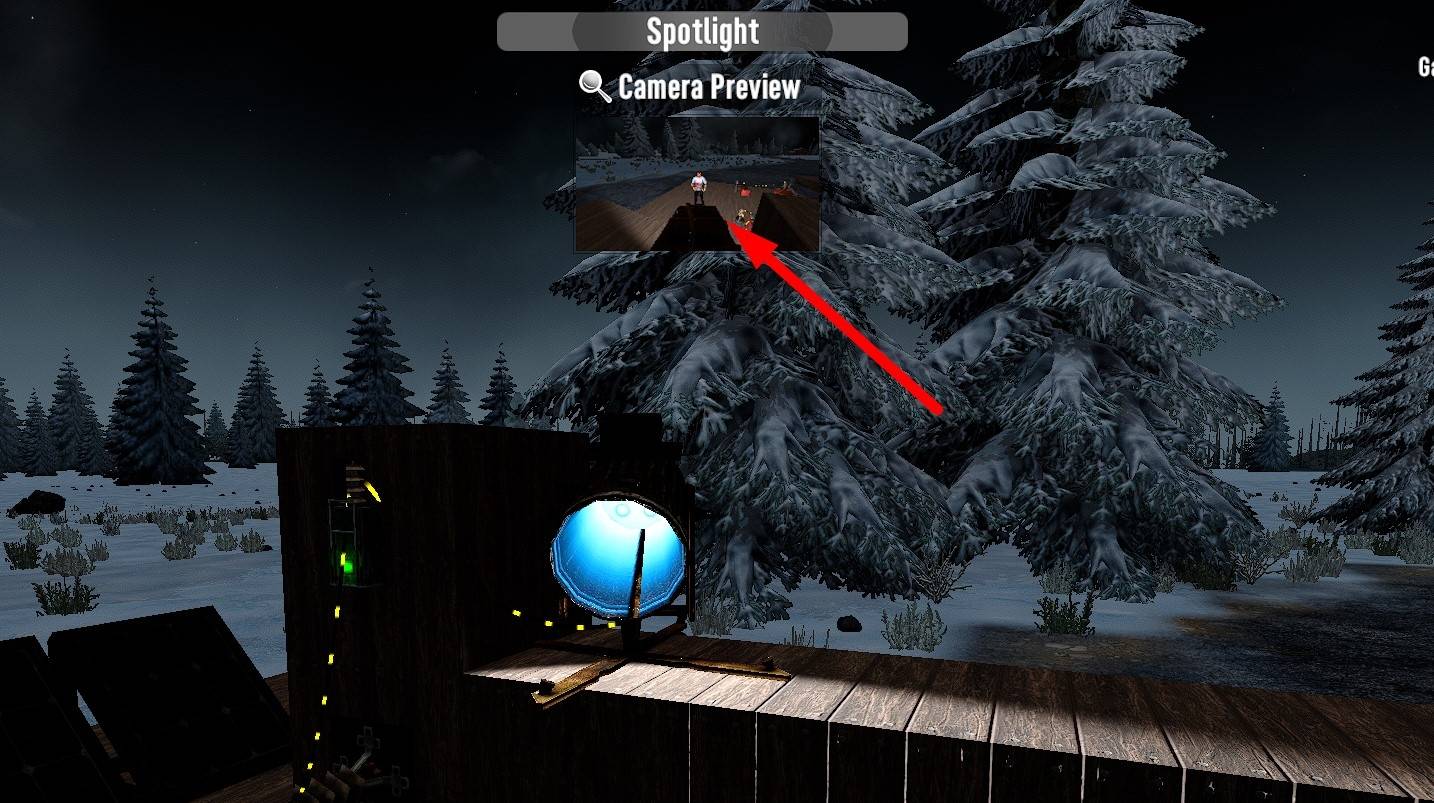
First connect the Spotlight to a power source, and then look at it and hold the “E” key to open menu.

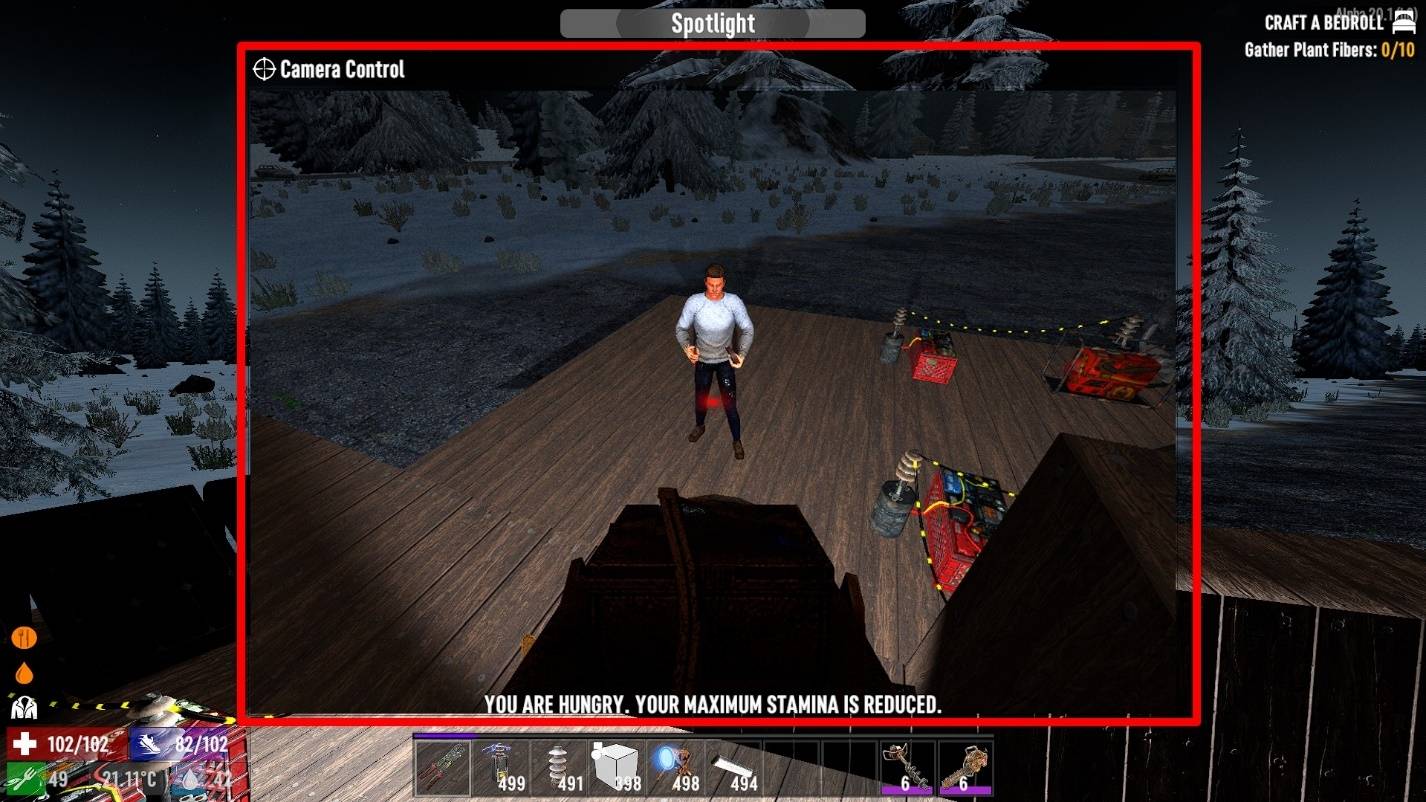
Then select “AIM” and click LMB on the camera screen.
Now you can direct the Spotlight wherever you want. Keep this mechanic in mind because the turrets will aim the same way as the Spotlight.
Blade Trap
An electrical trap that deals melee damage to zombies within the blades. Place the trap anywhere, connect it to a power source and enjoy cutting zombies. But keep in mind that zombie cuts reduce the durability of the trap, and when it gets too low, the trap will stop.
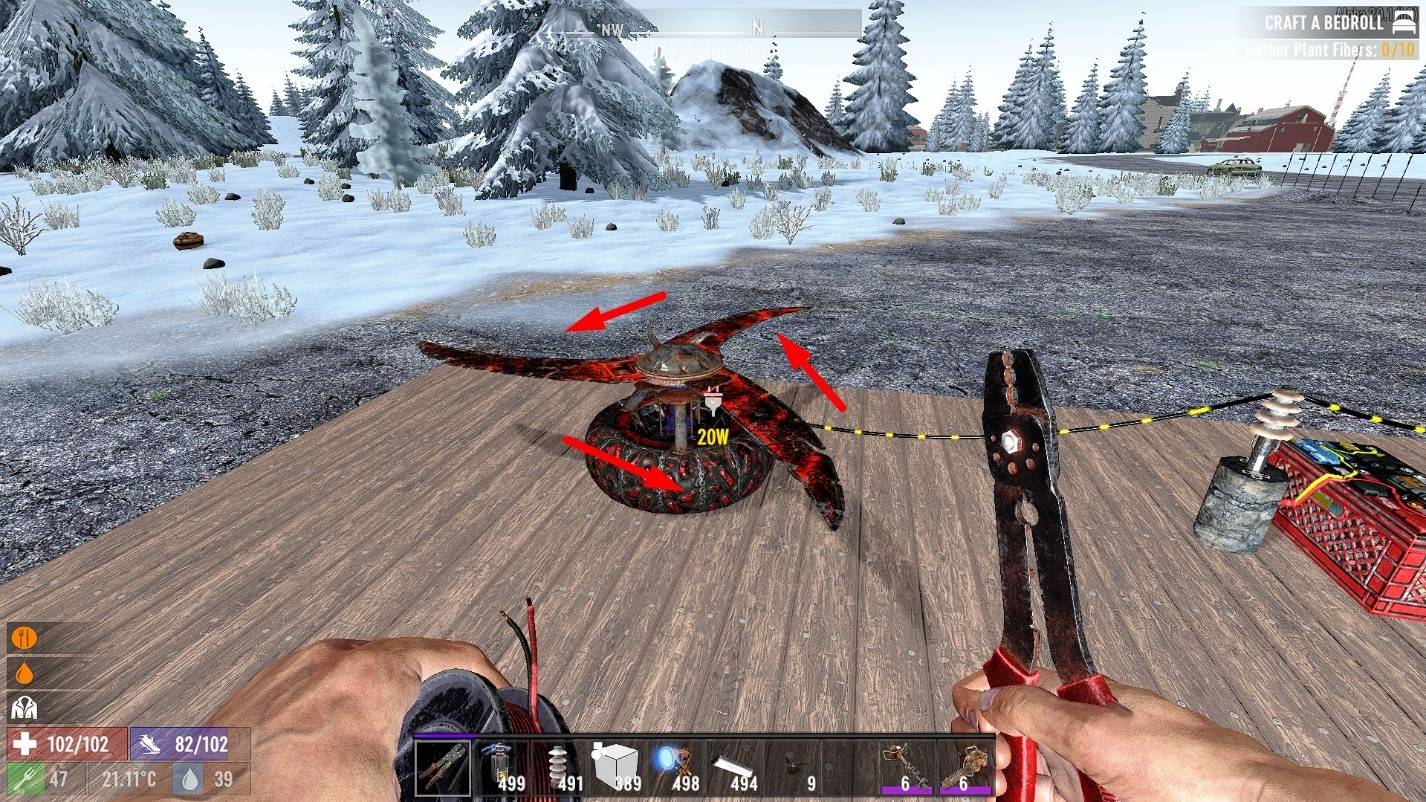
To repair the Blade Trap, you will need Forged Steel. So use this trap carefully in the early stages of the game, because it will be difficult to find steel ingots.
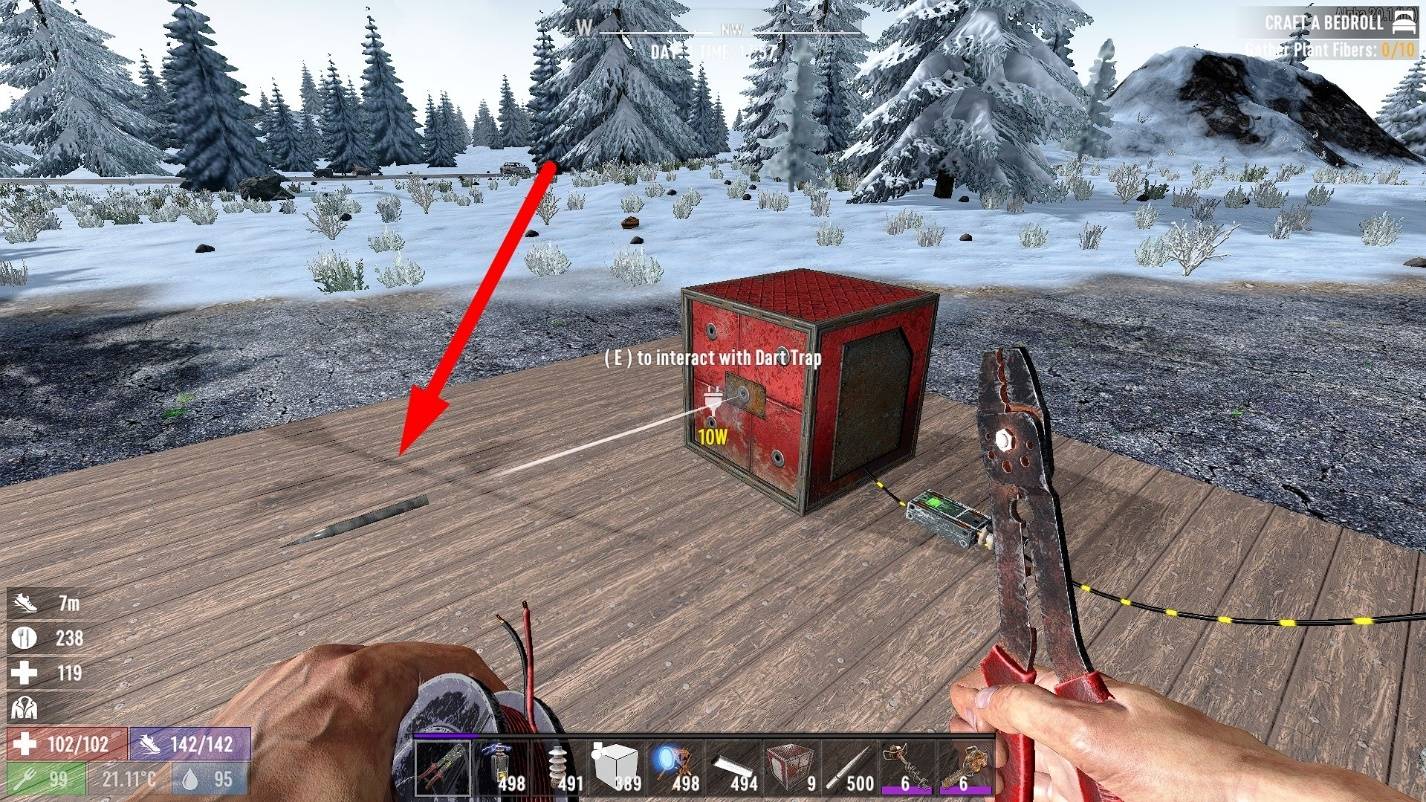
Dart Trap
The next trap is the Dart Trap. This is just a block shooting darts from one side. You can see this side when you try to place it somewhere.

Ammo for this trap is Iron Darts. Put the ammo in the special slots and make sure the “Lock Ammo” option is active.

Then connect the trap to the energy source. Now it will shoot darts until they run out. We will fix it later, don’t worry.
Just remember that all turrets in this game load the same way.
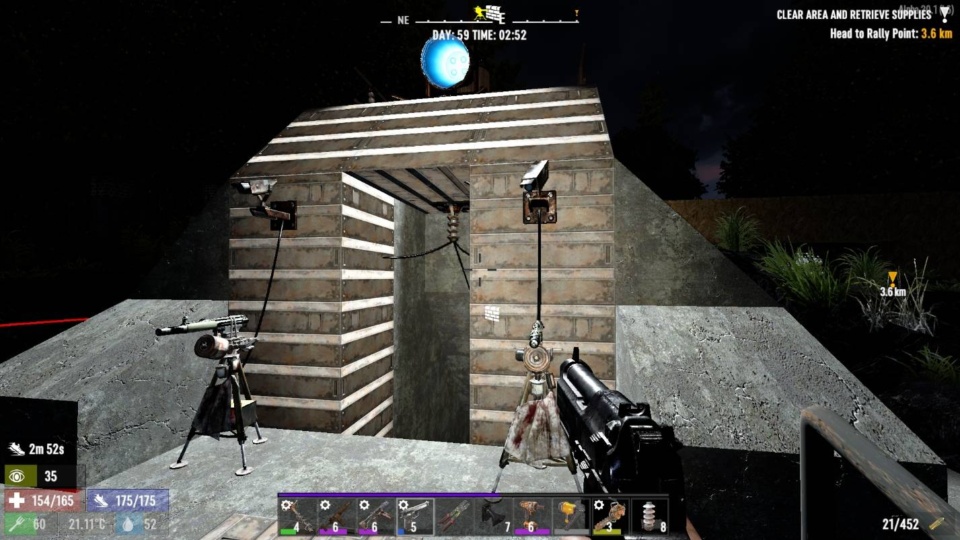
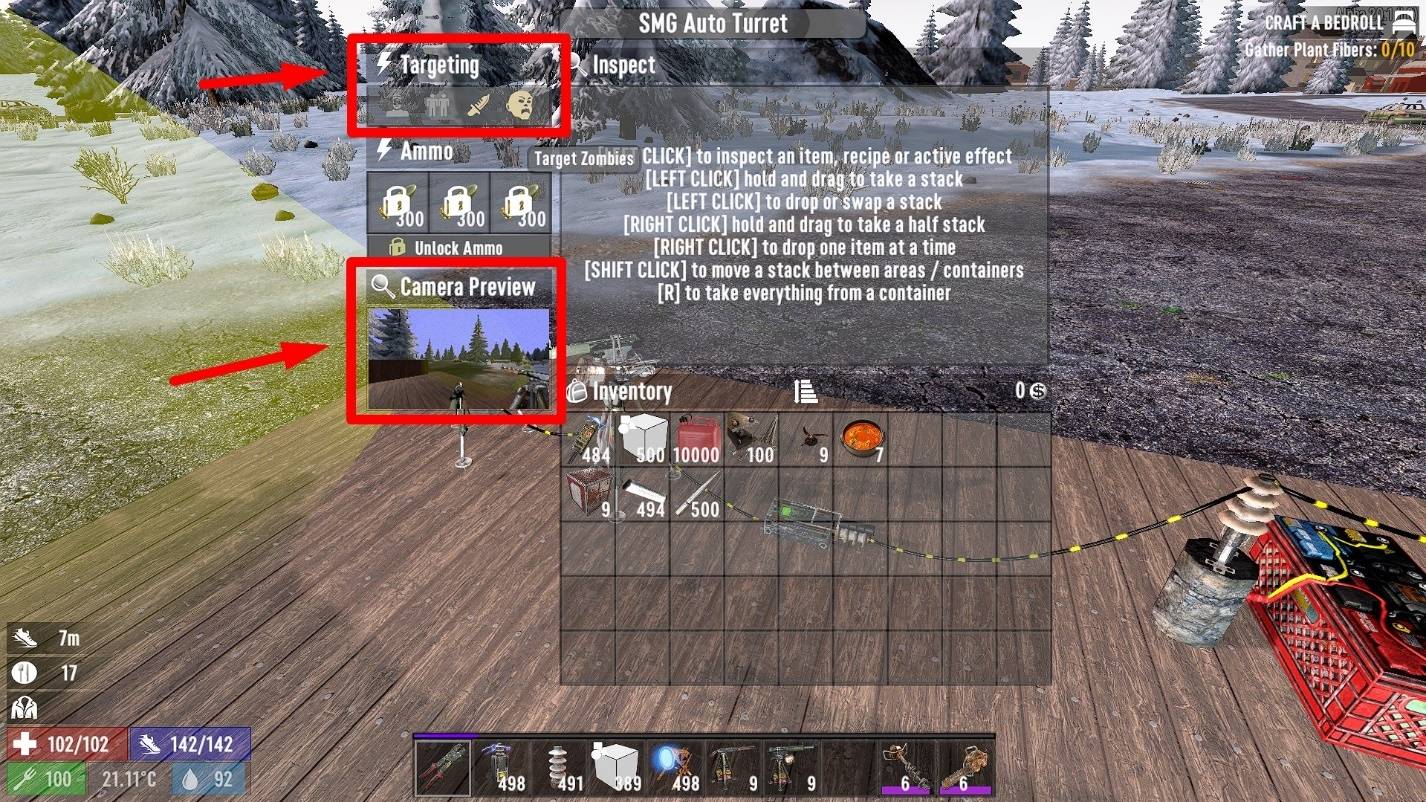
SMG and Shotgun Auto Turrets
Gun turrets will fire at zombies when they enter their detection area. You can see this area by holding the Wire Tool in your hand.

The turrets require ammo to shooting: 9mm for the SMG Turret and Shotgun Shells for the Shotgun Turret. In the turret interface, you can also specify which targets it will kill. And you can aim the turret like a Spotlight if you need to.
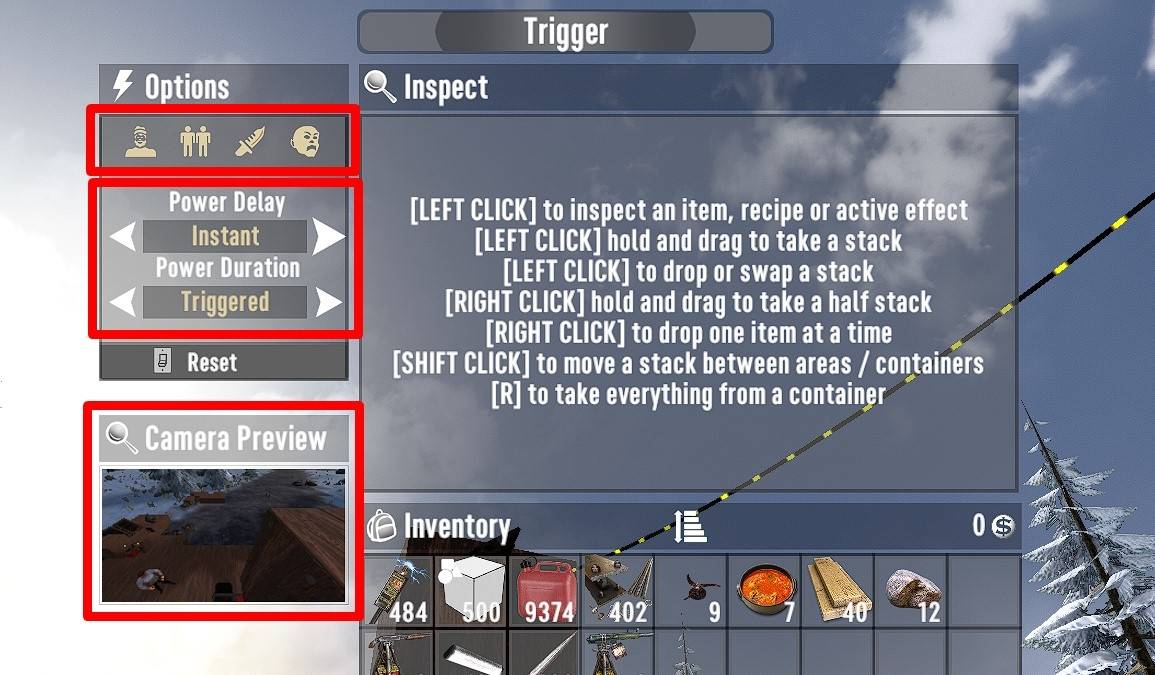
Trigger Plates
This device is used to automatically activate your protection systems. When someone step on it, it turns on connected traps or appliances.

There are two types of Trigger Plates: 1×1 and 1×5. But they work in the same way: someone steps on it – the plates begin to conduct electricity.

This is necessary so that your protection systems do not work continuously, because they will take a lot of energy. You can also adjust the Power Delay and Power Duration of the Trigger Plates.
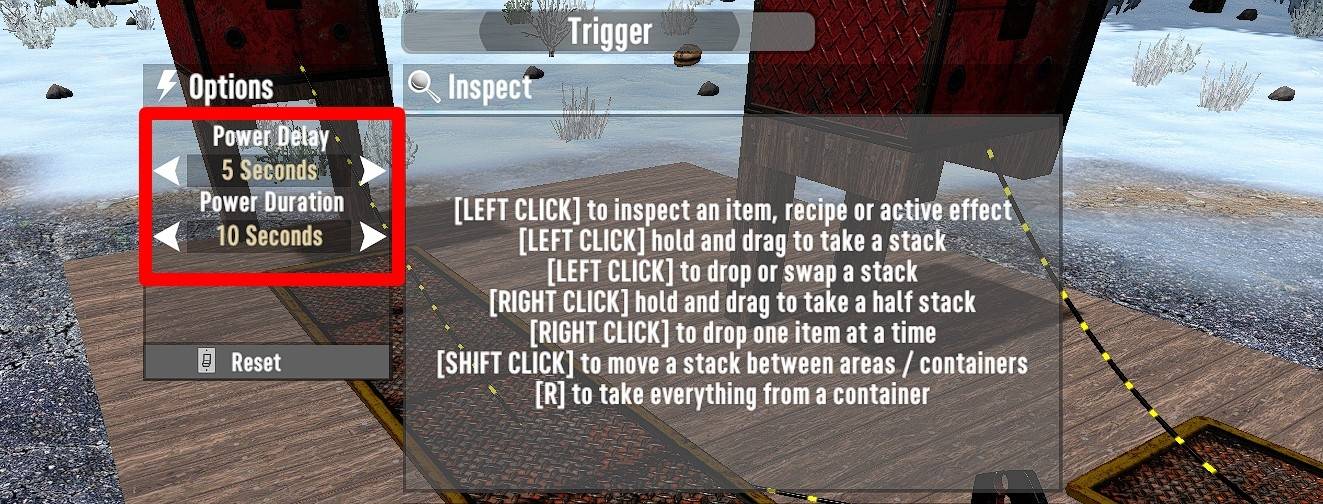
If you set the Power Delay to “5 second”, the trigger will fire 5 second after someone steps on the plate. If you set the Power Duration to “10 second”, this means that the trigger will be active until the entity is on the plate, and another 10 second after the entity get off.
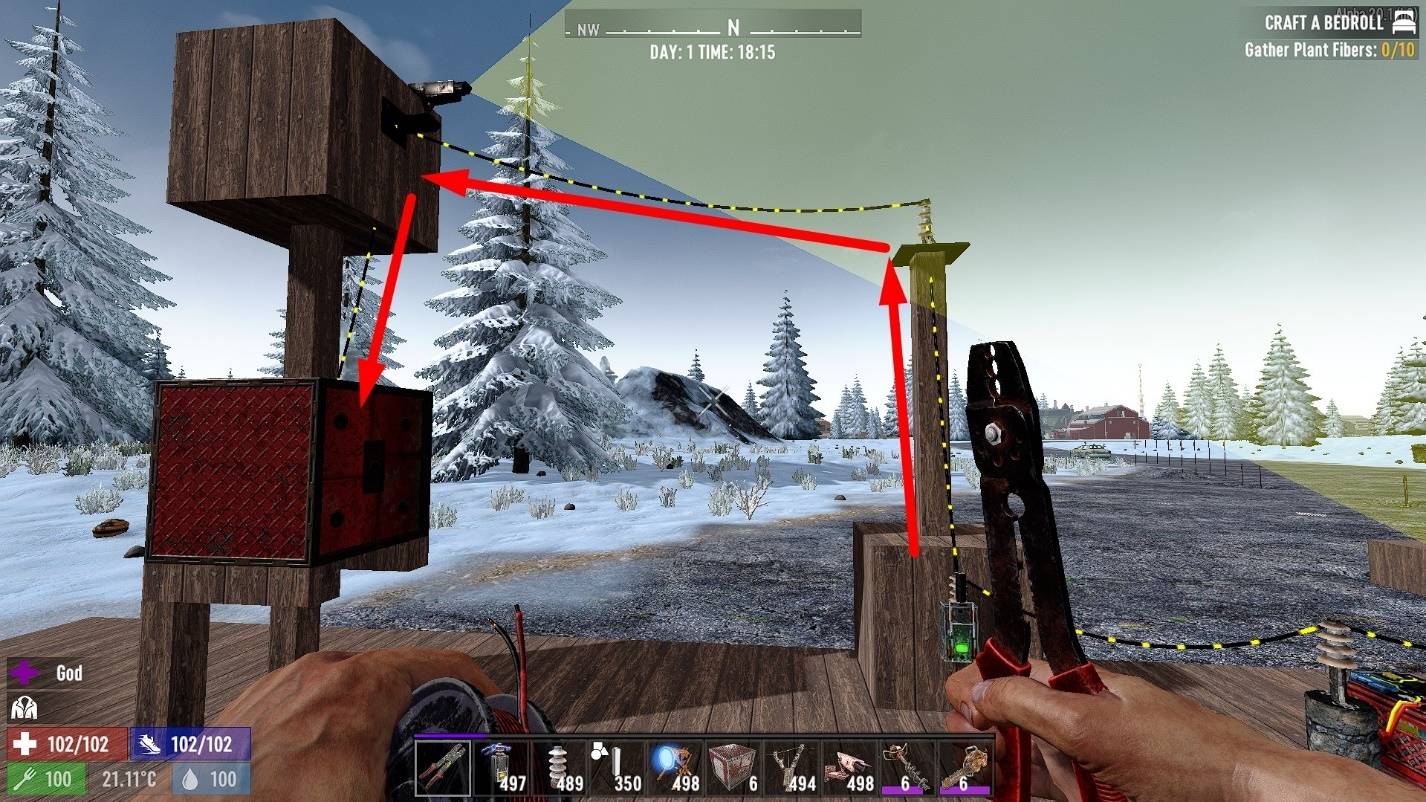
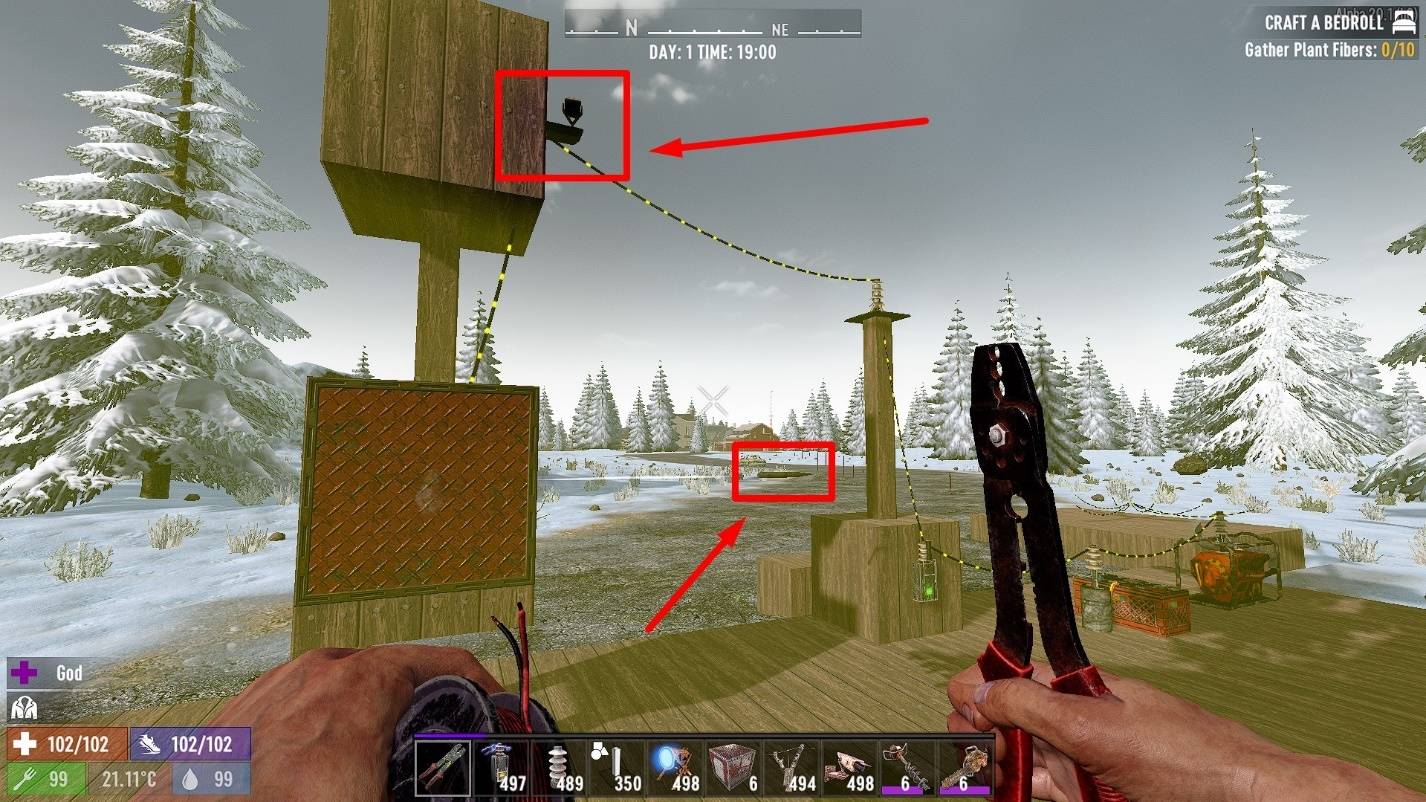
Tripwire Post
Tripwire Post works the same as the Trigger Plates. You need to place two or more items and connect them sequentially to each other using the Wire Tool. Current is applied to the input element, but for it to work, the traps must be connected to the last element of circuit. If you connect traps to any of the middle posts, they will only work if the entity activates the preceding tripwire segments.
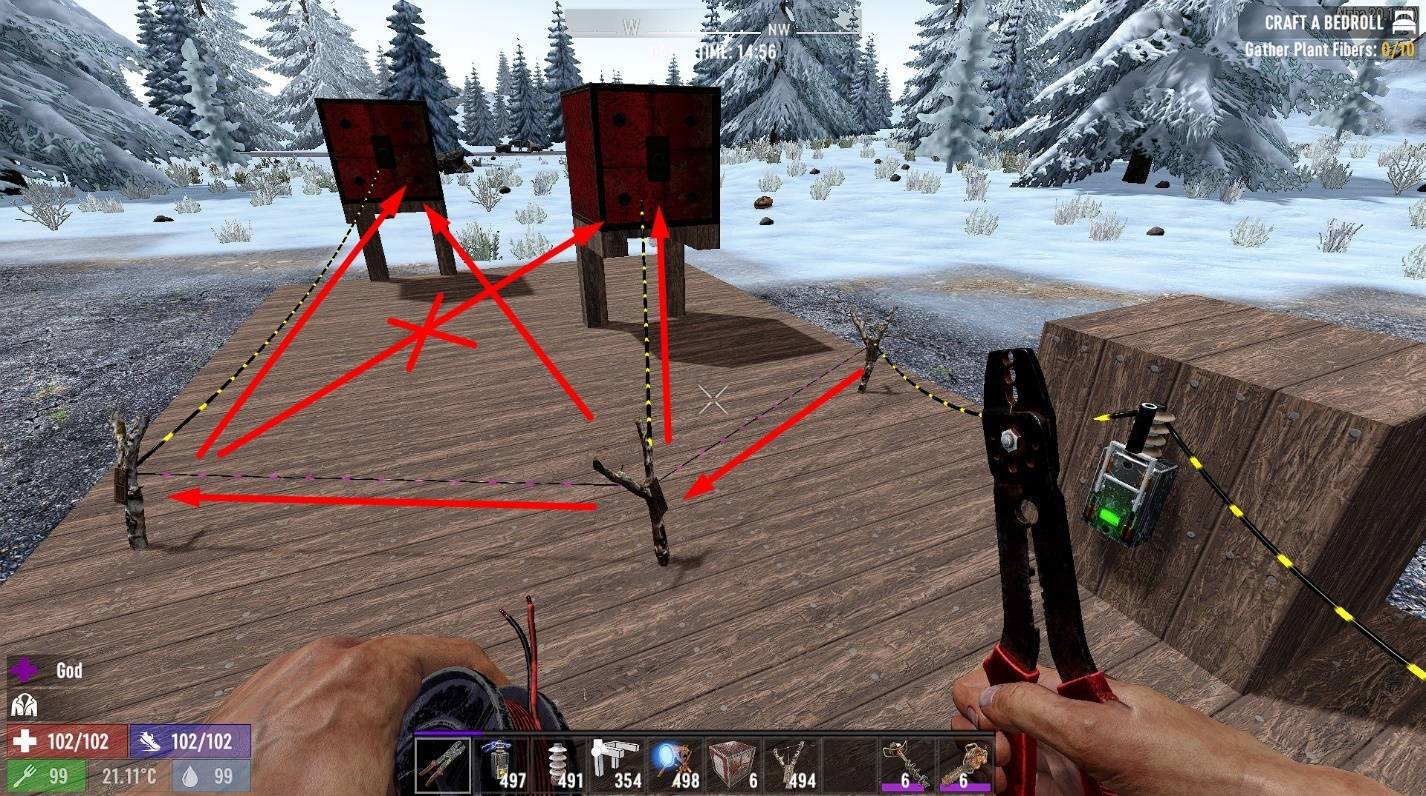
In the screenshot example, the right wire segment will trigger both Dart Traps. But the left tripwire segment will only fire the left Dart Trap because that segment is not connected to the right one.
Tripwire Posts in 7 Days to Die has the same settings as Trigger Plates.
Motion Sensor
The Motion Sensor is a camera that react to in-game entities. If the camera detects entities specified by the player, it will trigger connected appliances.
The viewing angle of the camera is 90 degrees from the original position. The original position can be set in the camera interface, just like with Spotlight. You can also specify which entities the sensor will detect. Other settings are the same as Trigger Plates and Tripwire Posts.
Thus, if we tilt the Motion Sensor to the right a little bit, it will be able to detect us at an angle different from its base angle.
Speaker
The Speaker will emit a siren if it is turned on. This is worth using with detection devices. For example, you can connect a Speaker to a Motion Sensor. And when the camera detects the specified entities, the Speaker will start emitting a siren.

This component has no interface.
Electric Timer Relay
Thanks to this component, you can set time frames for your systems. In its interface, you can specify “Start Time” and “End Time”. The relay will only pass current between these timestamps.
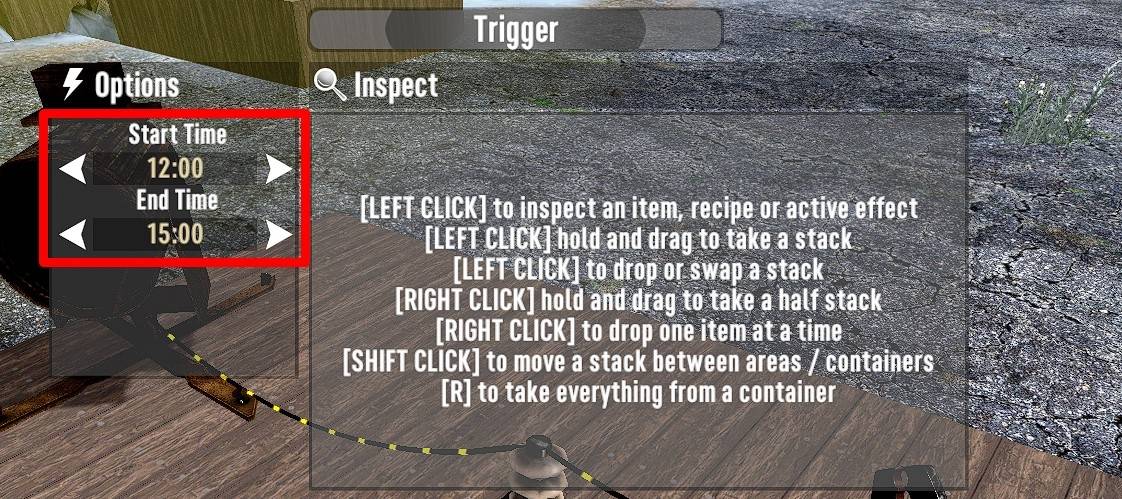
For example, if we set “Start Time” to 12:00 and “End Time” to 15:00, the relay will start to pass current at 12:00 and end at 15:00.

This can come in handy if you will only want to turn on your protection systems at night.
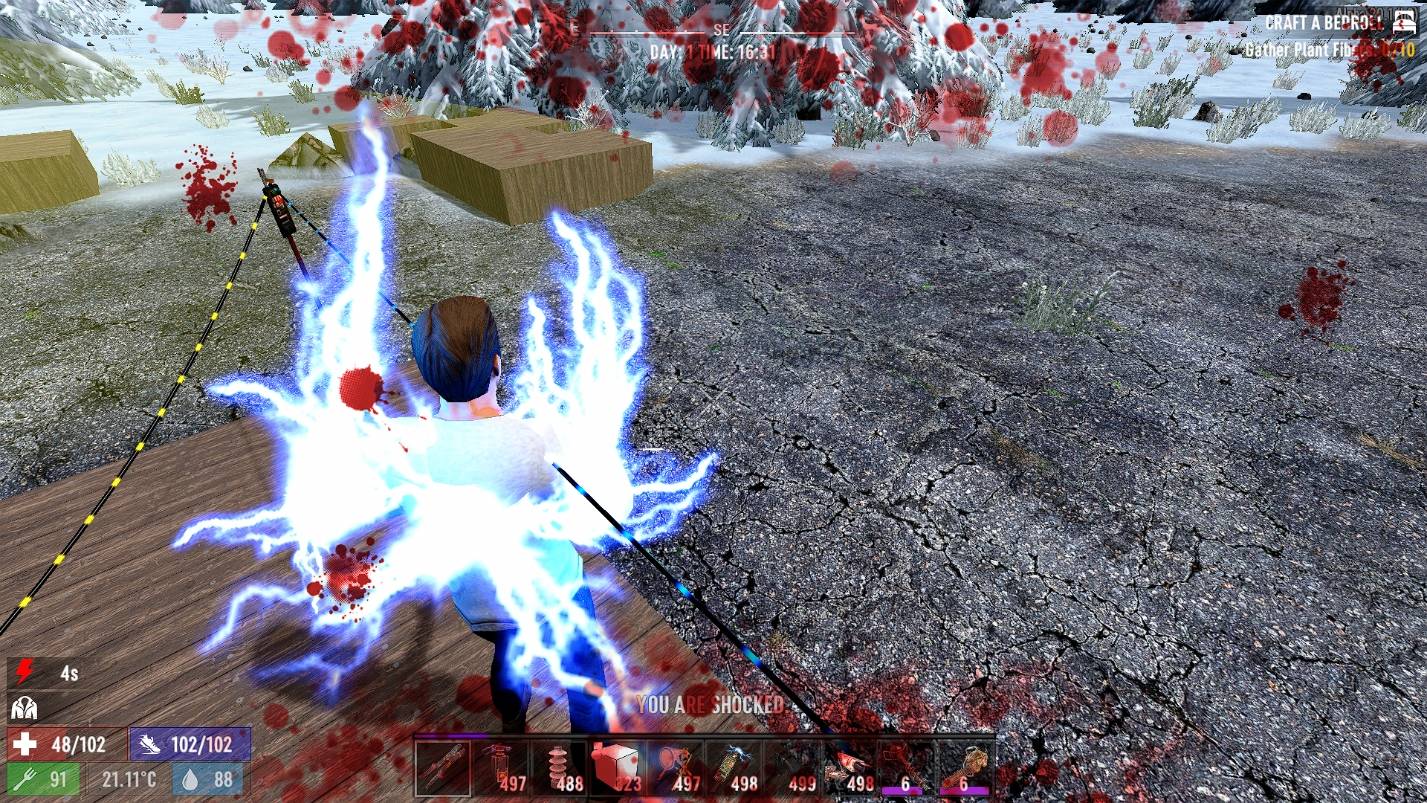
Electric Fence Post
Electric fence will shock everyone (including player) who comes into contact with it. Place 2 or more posts on the ground and connect them to each other using the Wire Tool.
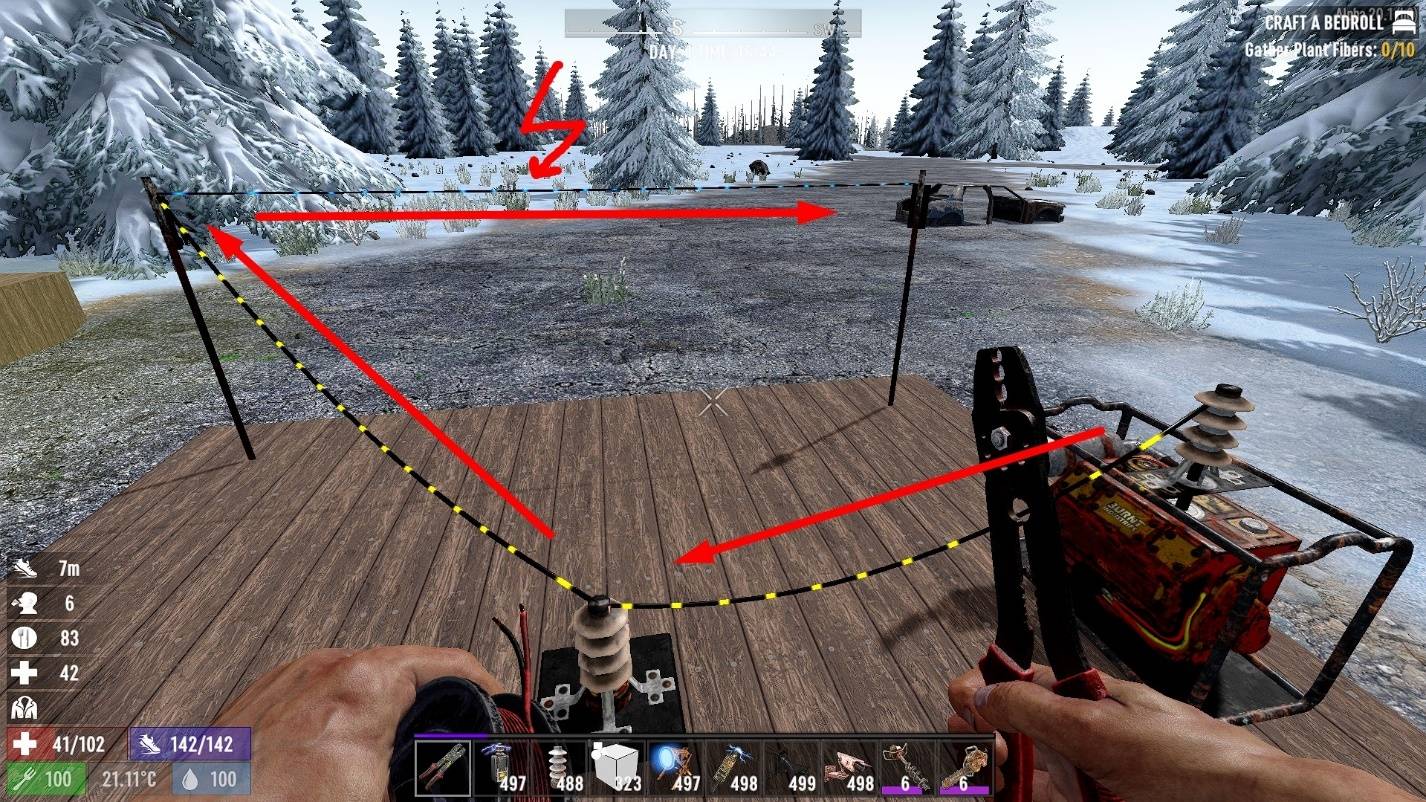
Observe the order of the power supply. The current must come from the power source and pass in series to each of the Electric Fence Posts you install.
Powered Doors
7 Days to Die also features several types of powered doors, including garage doors and hatch doors. They must be connected to a power source to work. When current is applied to powered doors, the doors will be opened.
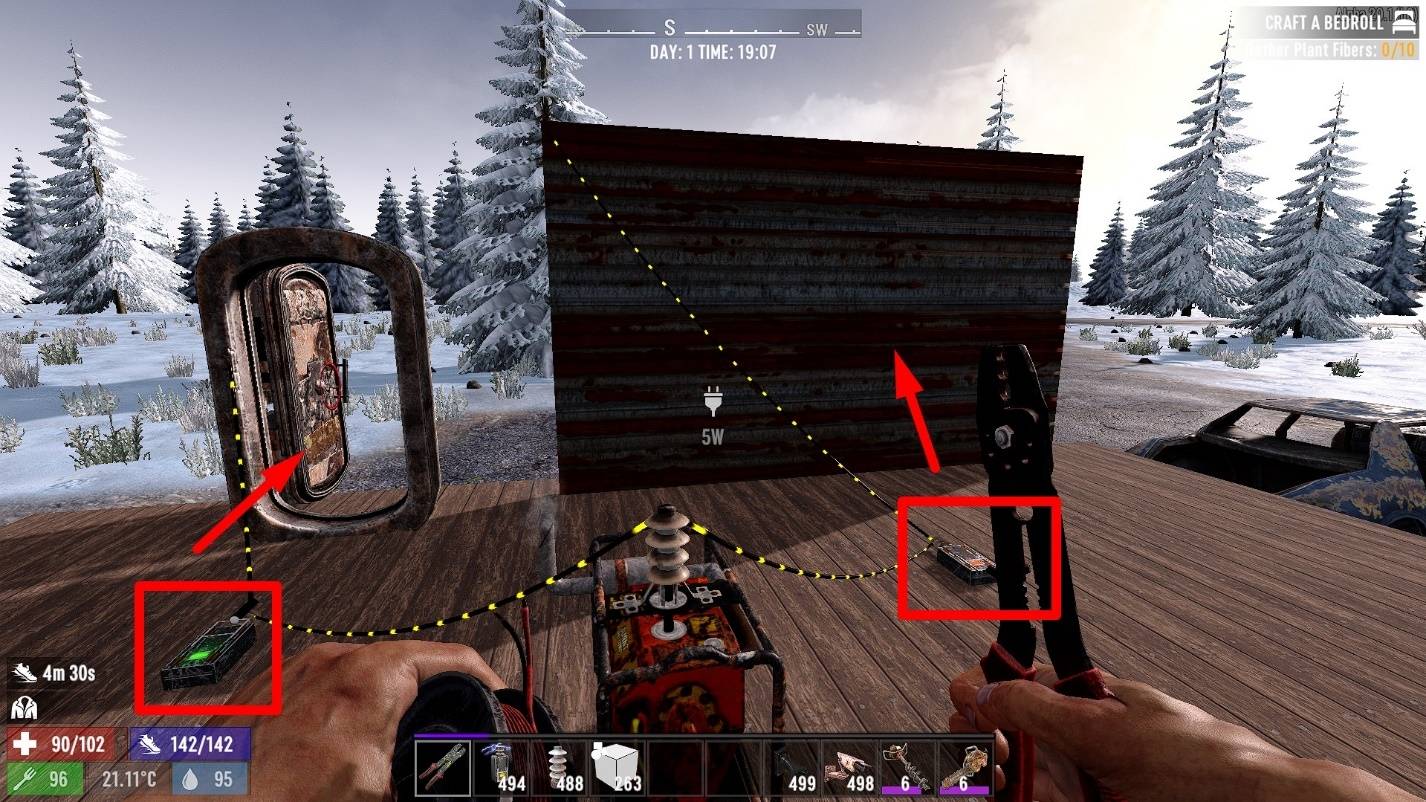
So, if we connect a power source to a switch, and connect the switch to the powered doors, we can use this switch to open / close the doors. There is also a powered bridge in the game. It works in the same way as the electric doors.
Now, that’s all. In this article, we have highlighted all the electric appliance in 7 Days to Die. When the developers add new content related to electricity, we will continue this guide. If you find a mistake or have any remarks, please write a comment. Your opinion is really important to us. Bye! 😎