Table of Contents HIDE
The plot quests in the game Survival: Fountain of Youth differ from typical quests in role-playing games. You won’t have markers on the map or a compass that literally “takes you by the hand” to the right place. To complete this game, you’ll need to think, study the found maps, and read documents. On the one hand, this is great and very interesting, but on the other hand, it can disorient newcomers who are not used to such deep immersion in gameplay.
This walkthrough guide for Island of Hope in Survival: Fountain of Youth is designed to help beginner survivors progress through the plot. It contains a detailed instruction on completing all quests available on Island of Hope at the beginning of the game before unlocking a new region. The guide contains spoilers, so I recommend referring only to the sections that will help you solve your current task in the game and not jump ahead. Otherwise, you risk spoiling your impressions of the game. Let’s begin.
First steps (important)
I recommend sketching the map using Mapping Charcoal, starting from the first minutes of the game. Light a fire, create 10-20 Mapping Charcoals, and always carry them with you.
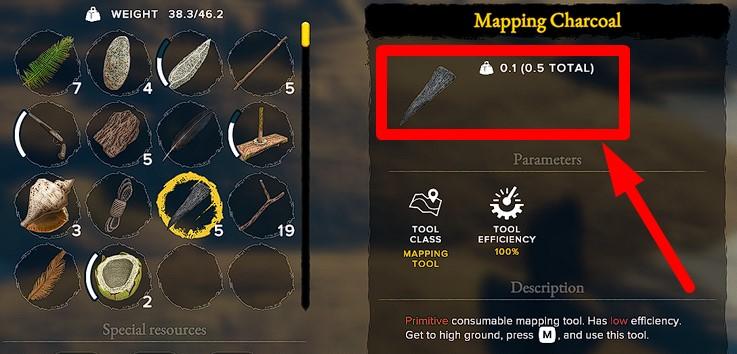
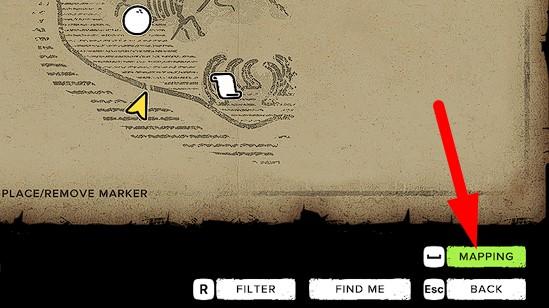
You don’t necessarily have to climb trees to map the terrain. Simply open the map with “M” and press the “Mapping” button.
Having a sketched map will greatly facilitate navigation in the future.
Find the Pictured Grotto
This is the very first plot quest for your character after being washed ashore on the Island of Hope. Here’s how you can complete it:
- Press “J” to open the quest journal.
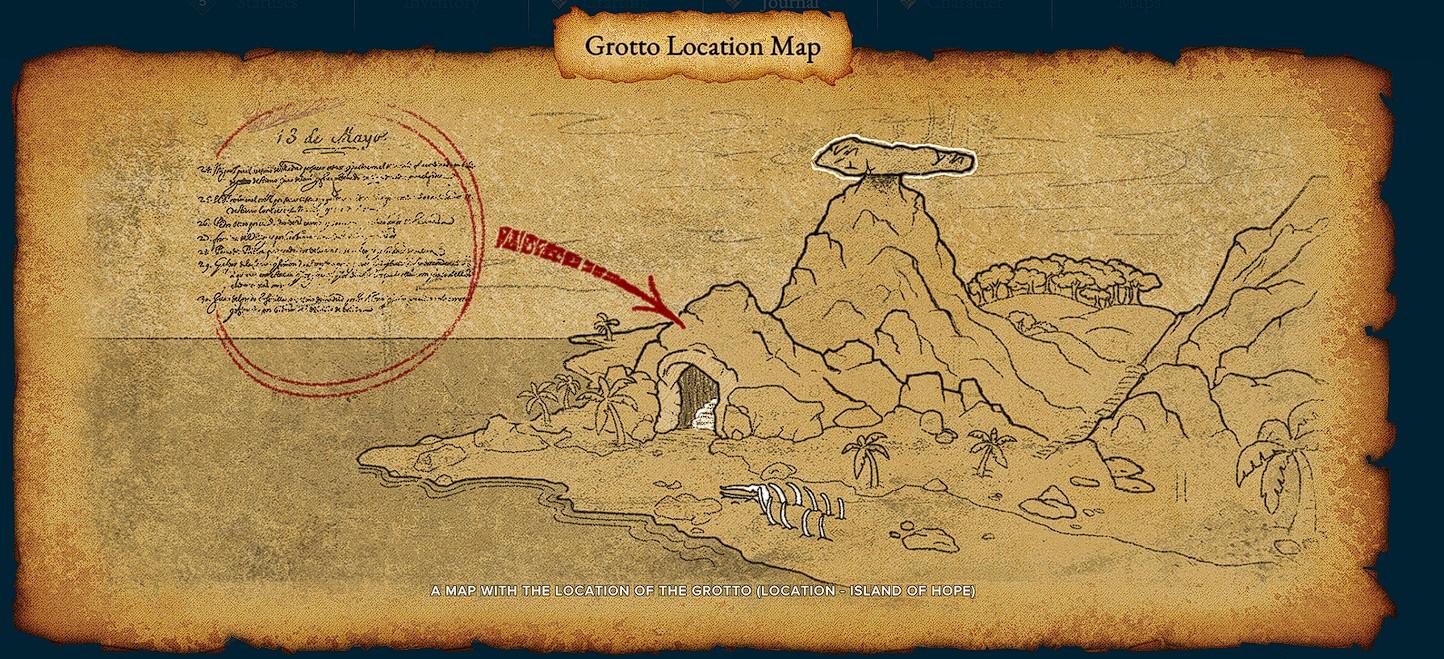
- Press “View Document” to study the linked document, which features the location of the Grotto. Remember this mechanic, as many future quests will include a linked document that you’ll need to study to complete the assigned task.

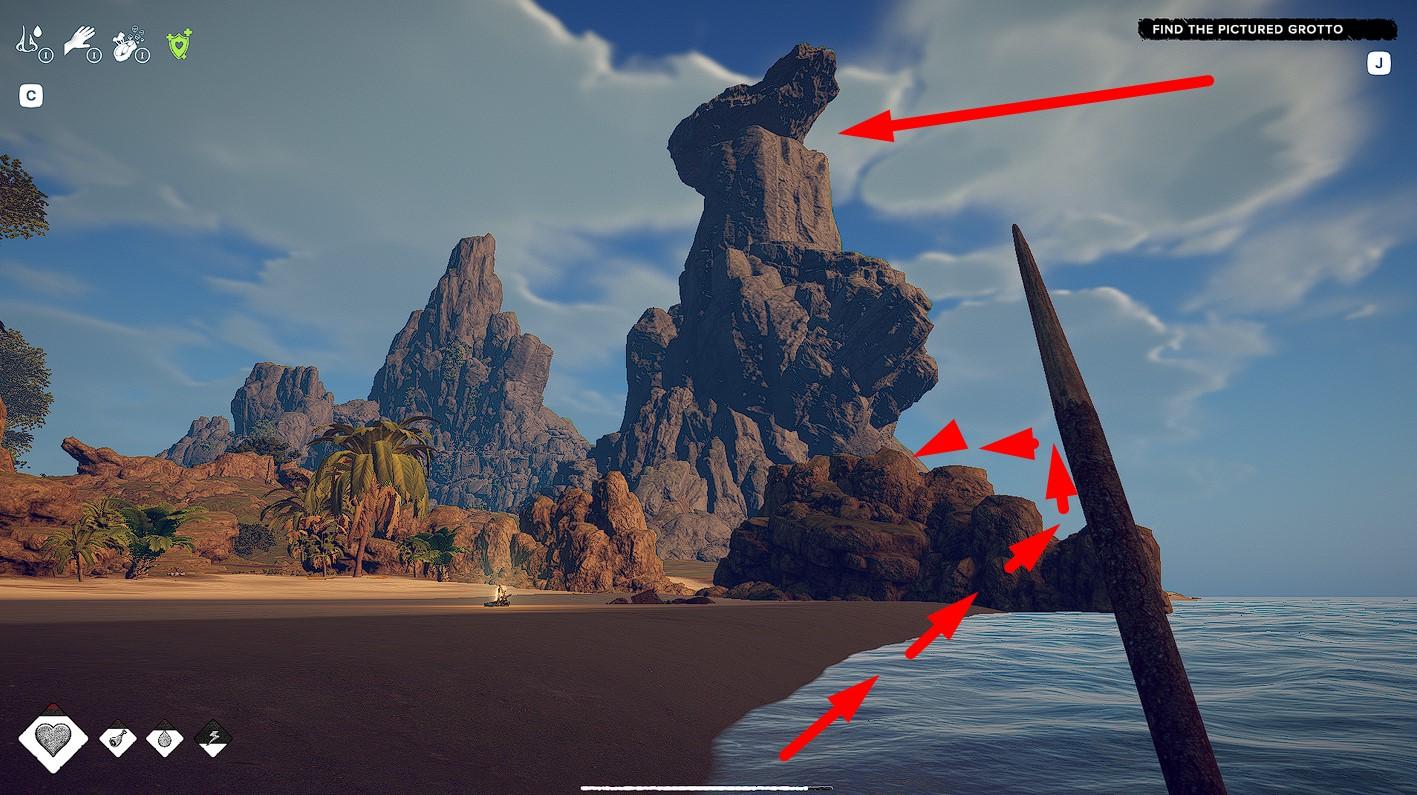
- In the picture, you can see an image of the rock formation containing the Grotto you need.
- This rock formation is easily recognizable by its appearance. It is located south of the spot on the shore where your character was washed up after the shipwreck. In other words, if you stand with your back to the sea, this rock formation will be on your right. It’s hard to miss.
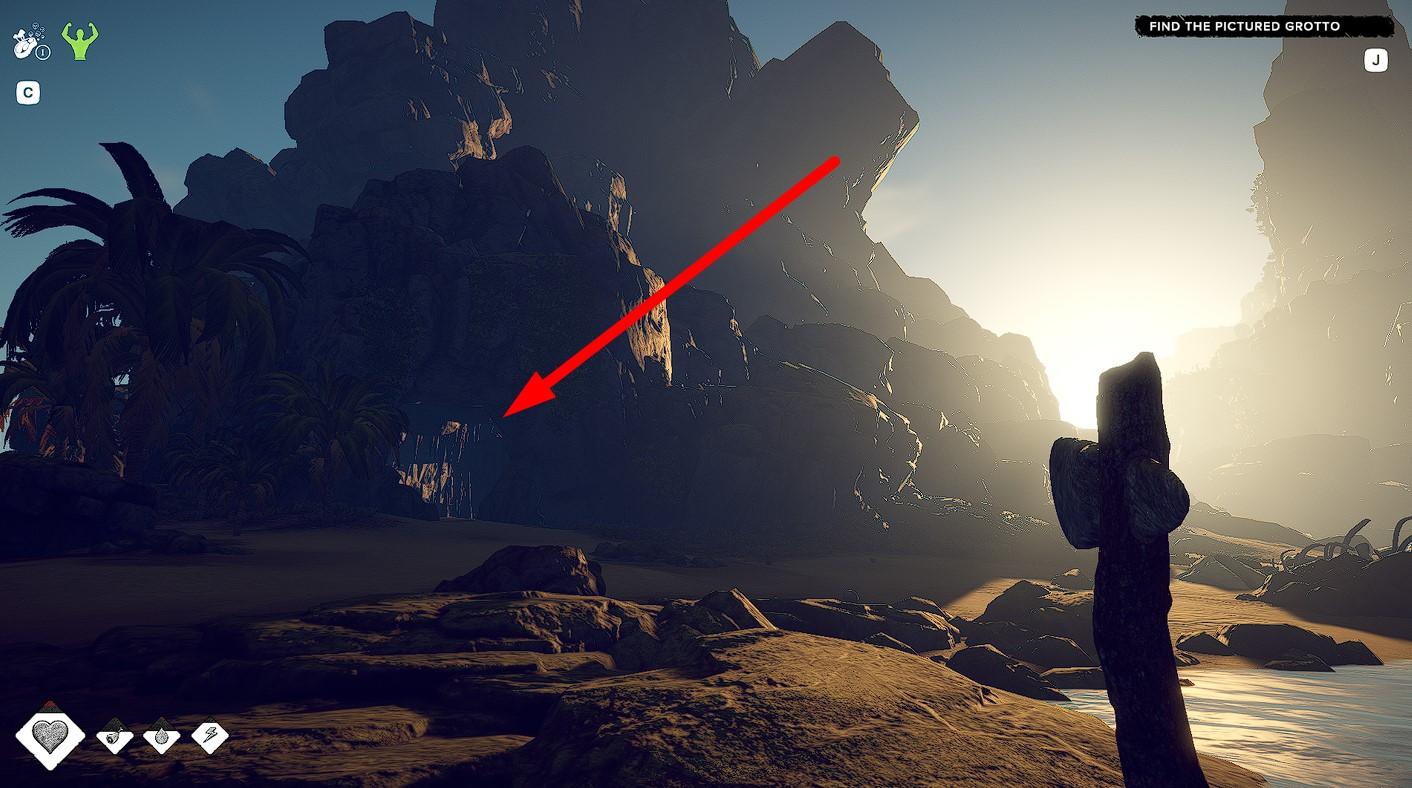
- Simply move along the shore to bypass the rock formation from the sea side. On the southern side, you will find the Grotto you need.
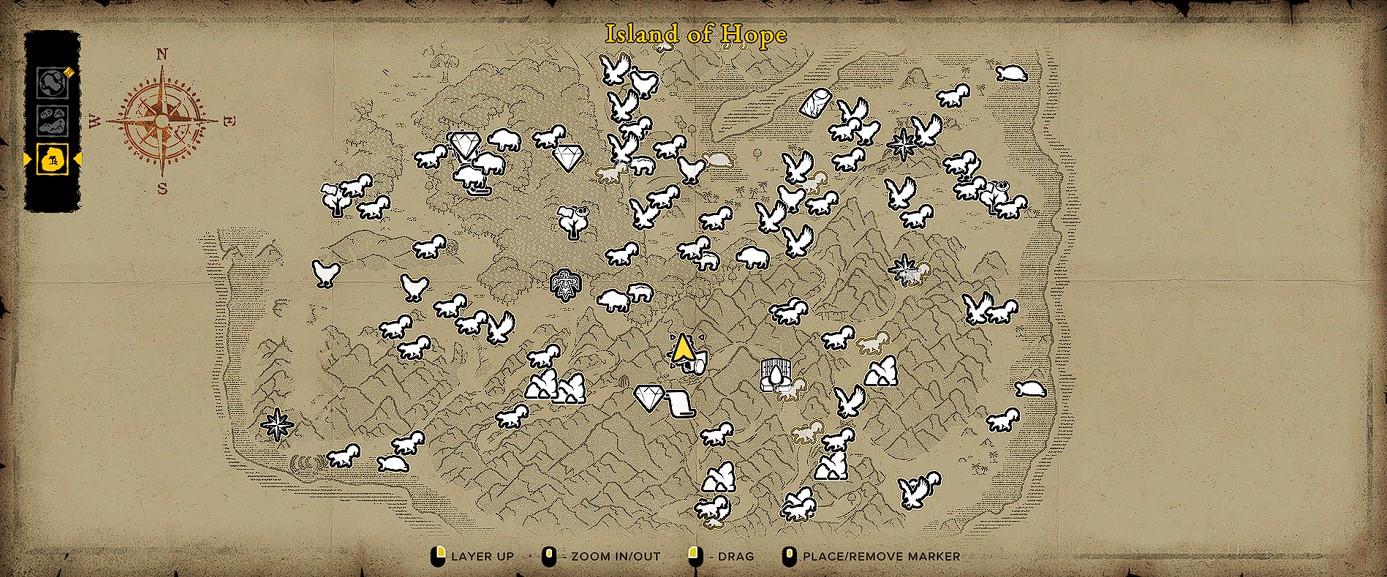
- I also sketched the map to show its location more clearly.

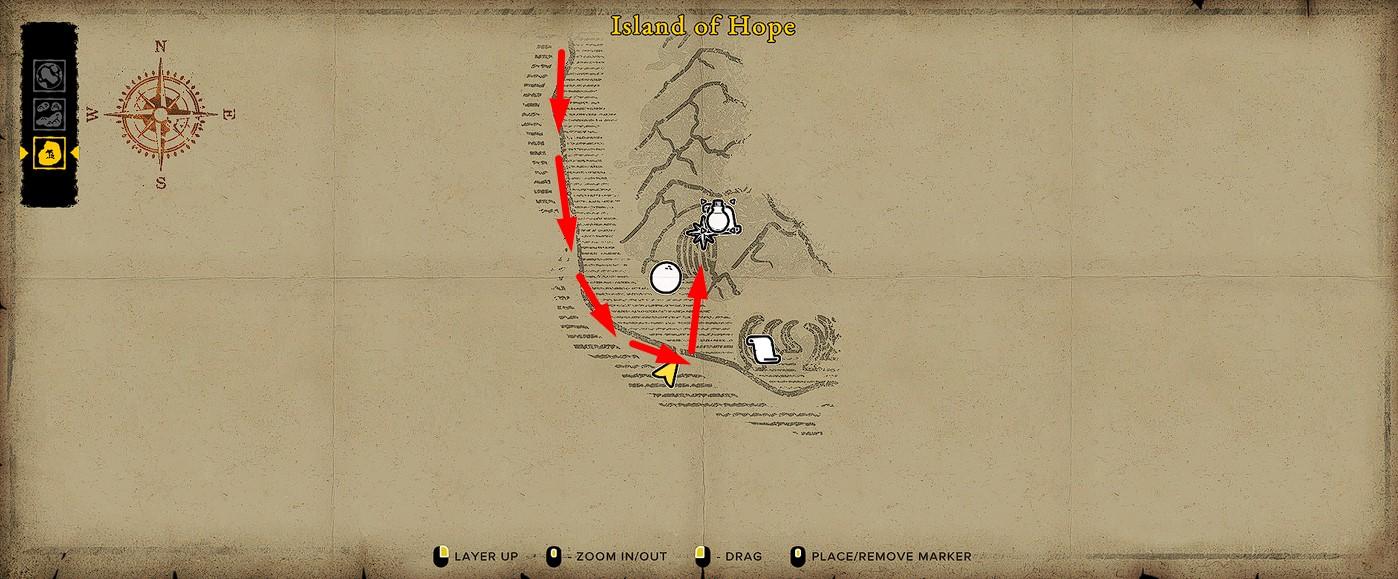
In addition to the Grotto, you can see additional interesting markers on the map. That’s why I recommend drawing the map continuously until the “fog of war” completely disappears from the island.
Inside the Grotto, you will find several objects to study. You will receive the “Take the letter” quest, which requires you to pick up Ponce’s Letter located inside the cave. After that, a short cinematic scene will tell the story of what happened to Ponce de Leon.
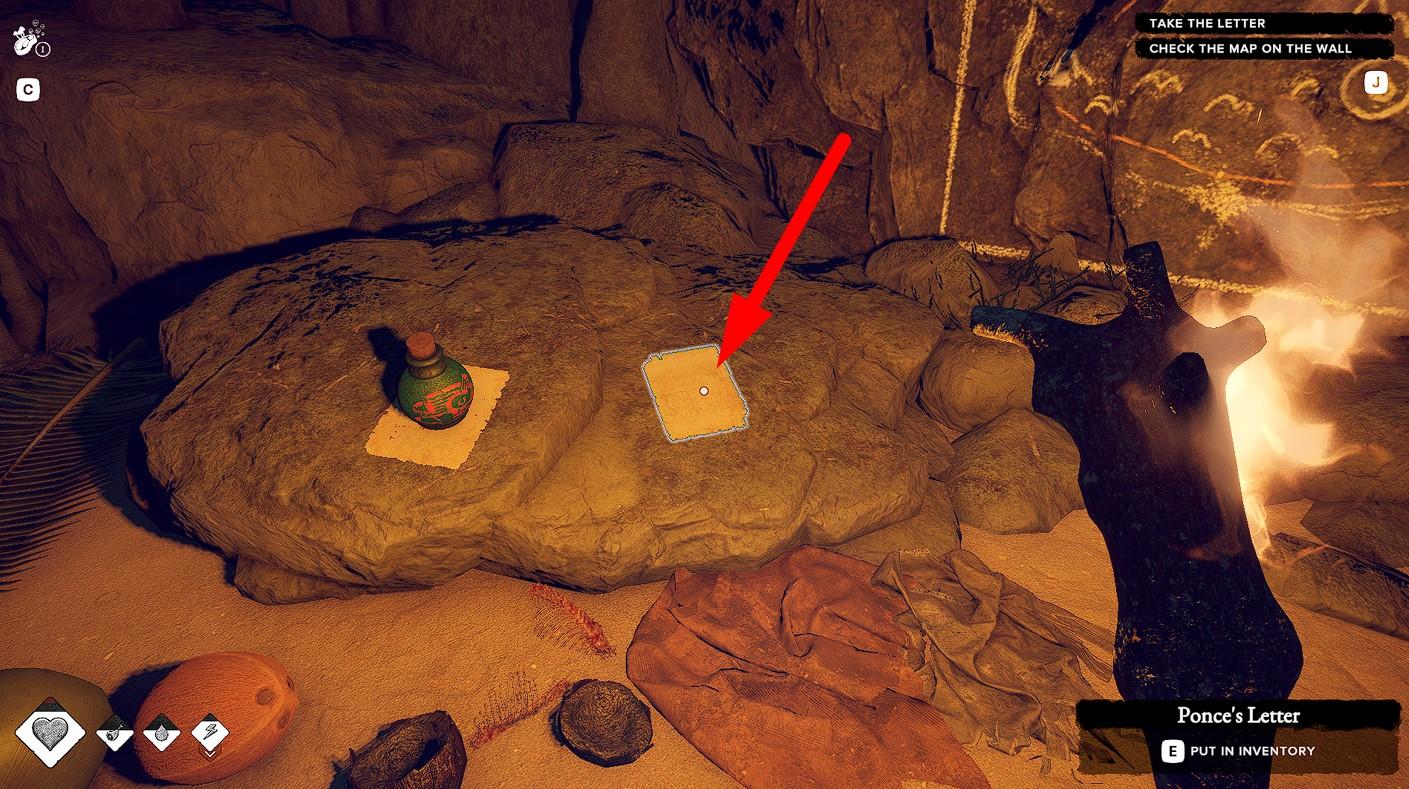
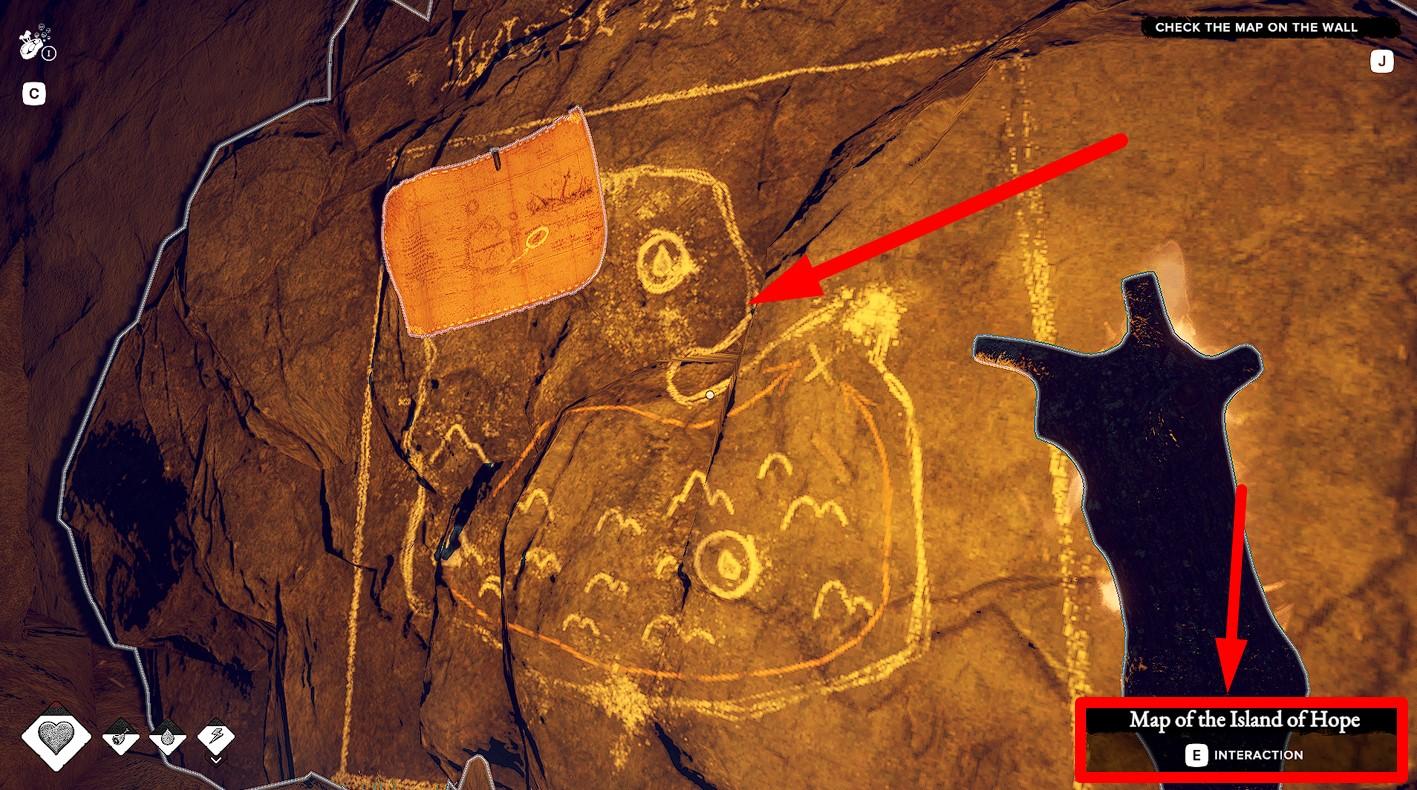
You will also receive the “Check the map on the wall” quest. To complete it, you need to look (E) at the island map you’ll find on the cave wall next to the letter. After that, you will receive the next quest.
Note that you can find useful items in the cave, including 1 Living Water. Living Water is automatically equipped in a special inventory slot when picked up.

When used, it restores the character’s health. Use it wisely.
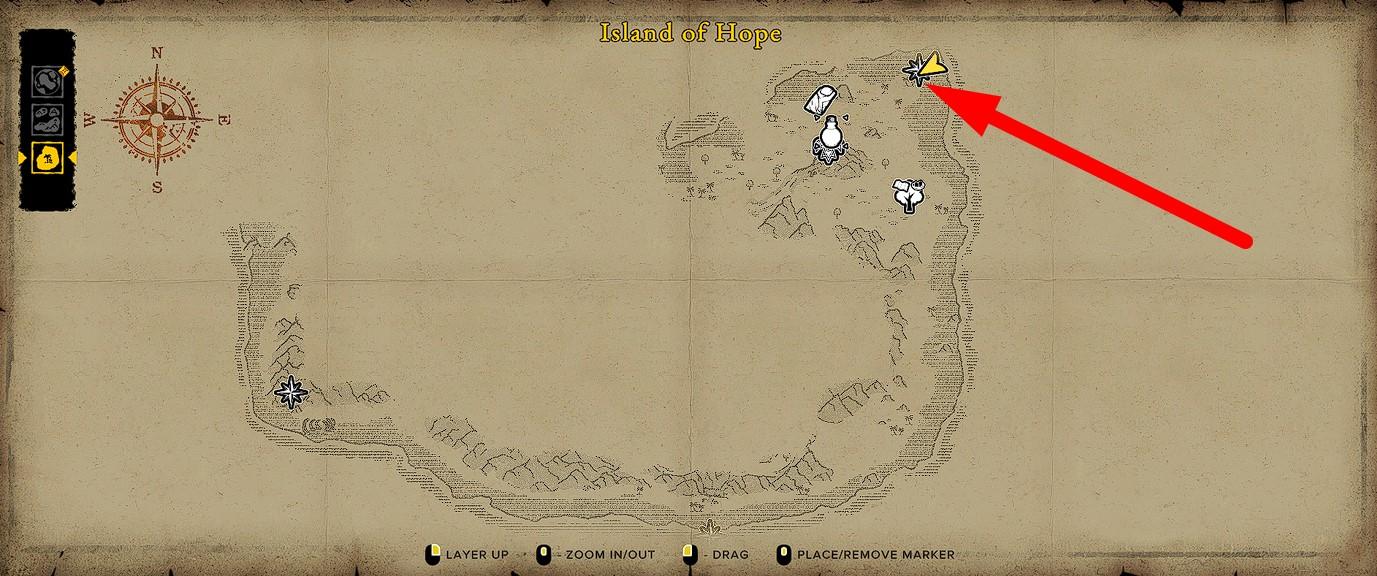
Reach the Location Near the Bay
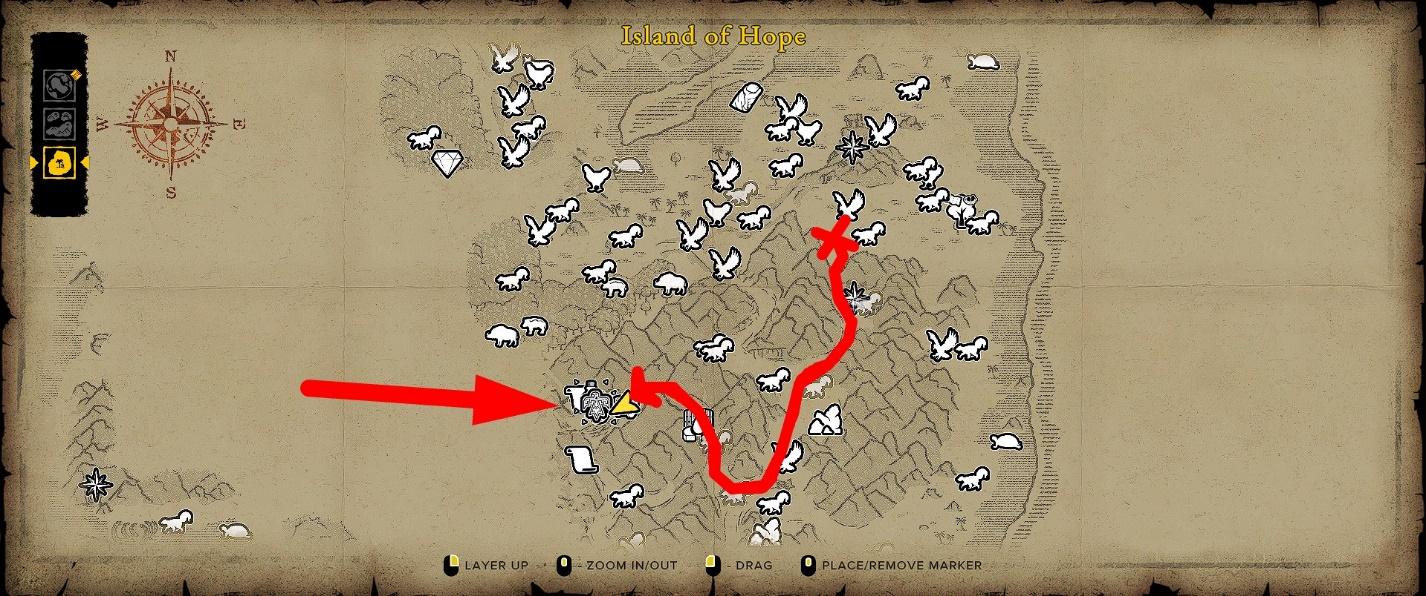
Your next goal is to find the spyglass that Ponce de Leon lost on the island. The location of the spyglass is marked on the map drawn by Ponce de Leon himself. This place is near a bay and marked with a cross.
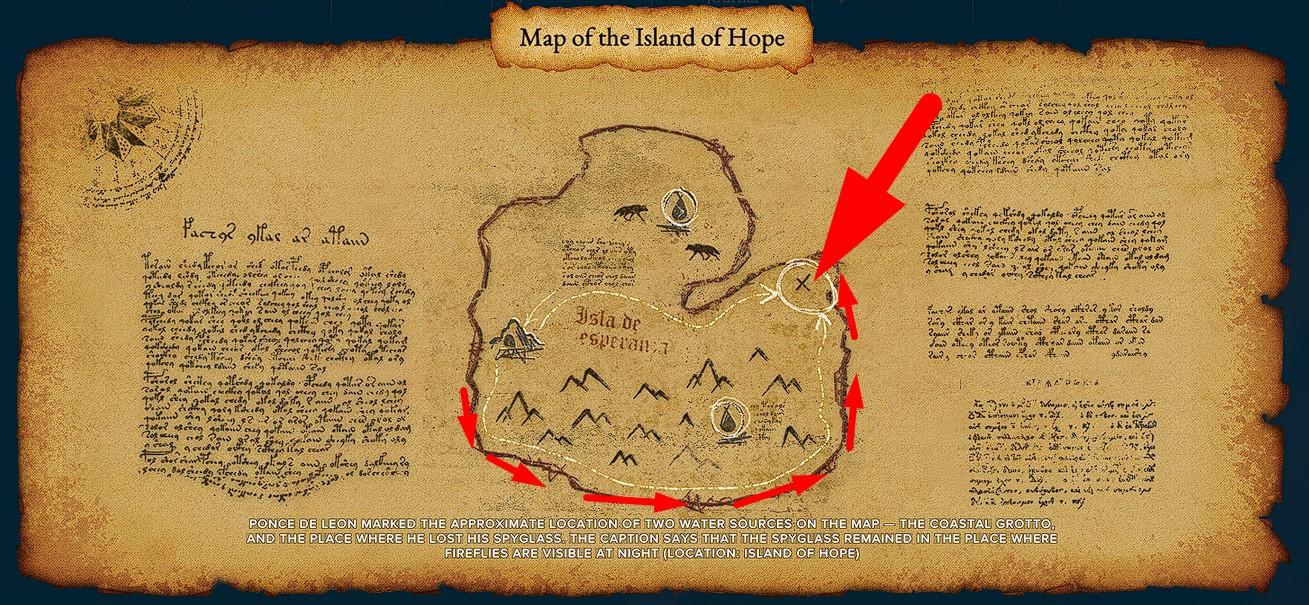
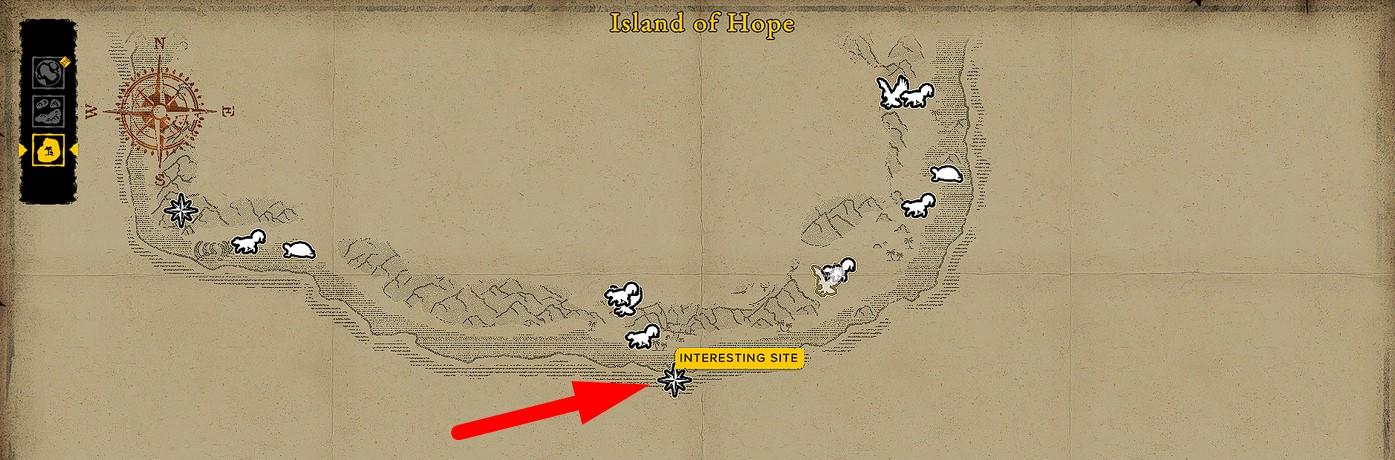
Since we know the shape of the island from this map and know where we are at the moment (Grotto), we just need to go east along the shore until we reach the bay. I’ve drawn the route for you in case you didn’t understand the original map. Don’t forget to use Mapping Charcoal to map the terrain on your in-game map.

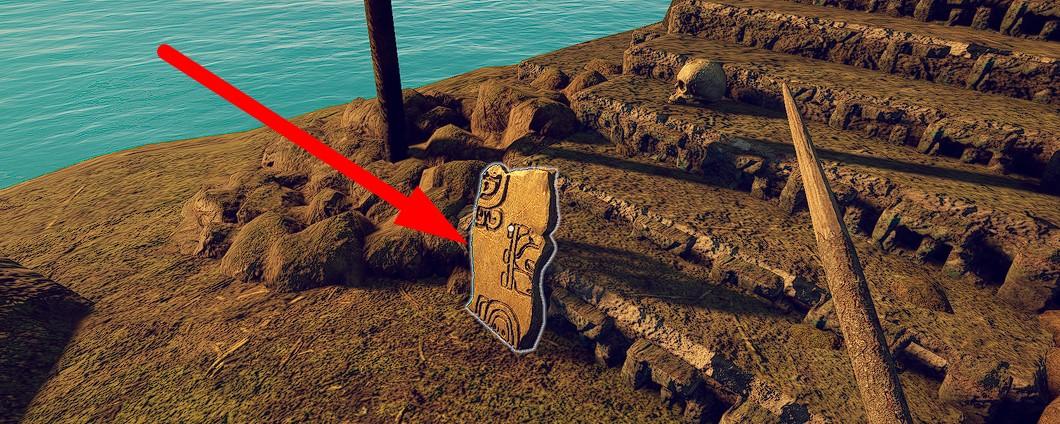
Along the way, you will come across an Ancient Drawing, which you should study.
Nearby, on top of a sea altar, you will find a Piece of Natives Map. Always collect such map pieces, as they will be useful for unlocking new regions in the future.
At the bottom of the sea near the altar, you can find a Snake Potion. You can drink this potion immediately or save it in case you run out of food and water. It temporarily reduces the consumption of your character’s food, water, and energy points.
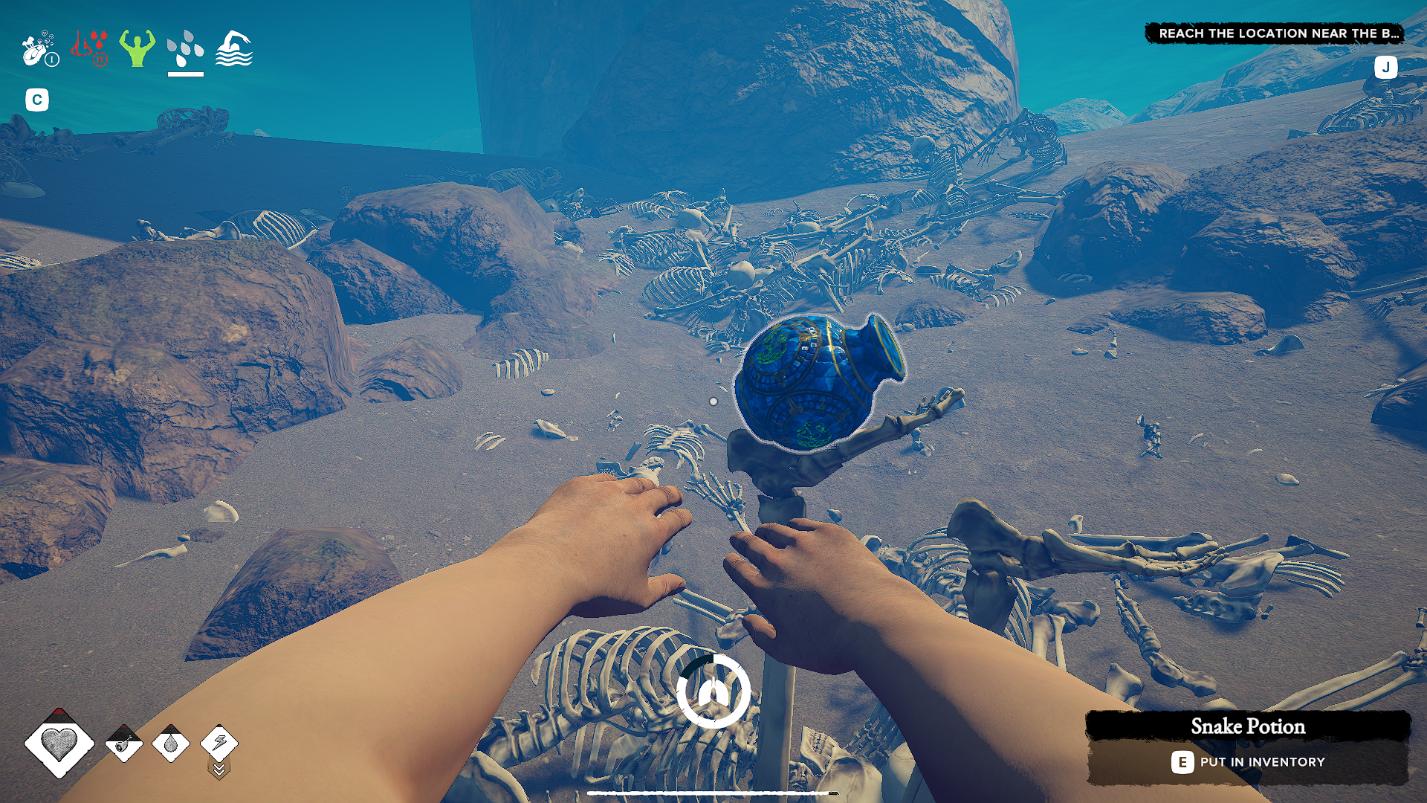
And you wouldn’t know that this potion is at the bottom if you didn’t map this area of the island or if I didn’t tell you about it. So, I repeat: Mapping Charcoal is your best friend in this game.
Once you reach the desired location, you will receive a new quest called “Find the spyglass near the fireflies“. You can either wait for nightfall and rely on the fireflies’ glow in the darkness or use Mapping Charcoal to map the area, in which case the spyglass will be marked as a “Special Object“.
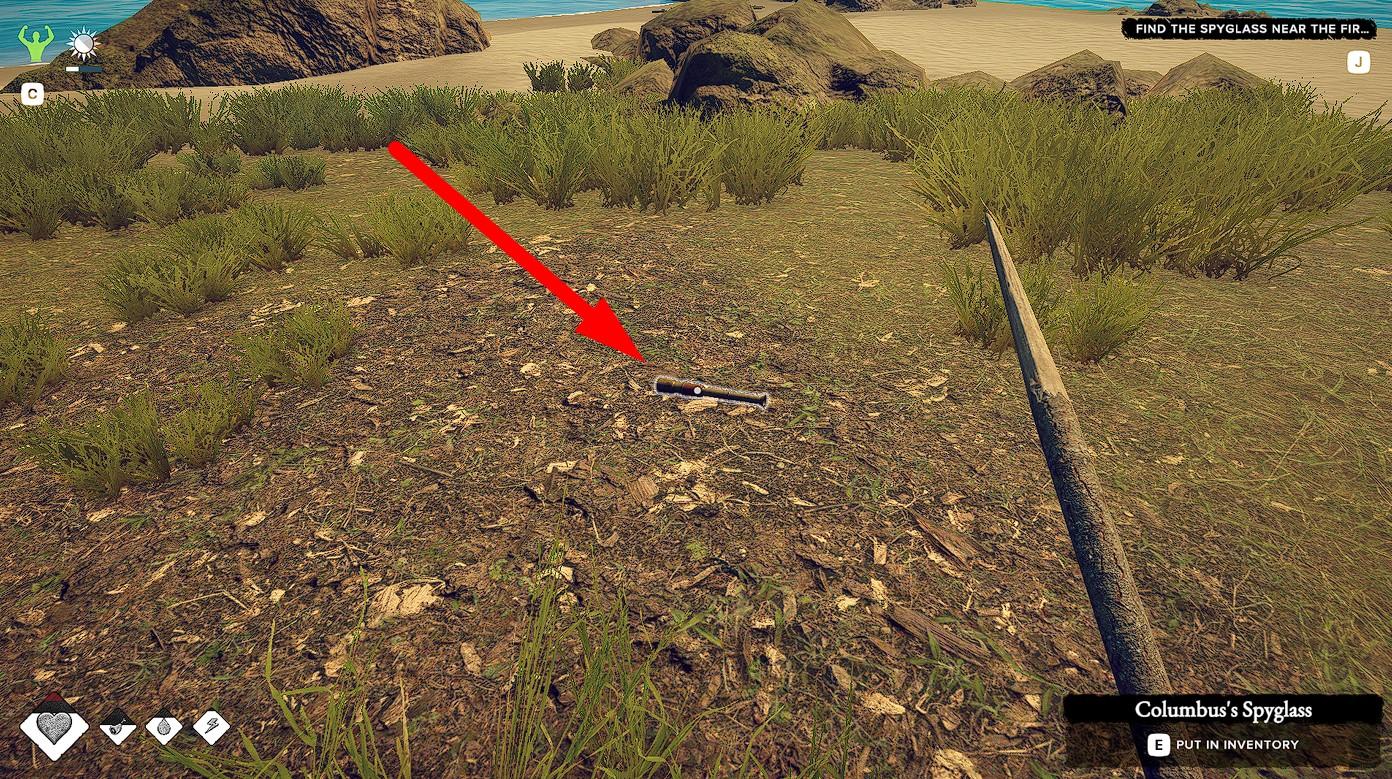
It simply lies on the ground near some palm trees; pick it up. Now you can move on to the next quest.
Note that there is an ancient temple nearby on a hill where you will find 1 more Living Water and 1 Piece of Natives Map.
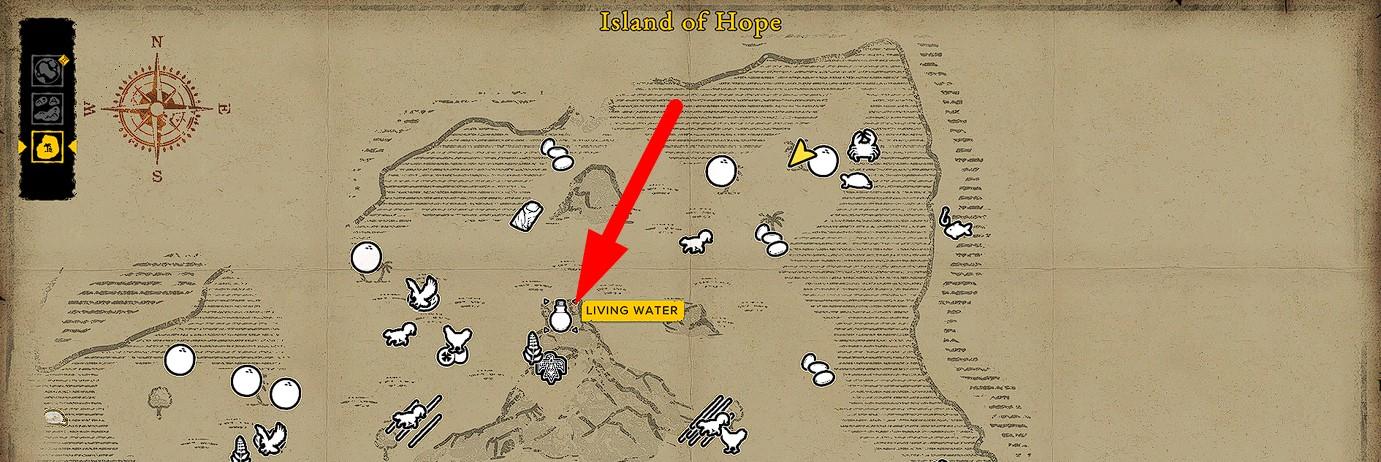
You will also find several useful resources there. Be sure to take the Obsidian Shard and Liana with you.
These are very useful items, as you will find out very soon. But be careful, as there are a few snakes living there.
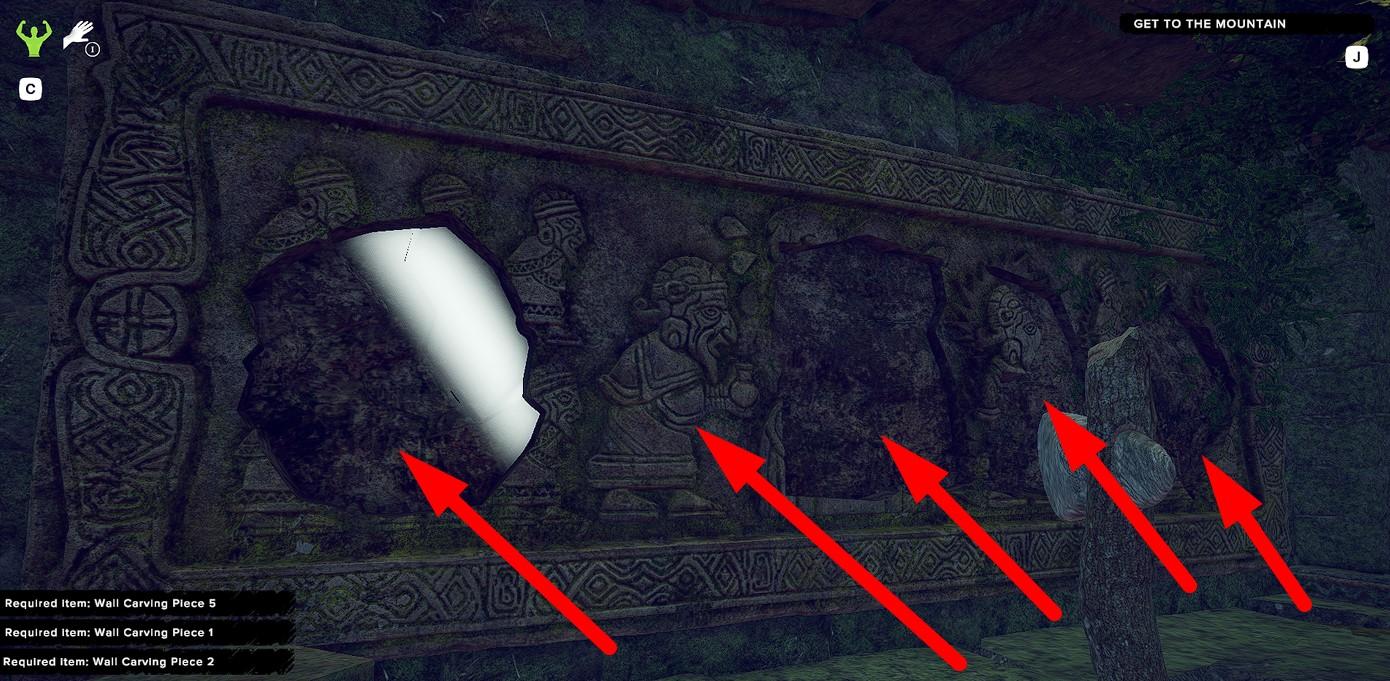
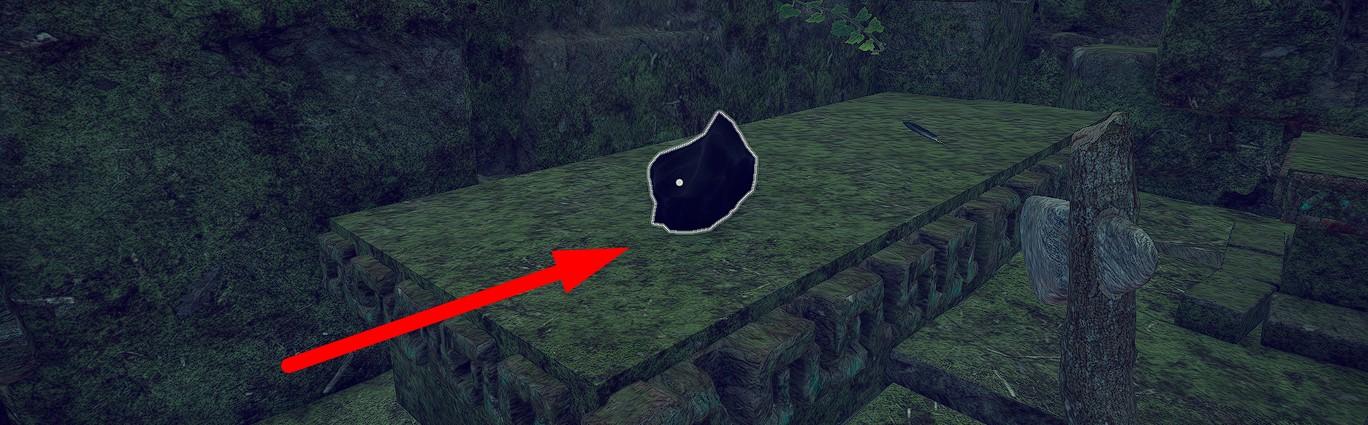
Also, in the temple, there is a wall that can be repaired by placing a few corresponding Wall Carving Pieces in it. One such piece of the wall lies on the temple floor. The other 4 parts are scattered around the temple.
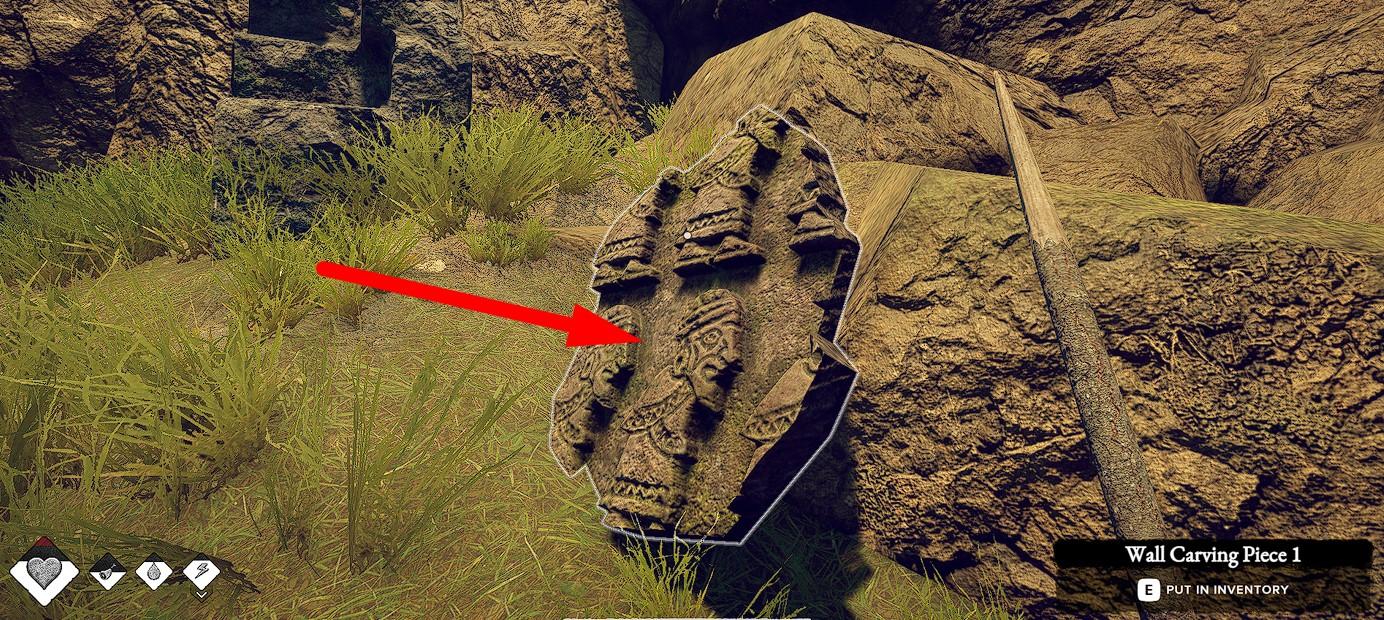
If you collect them, you can restore the wall.
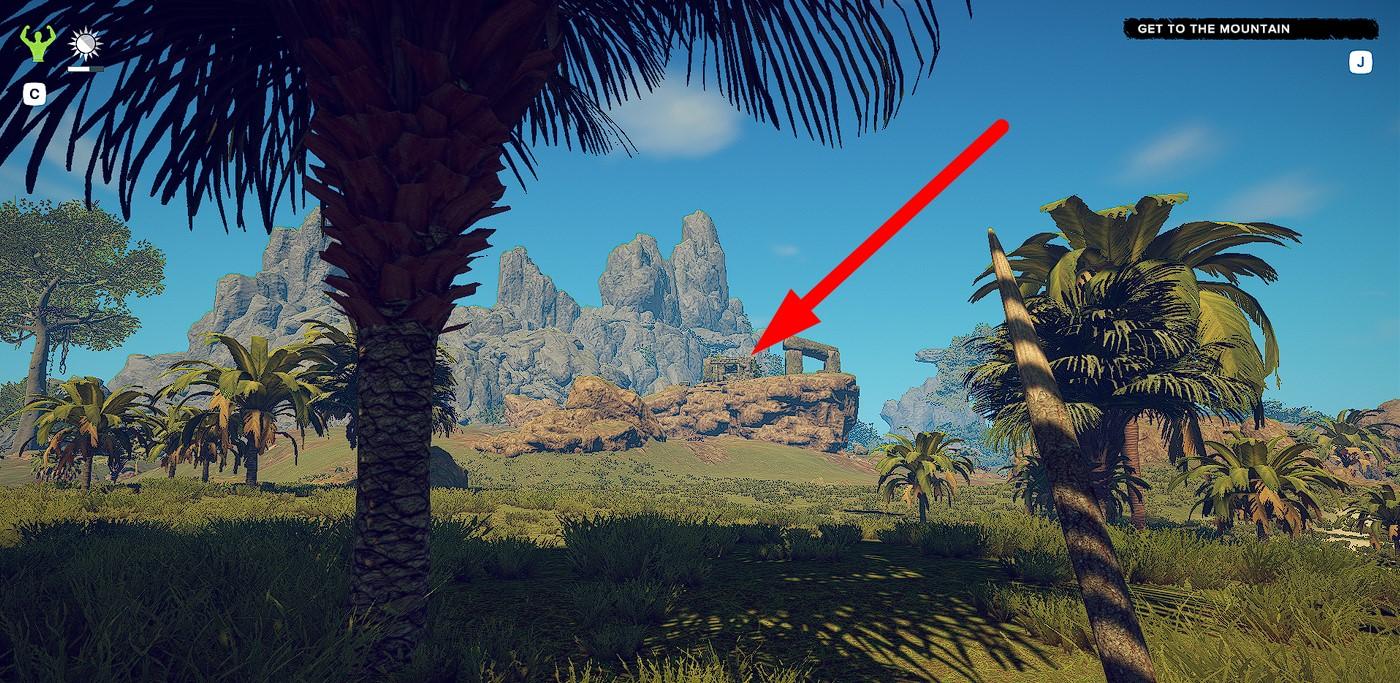
Get to The Mountain
In this task, you need to find a passage to the mountains. If you stand on the hill with your back to the aforementioned temple and face the mountains, you’ll easily find this passage.
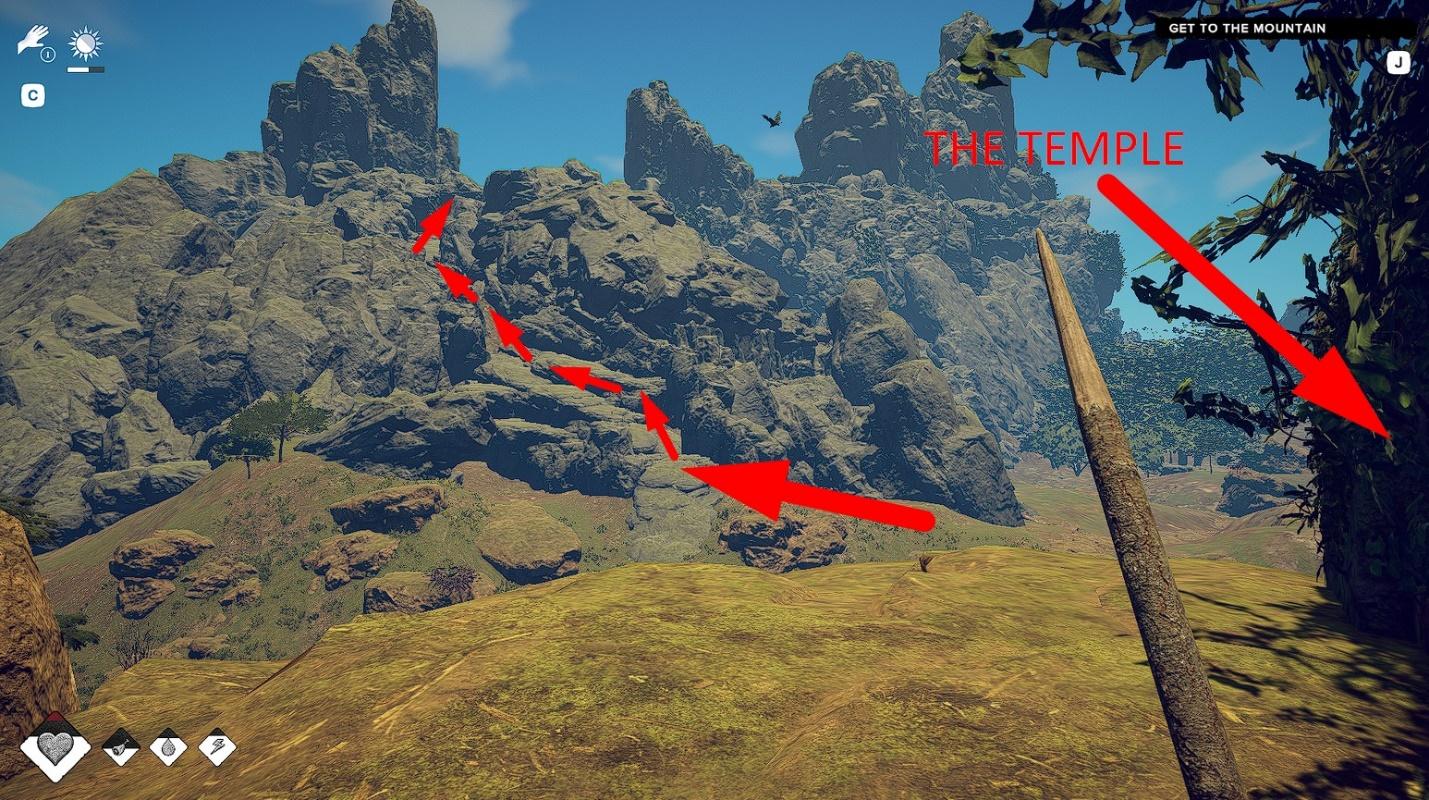
I’ve marked it for you in a screenshot.
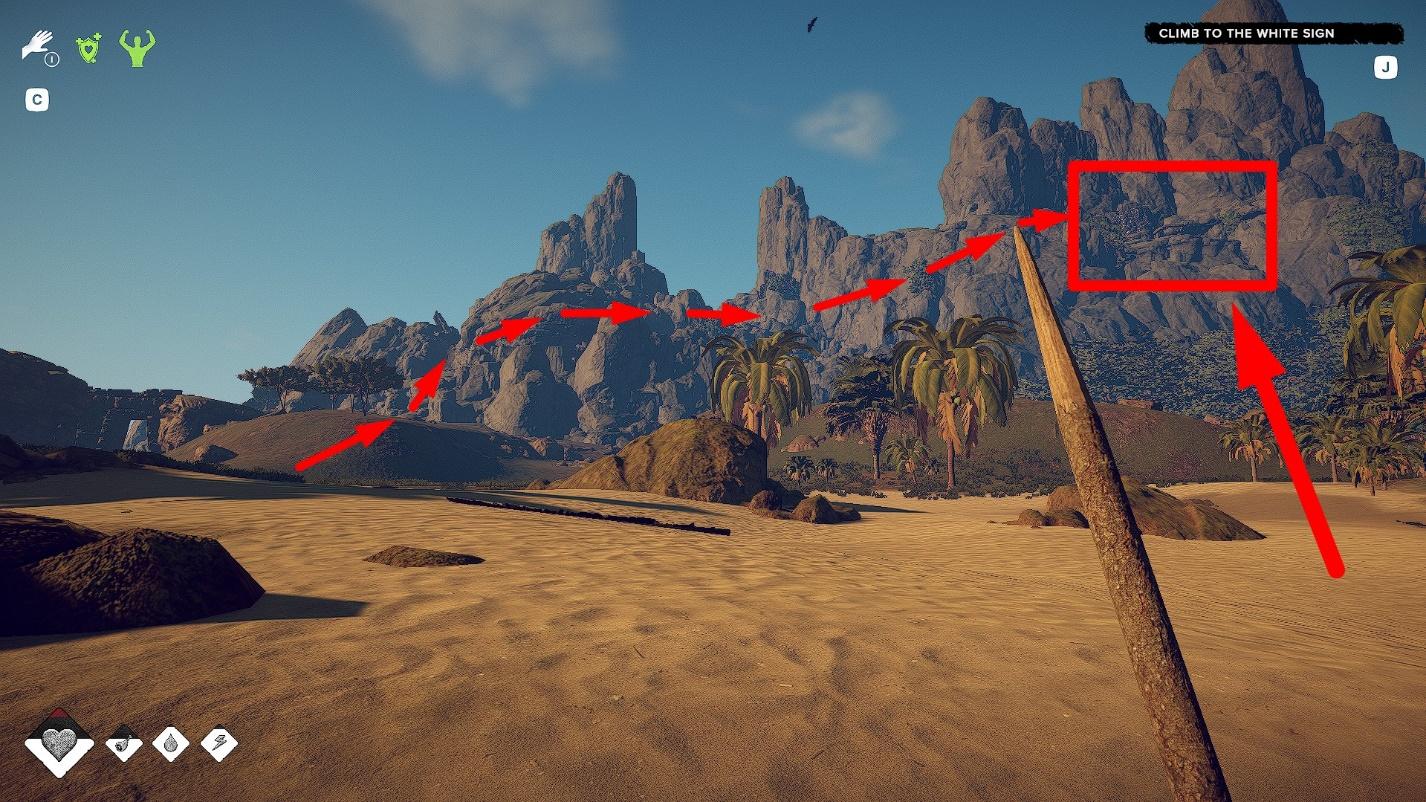
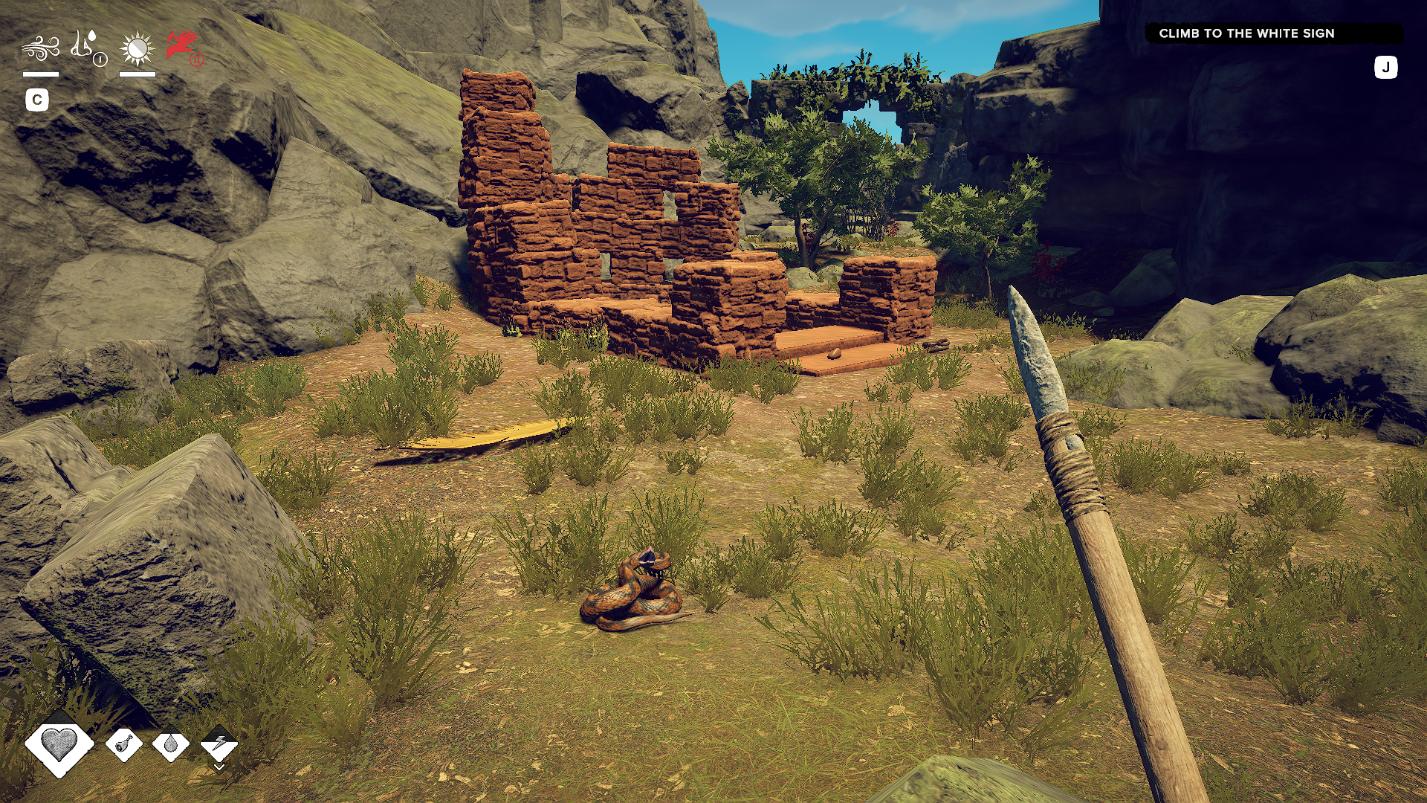
Climb to the White Sign
A newcomer in Survival: Fountain of Youth might not understand what the “white sign” is, as to see it, the player must go a little west along the bay’s shore. Then, at the top of the mountain in the distance, you can see a noticeable “white sign” and a square arch. This is your goal, and you must reach it.
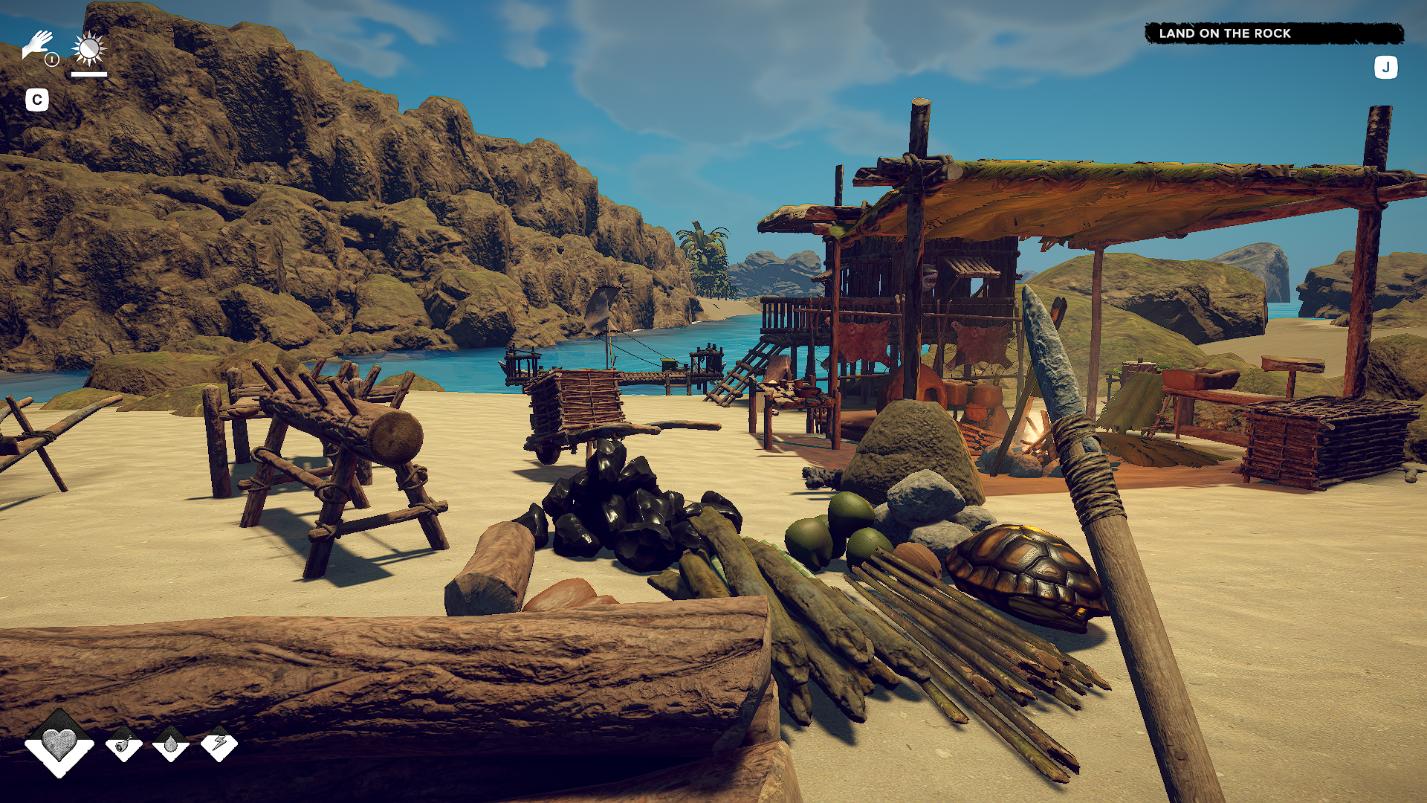
Before setting off, I highly recommend setting up a camp somewhere on the bay’s shore. Build a chest and store any extra items. Also, build workbenches and create a Cart. In the mountains, you will find many useful resources that you will want to bring back to your camp. You can also create a Stone Pickaxe to mine stone in the mountains (you will find several deposits along the way).
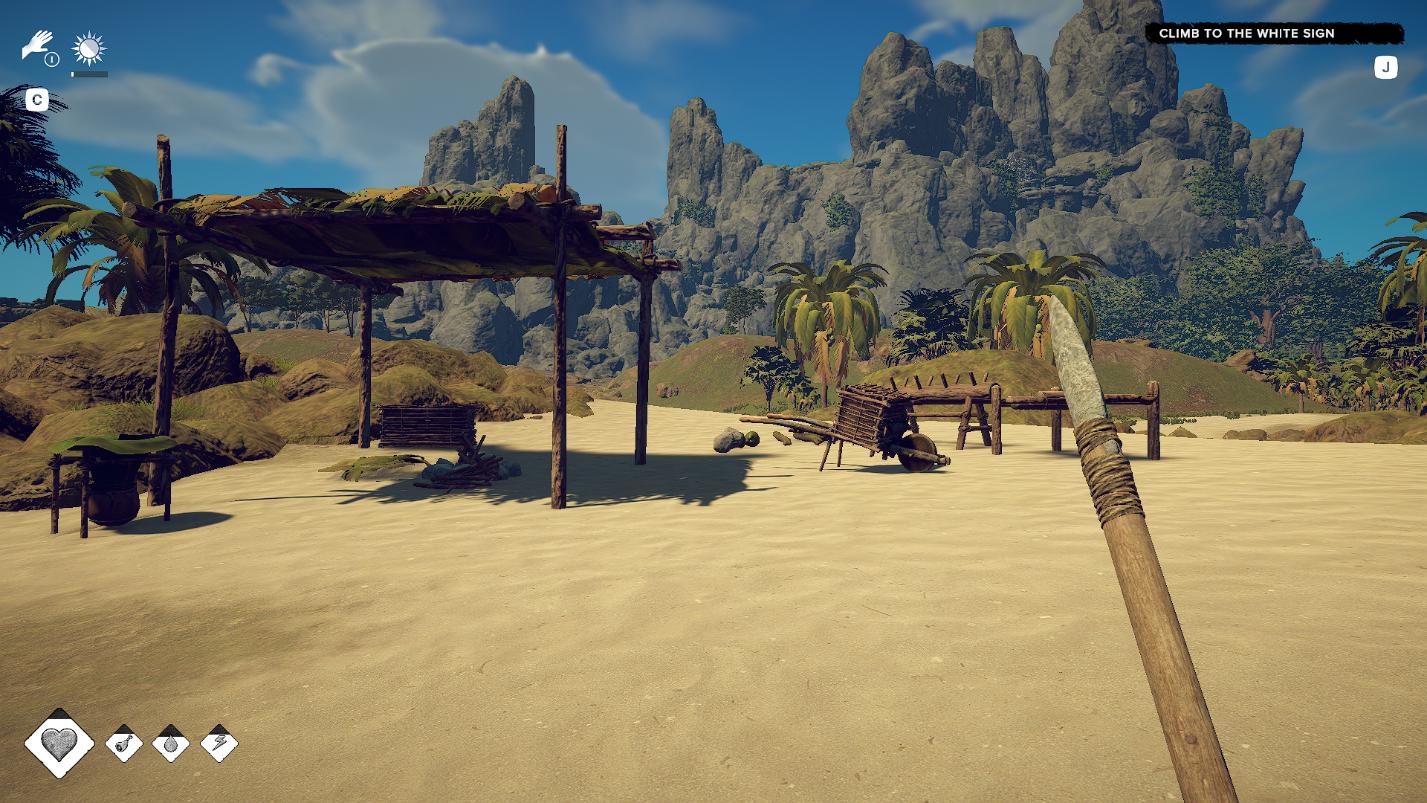
In the picture, you can see the starting camp I built. Read the guide on building a starting camp in Survival: Fountain of Youth to learn more useful information. When you’re ready, you can set off.
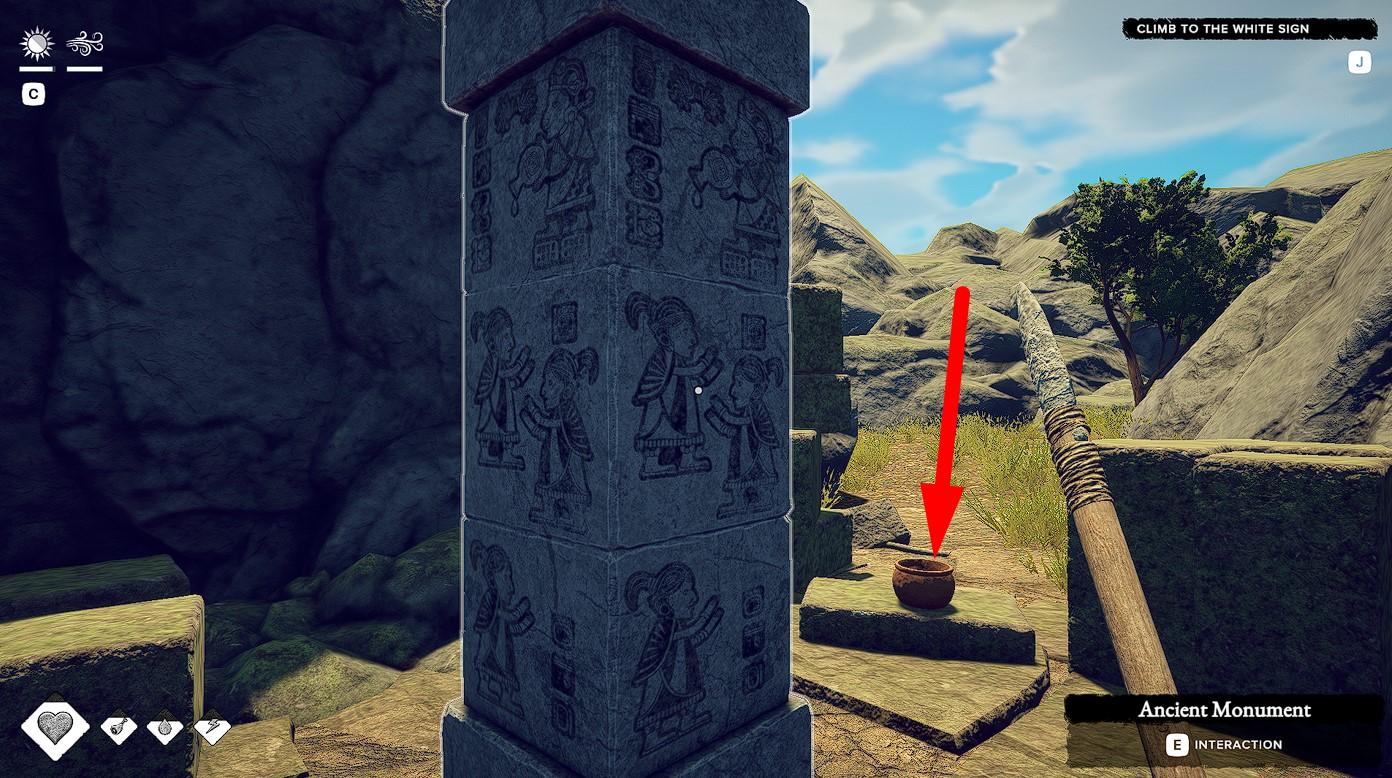
On the way, you will find a Raw Clay Pot. I recommend taking it with you, as it will be useful for crafting in the future. In the mountains, aim to collect all the resources you come across: flint (important!), bamboo (especially bamboo, as it doesn’t grow anywhere else on the island), flexible branches, and more. You probably won’t want to climb the mountains for these resources again, so it’s better to take advantage of the opportunity to stock up on them. I’ve marked a route for you on the map.
By the way, on the way, there will be one of the Water Sources, so you can drink and fill your Coconut Flask.
Near the White Sign, you will find an Ancient Observatory Drawing. After interacting with it, you will receive a map depicting three arches, each of which you must visit as part of a new side quest.

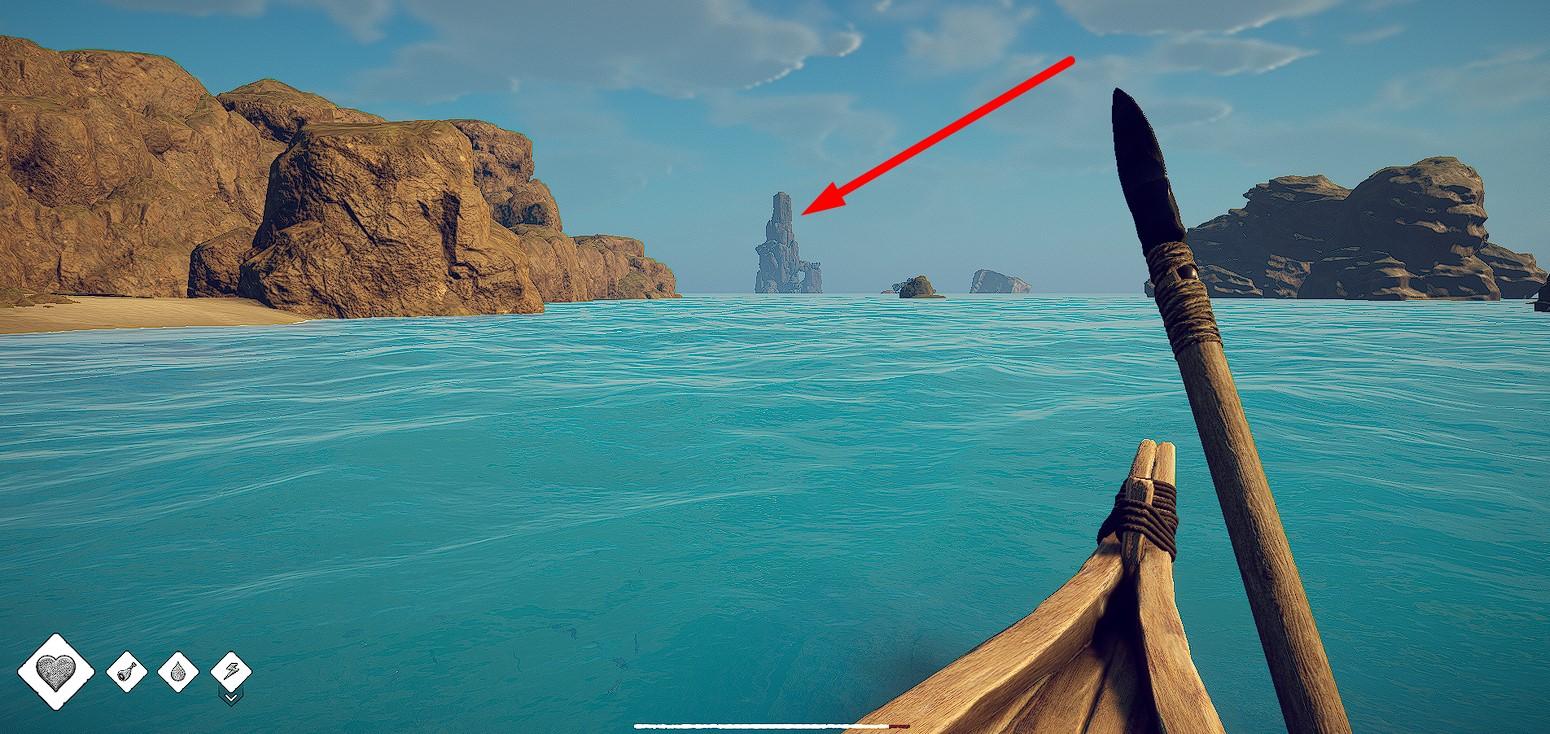
To complete the main quest, you must approach the edge of the platform.
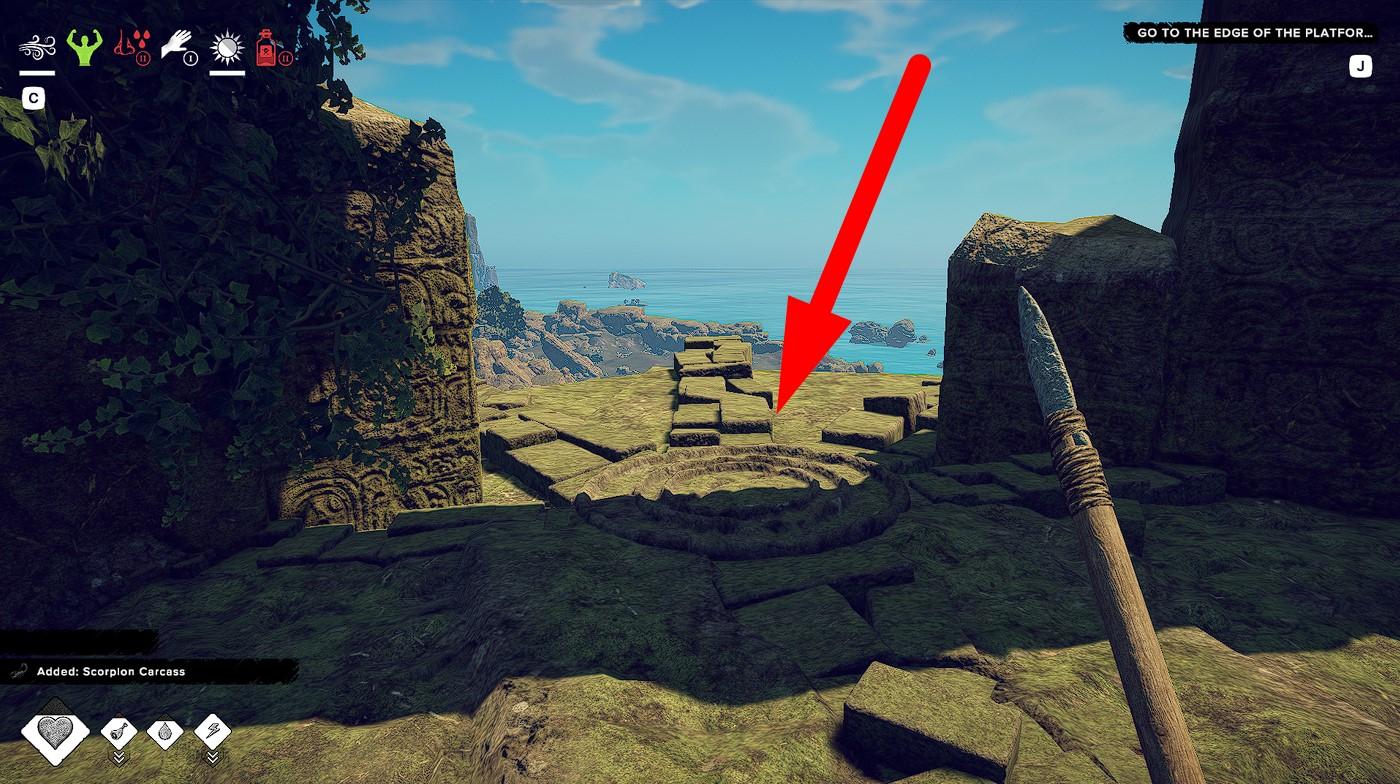
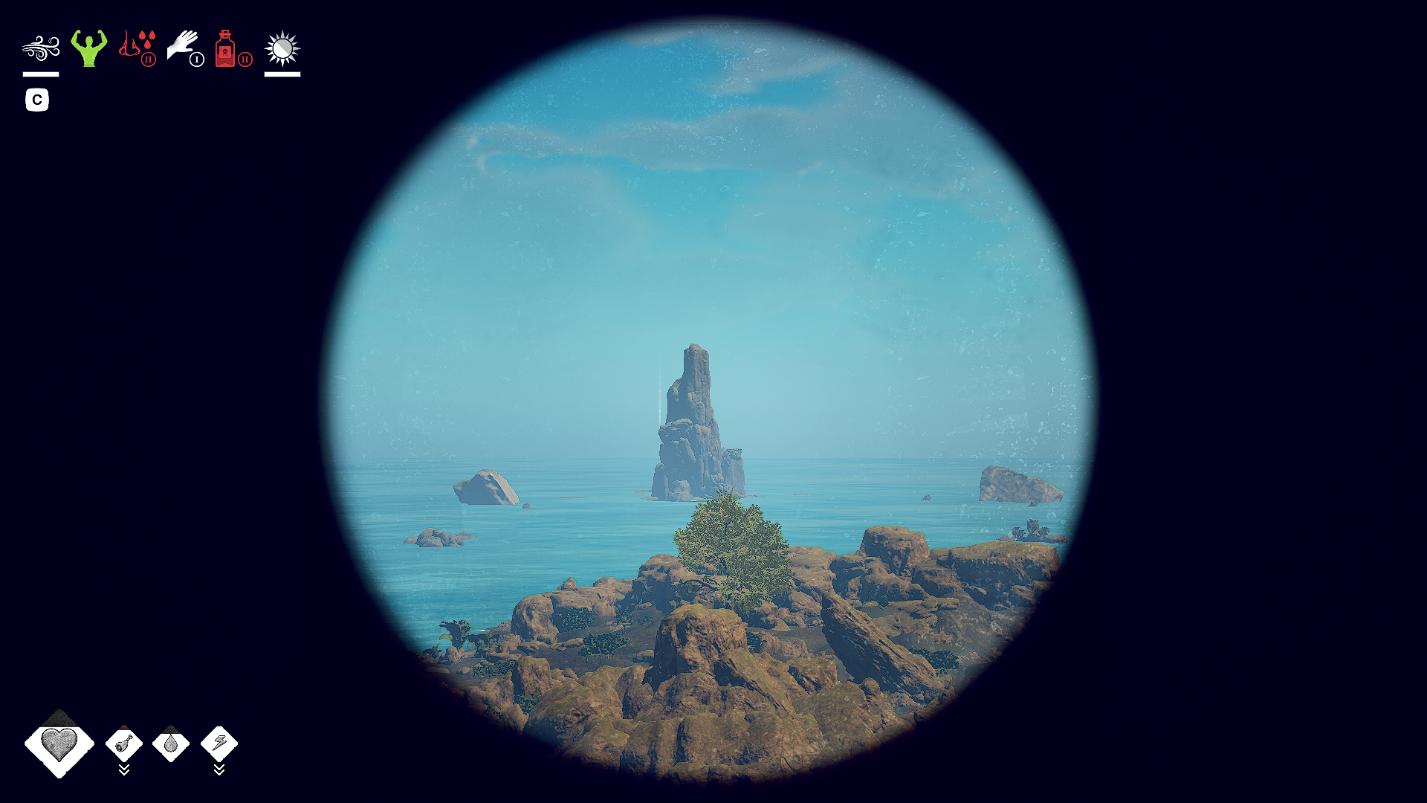
Your character will look through the spyglass and see a large rock in the sea, which you will need to reach by boat.
While standing there, on the edge, be sure to use Mapping Charcoal (open the map and press “Mapping“) to map the visible area. The higher the character is above sea level, the larger the area will be mapped during mapping.
Standing at this point in the mountains, you will map a large part of the island with all its resources in one stroke. Don’t miss this opportunity.
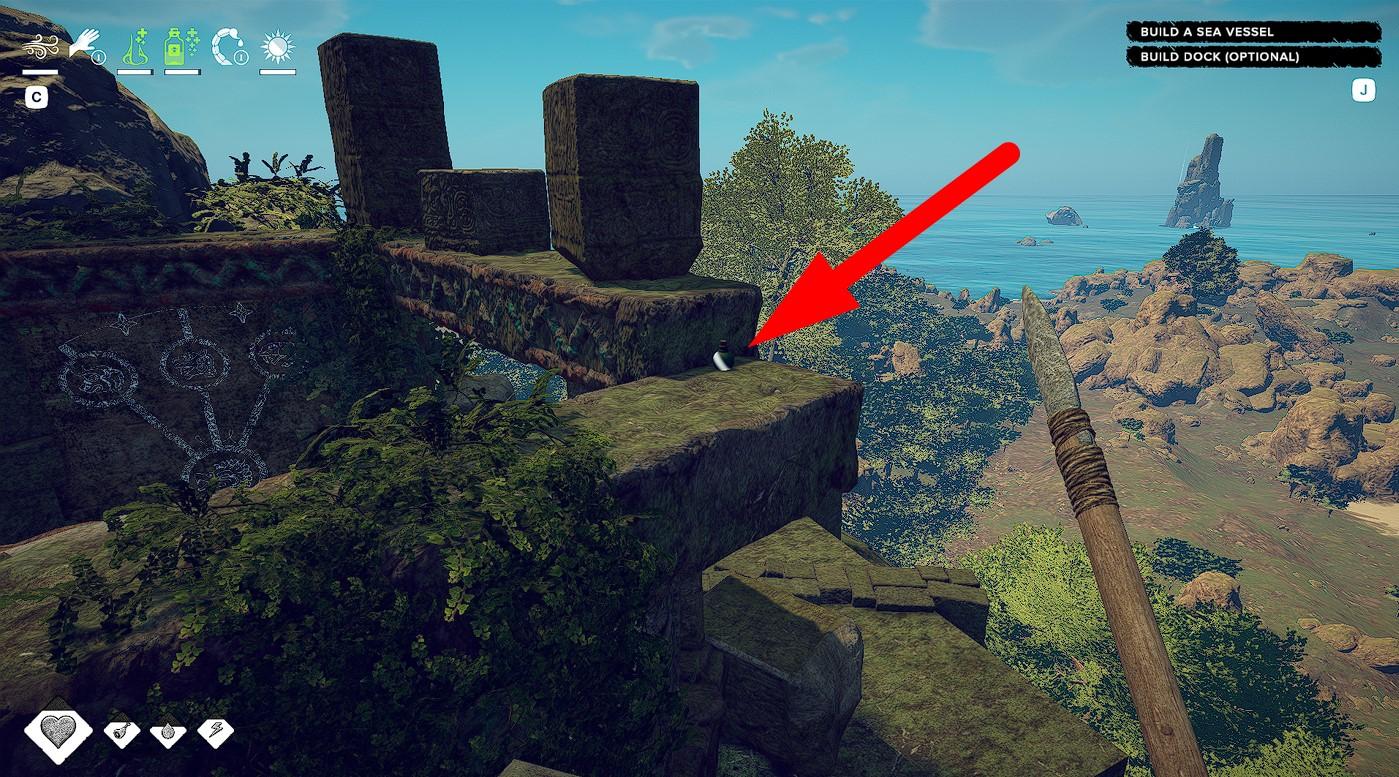
You should also know that on top of one of the structure’s walls, there is 1 Living Water. You need to climb up to get it.
A little further in the cave, you will find another Piece of Natives Map. Be sure to take it.

In the same cave, you will find a Dead Spaniard Map, which shows the location of the survivors’ camp (or what’s left of it) on the island.
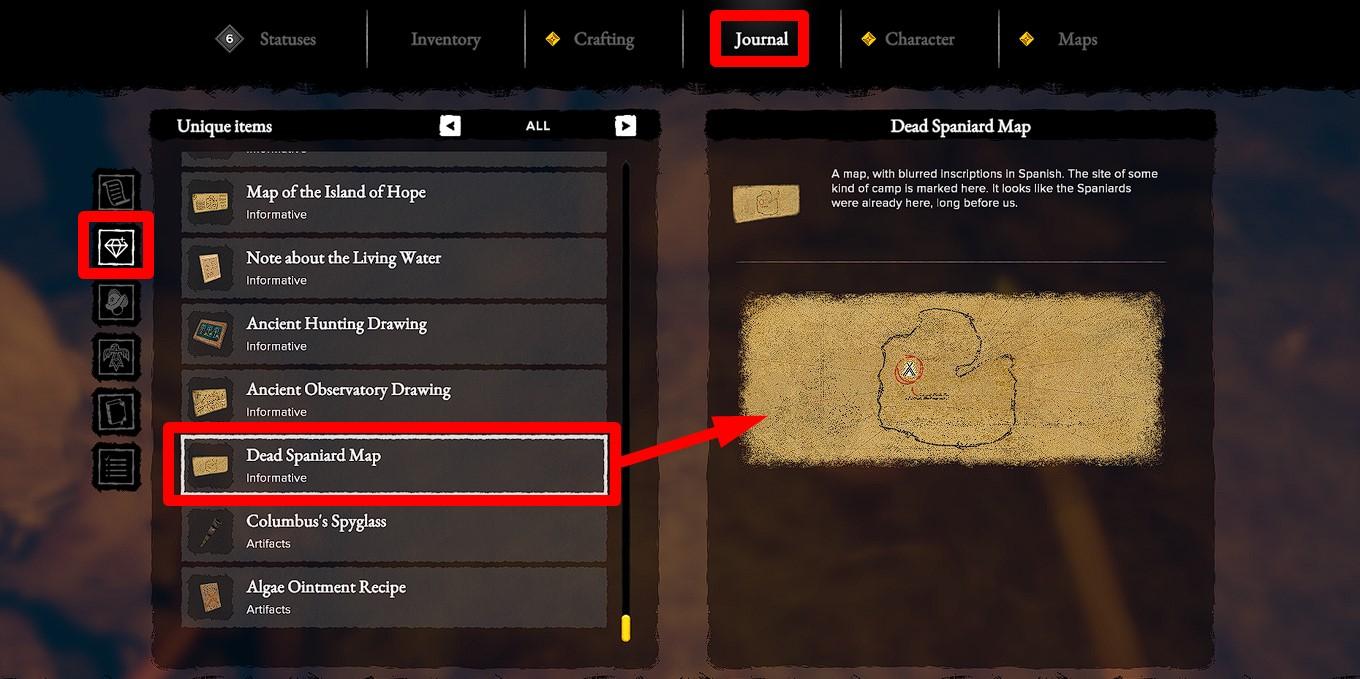
Remember, all your maps and drawings can be found in the “Journal” (J) → “Unique Items” (diamond icon).
Ancient Observatory Buildings (side quest)
On the received map, you can see the conventionally designated locations of the arches you need to visit. I marked these places on the game map for you. Orient yourself based on the bay.
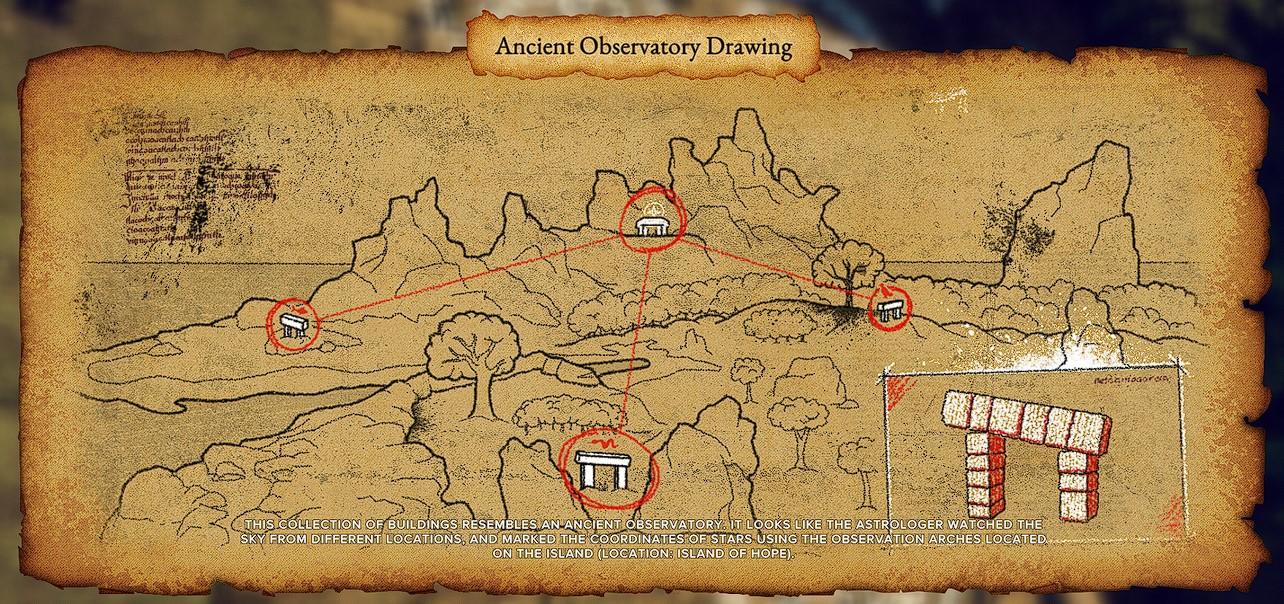
The first arch is located near the ancient temple on the hill, not far from where Ponce de Leon lost his spyglass. You have most likely already visited this arch.
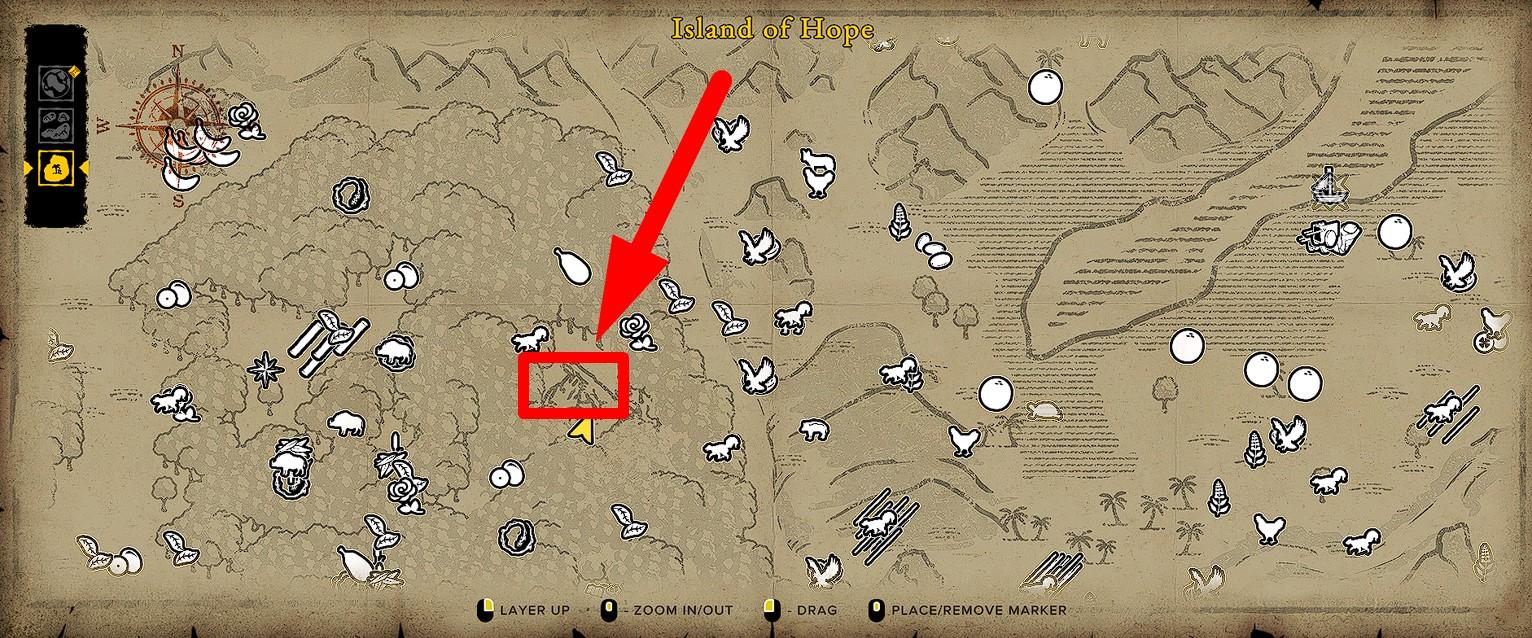
The second arch is located in the jungle, right in the place where rocks are drawn among the trees. There, you will find several useful items, one of which is in a chest.
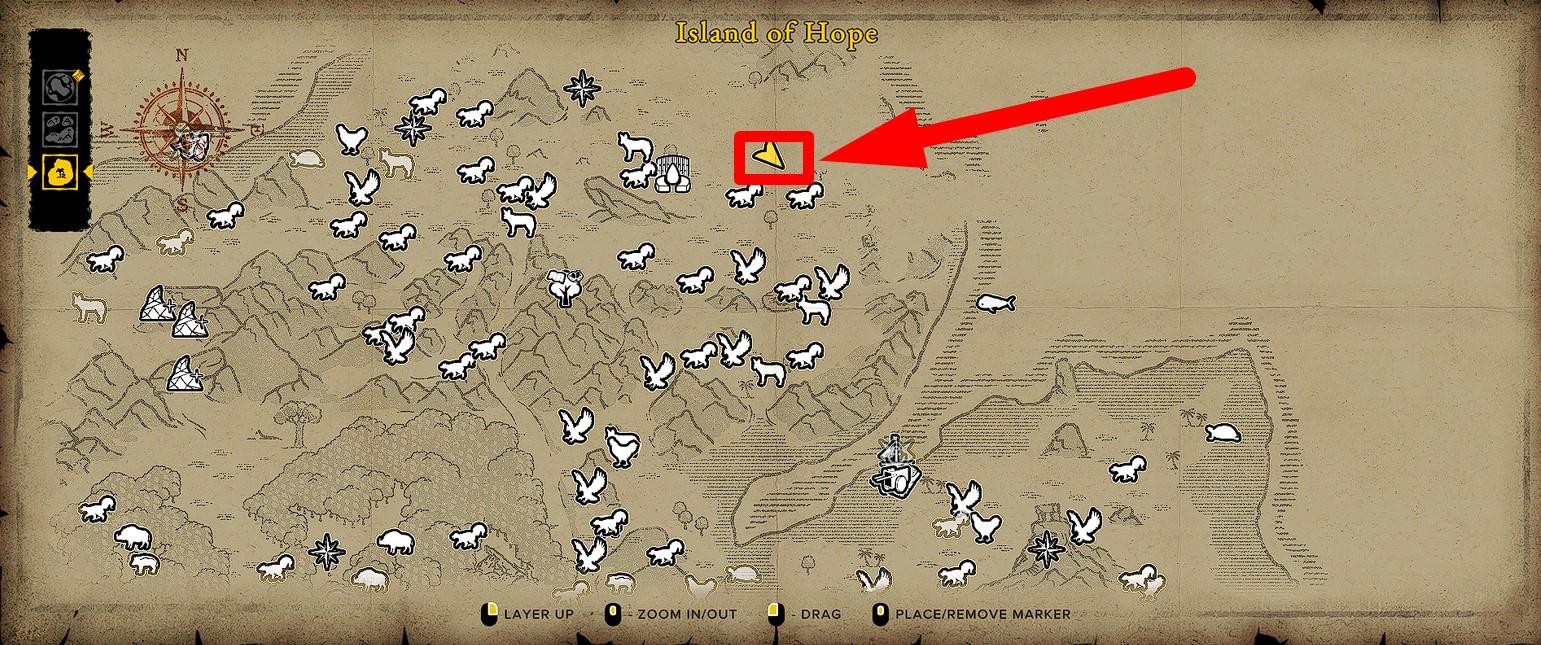
The third arch is located in the savannah, a little north of the bay. It’s hard not to notice, as the terrain is completely open. Under the arch, you will find 1 Living Water, and near the arch, there are several Orange Trees.
Start Sailing and Land on the Rock
After completing the “Build a Sea Vessel” and “Build a Dock” tasks, you will receive the “Start Sailing” task (simply sit in the boat to complete it), and then the “Land on the Rock” task.
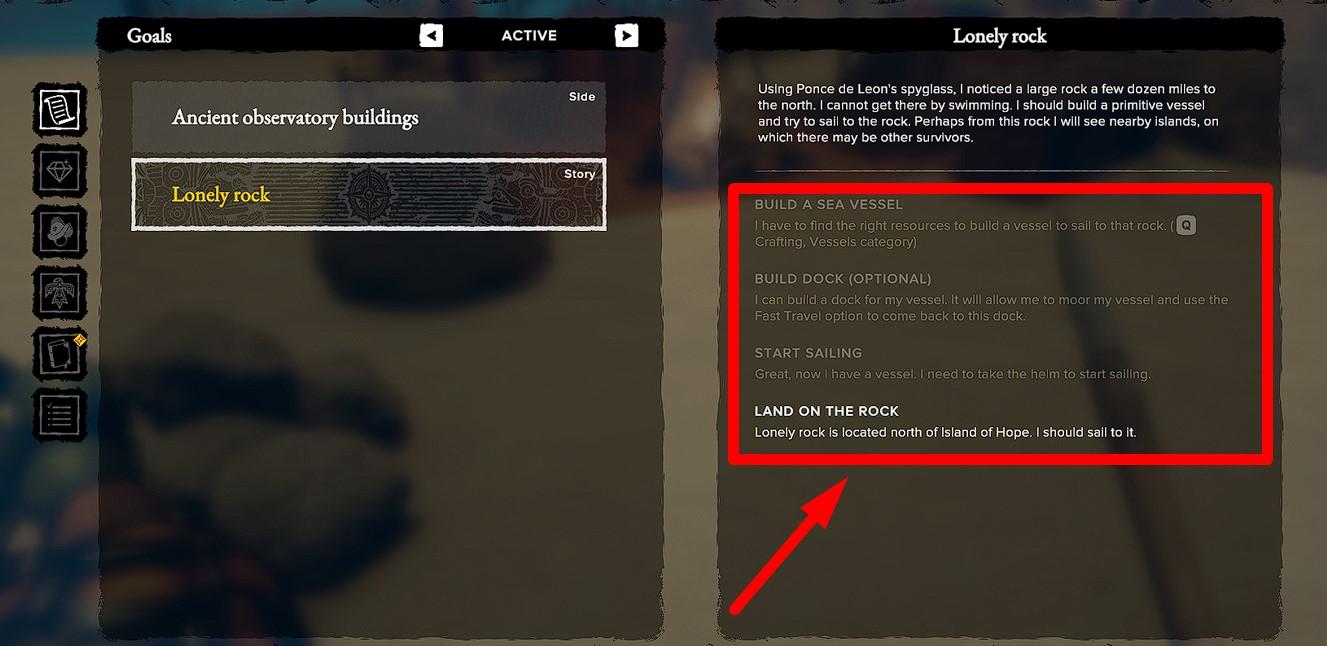
I do not recommend rushing to complete this task, as after completing the quests on “Lonely Rock“, you will immediately receive a task to travel to the next region in the storyline. Therefore, before starting the “Land on the Rock” task, I advise you to build everything available on the Island of Hope, produce all possible workbenches and tools, fully explore the island (especially points of interest), and most importantly: stock up on long-lasting food and drinking water, which will come in handy in the next region of the map.
There is a separate guide on the site for building a proper starting camp, so please familiarize yourself with it. Create obsidian weapons and tools. Craft equipment from the “Animal Hide” set. Stock up on medicines for all possible diseases and load them onto the ship. The better prepared you are, the easier it will be for you later. I also recommend completing all side quests.
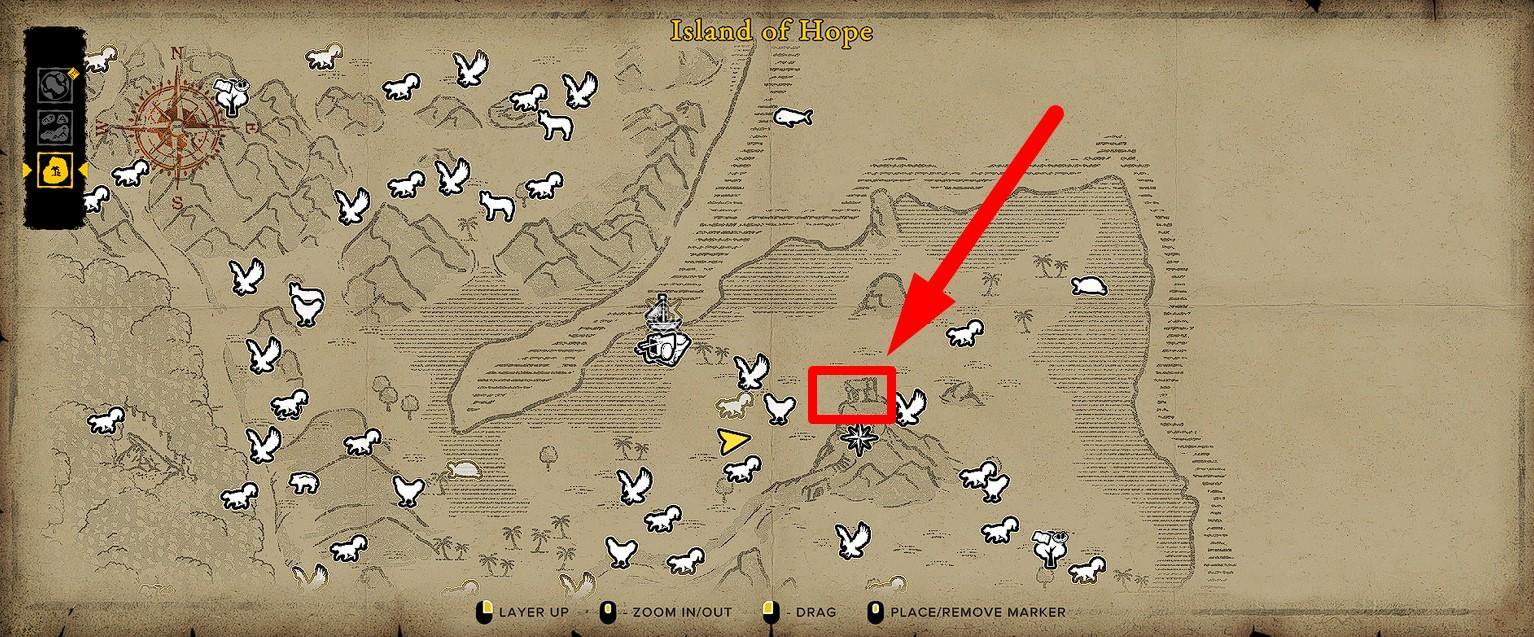
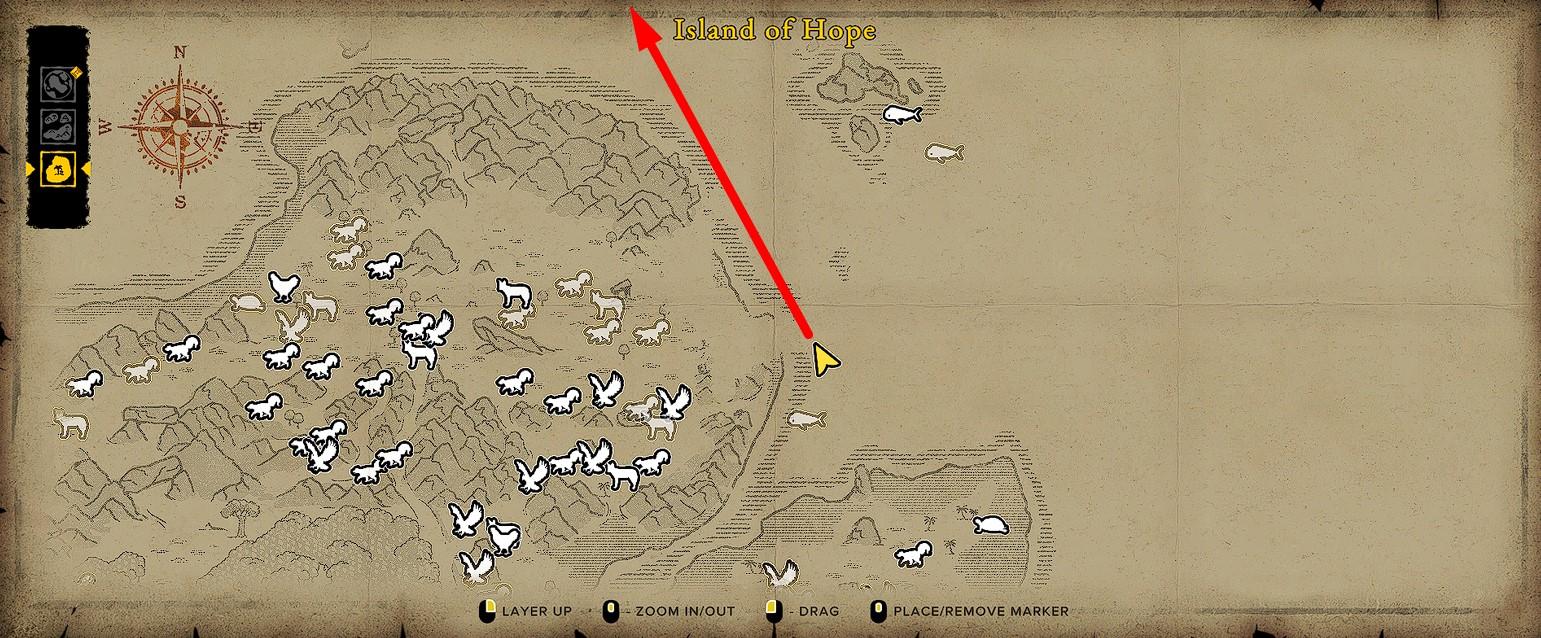
When everything is ready, sail to the “Lonely Rock“, which the character looked at through the spyglass. It is located to the northeast (left, if you stand with your back to the bay).
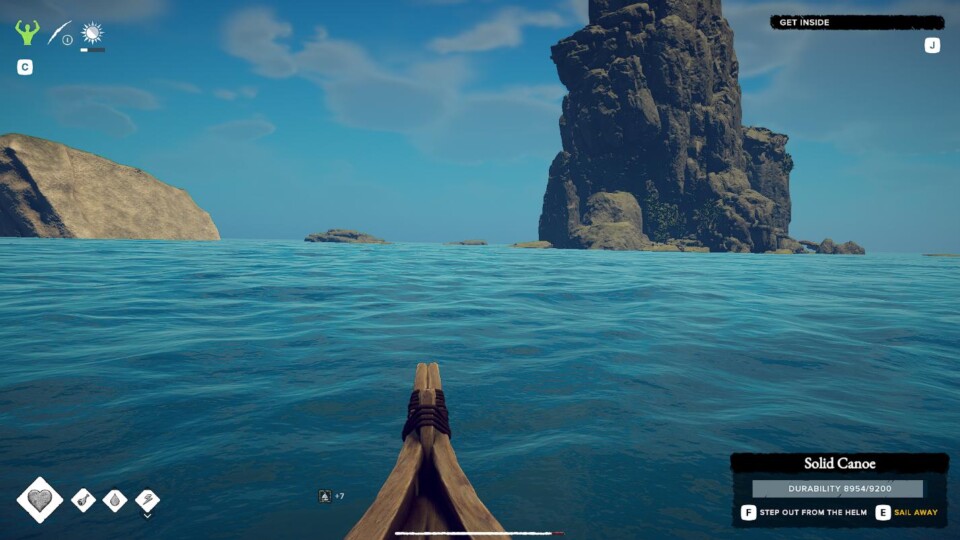
Approaching the rock, you will receive the next task “Get Inside“. To complete it, you must enter the cave in the rock.
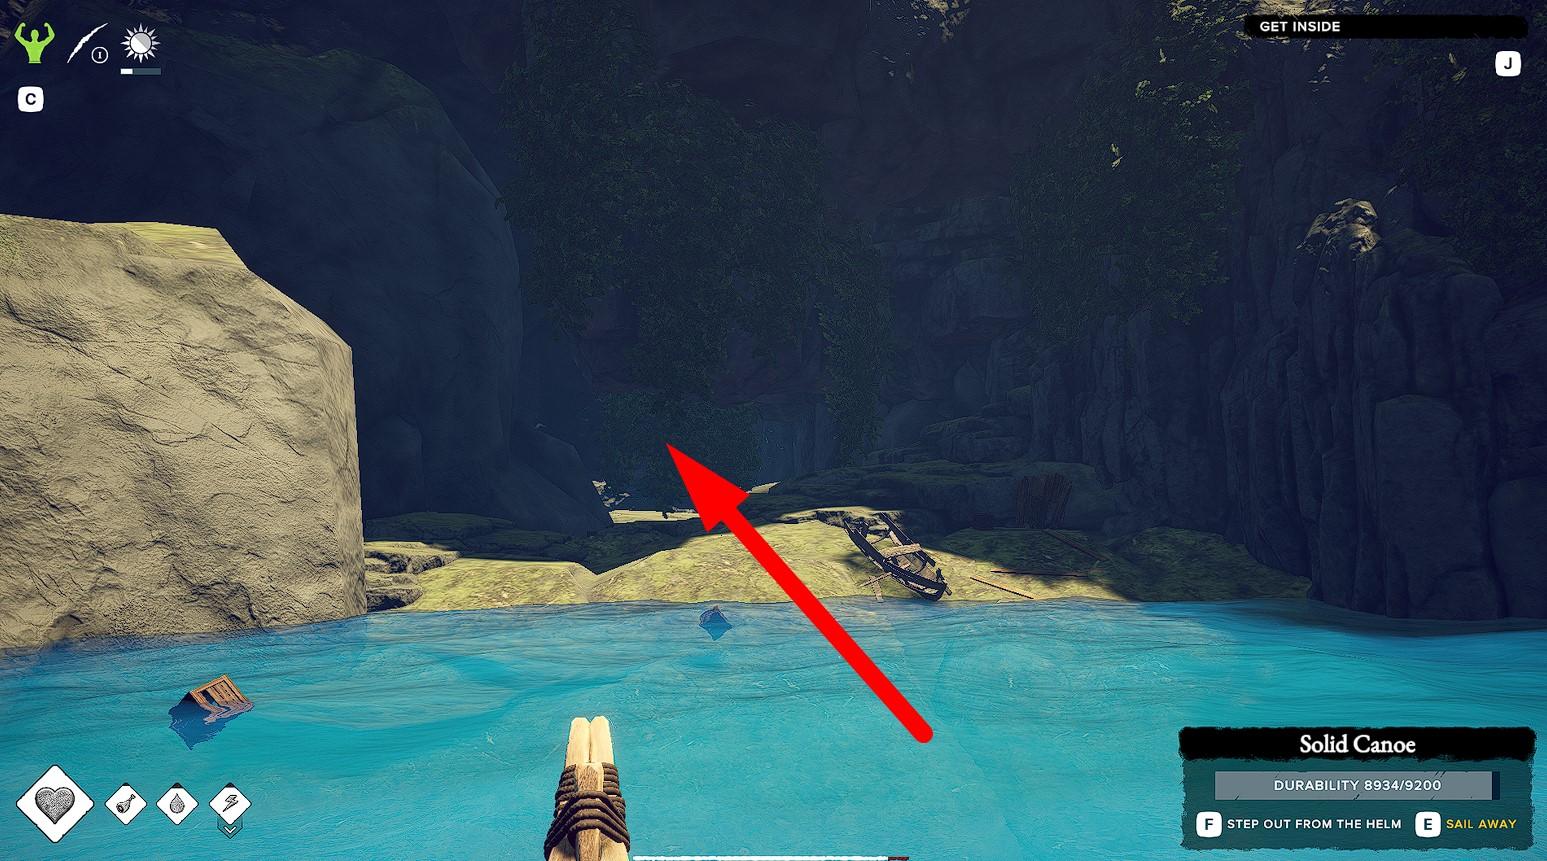
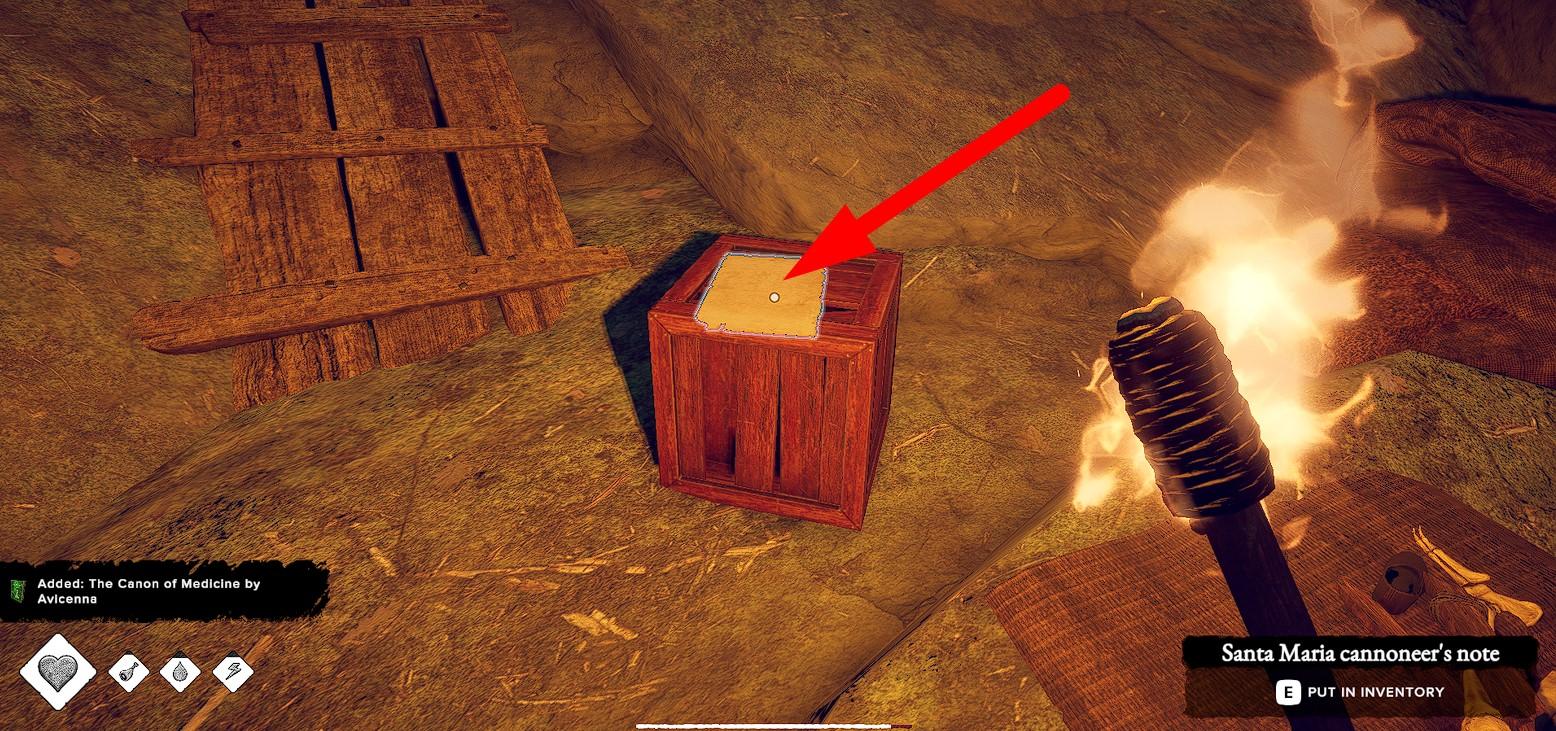
Inside the grotto, you will find the “Santa Maria cannoneer’s note“, which lies on an old crate. Read it to receive the next task “Explore the Top Level of The Rock“.
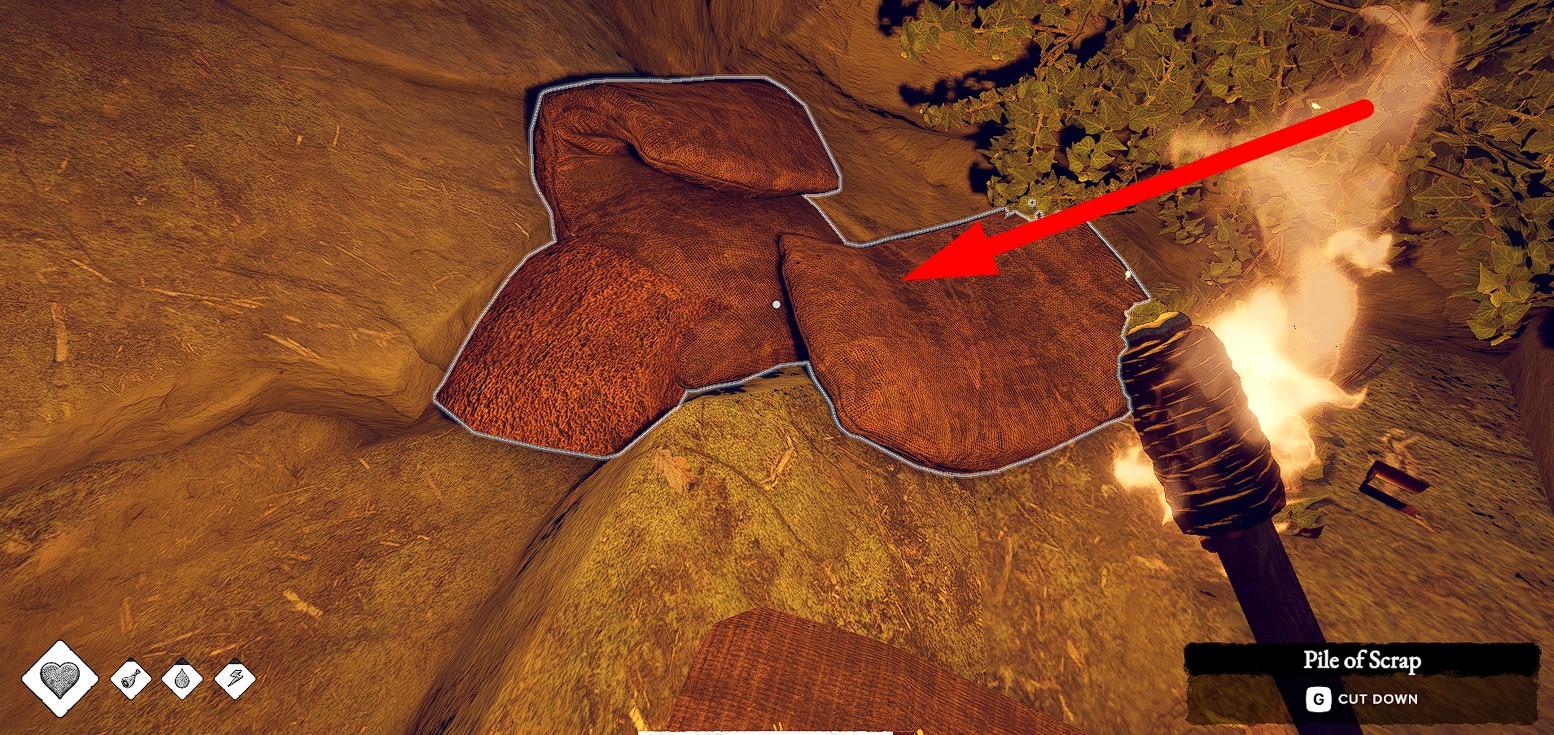
I draw your attention to the fact that by dismantling the pile of rags nearby, you can get 1 Tendon Thread. Considering the value of this resource, you will almost certainly want to do this.
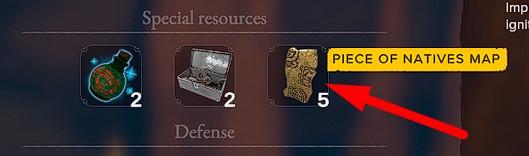
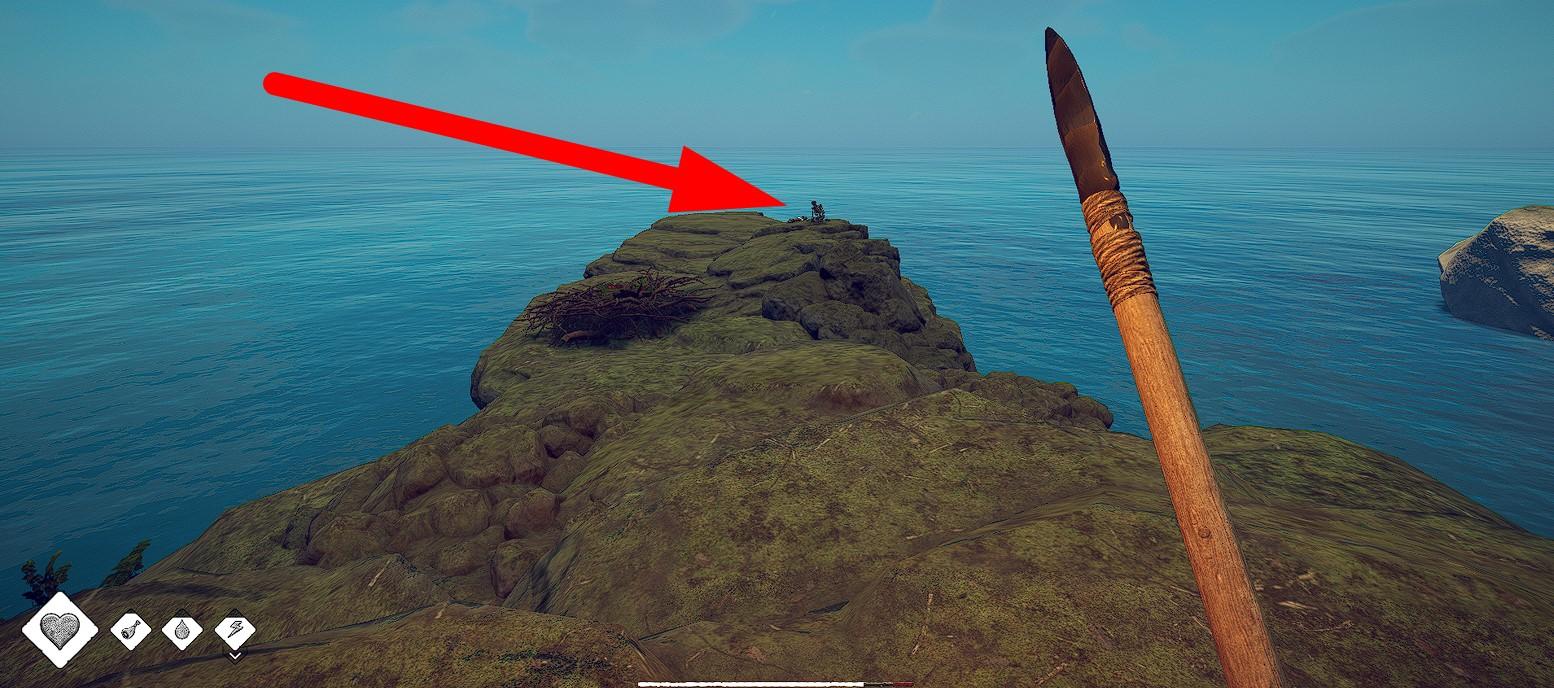
After that, you must climb to the very top of the rock. Along the way, you will find another Piece of Natives Map. It is assumed that by this point, you will already have 5 Pieces of Natives Map, which will allow you to travel to a new region. You can check the current amount in a special inventory slot.
At the top, you will find the skeleton of a cannoneer from Santa Maria and learn his short story from a cinematic cutscene.
After that, you will receive a new chain of tasks “Santa Maria“, which starts with the quest “Sail to The Buffalo Region“. This concludes the first part of the walkthrough on the Island of Hope.
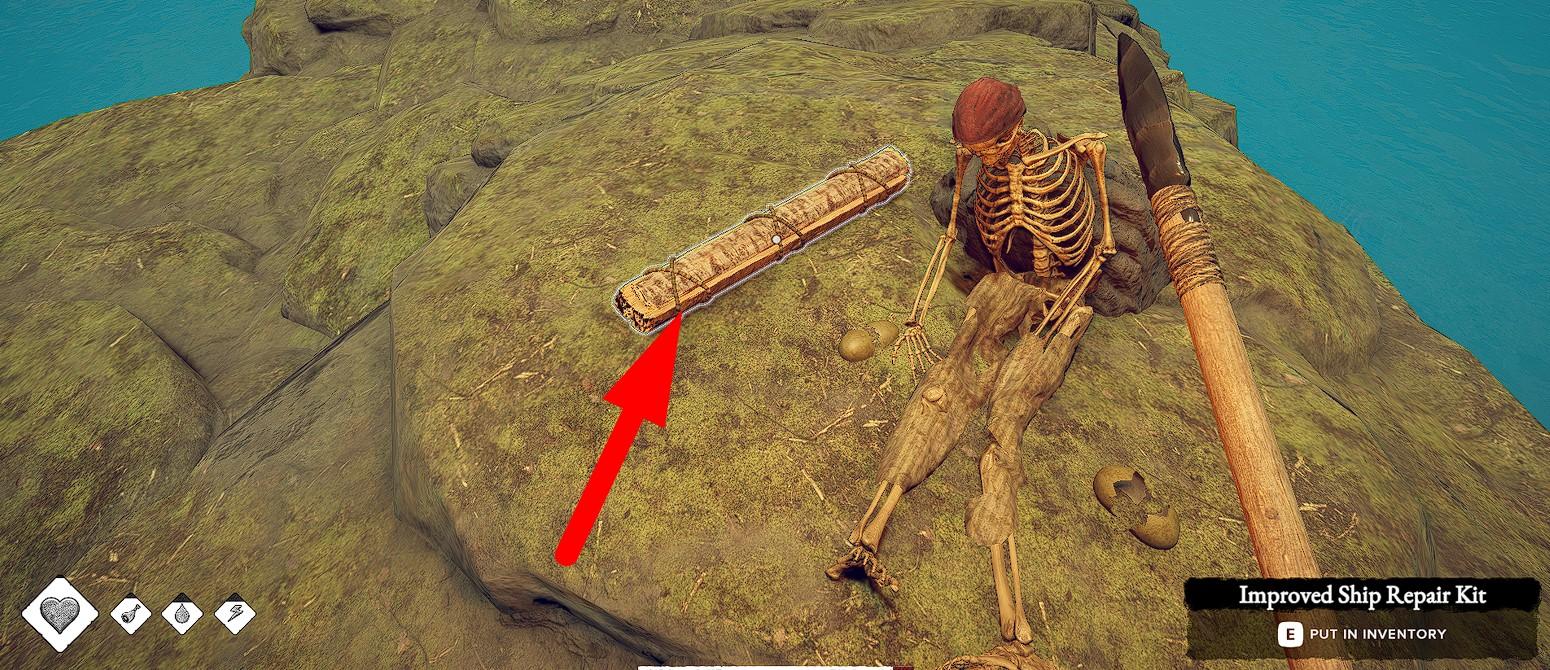
Note that near the cannoneer’s skeleton, you will find 1 Improved Ship Repair Kit. Take it with you, as it will be useful for repairing the ship.
The next part of the game walkthrough will appear on the site very soon… 🙄